
- All
- Product Name
- Product Keyword
- Product Model
- Product Summary
- Product Description
- Multi Field Search
English
Views: 243 Author: Young Mei Publish Time: 10-11-2026 Origin: Site


Content Menu
● What Does a Properly Fitting Press-On Nail Look Like?
● How to Measure Your Nails for Press-On Nail Sizing
>> Measure All Ten Nails, Not Just One Hand
>> Use the Specific Collection's Size Chart
● Press-On Nail Sizing Troubleshooting: Identify the Real Problem
● How to Fix Press-On Nails That Are Too Big
>> File the Artificial Tip Gradually
>> Respect Product-Specific Filing Instructions
● What to Do When Press-On Nails Are Too Small
● Between Sizes? The Adhesive System Changes the Answer
● Flat Nail Beds, Curved Nails, and Cuticle Shape
>> Why Width and Curvature Must Be Checked Separately
>> Cuticle Alignment Should Not Require Force
● Apply Your Selected Sizes Without Creating New Problems
● Manufacturer Insights: How Brands Can Improve Press-On Nail Fit
>> Build a Fit-Test Matrix Before Approving Samples
>> Review Size Distribution, Not Just Total Tip Count
>> Turn Customer Feedback Into Specific Development Questions
● Develop a Better-Fitting Collection With YoungMei
● Frequently Asked Questions About Press-On Nail Sizing
>> How Do I Know Whether My Press-On Nails Are Too Small?
>> Can I File Press-On Nails to Make Them Fit?
>> Should I Size Up or Down Between Sizes?
>> Why Do Correctly Sized Press-On Nails Keep Lifting?
>> Can I Use Heat to Stretch a Small Press-On Nail?
>> Can Brands Request Custom Press-On Nail Sizing?
Perfectly fitting press-on nails should cover your natural nails comfortably without pinching, lifting, or spilling onto your skin. If your press-on nails are too big, too small, or oddly curved, the answer is not automatically more glue. Start by checking width, curvature, and cuticle alignment separately. Then decide whether a small adjustment will help or whether you need a different size or shape.
At Dongguan YoungMei Technology Co., Ltd., we approach fit as a product-development priority, not simply an application problem. With more than 15 years of experience in nail-product manufacturing, our team supports global brands, wholesalers, and retail chains with OEM/ODM development, sampling, and production. This guide combines practical fitting guidance with a manufacturer's perspective on building better-fitting collections.
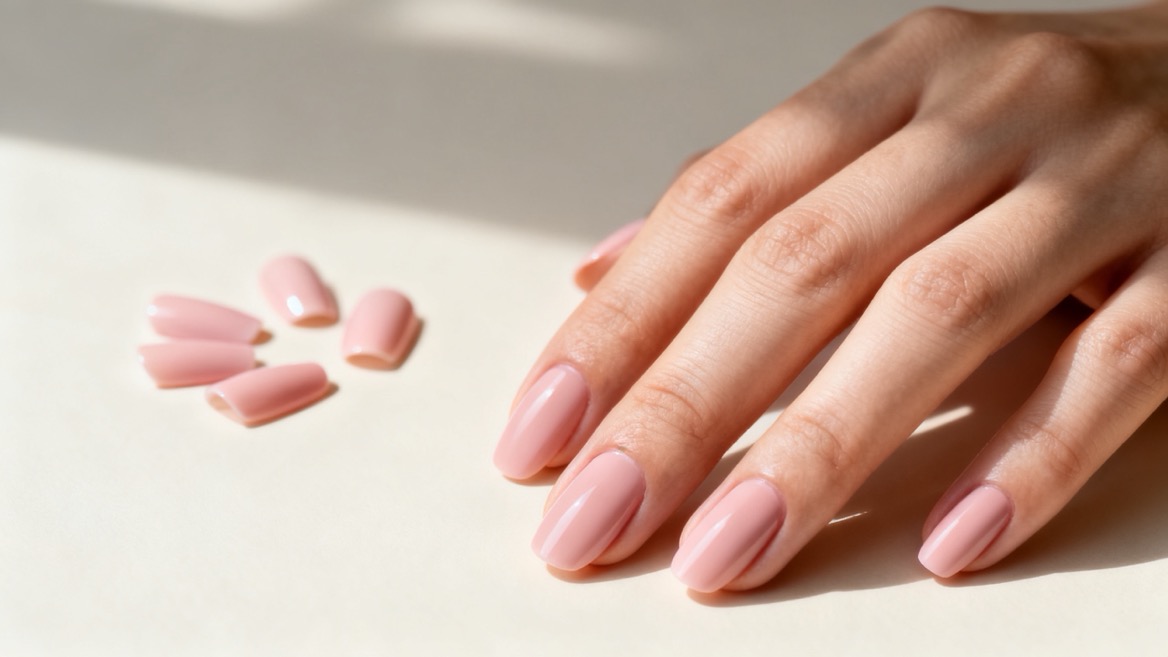
Before opening your adhesive, place each tip over its intended natural nail. A useful dry fit answers four questions:
- Does it cover the nail from sidewall to sidewall?
- Does its base follow your cuticle outline without resting on skin?
- Does it sit comfortably without force?
- Does it remain reasonably stable rather than rocking?
A decorative tip can look attractive from above yet fit poorly underneath. Width alone cannot tell you whether the underside matches your nail's curve. Likewise, choosing a longer tip does not necessarily solve a wider nail bed.
Comfort matters. A nail that feels tight during the dry fit is not a good candidate for application, even if pressing harder makes it appear flush.
Your left and right hands may need different size combinations. Record each finger separately rather than assuming both thumbnails or both ring fingers match.
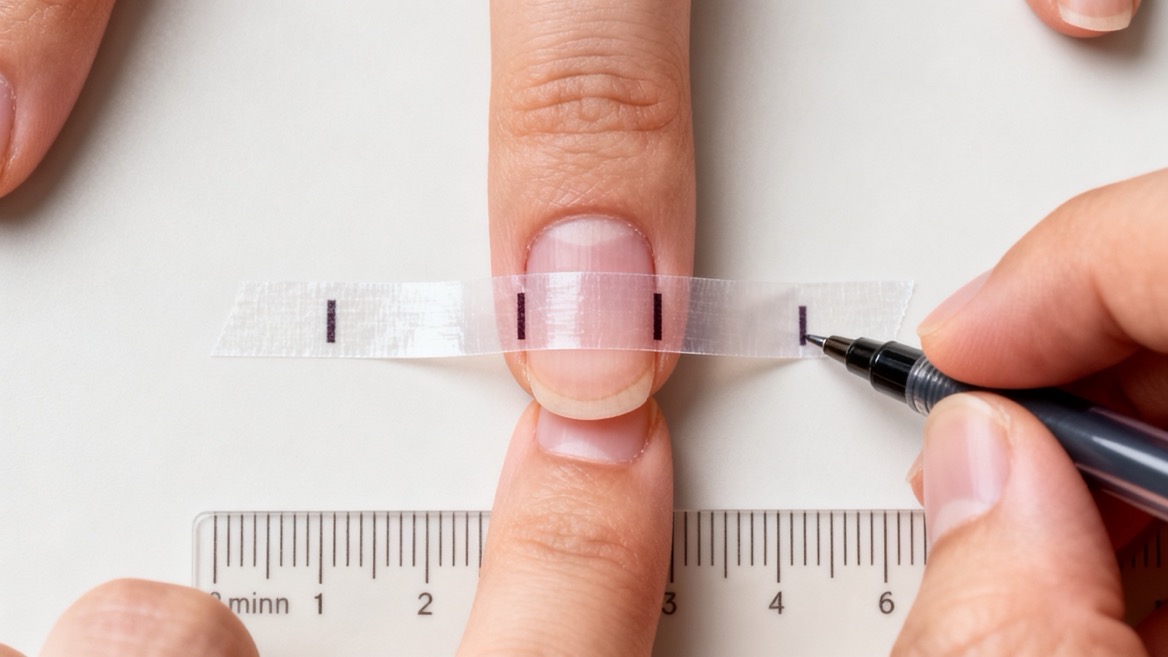
A simple measuring method uses clear tape, a fine pen, and a millimeter ruler:
1. Place tape across the widest part of your natural nail.
2. Let it follow the surface without stretching it.
3. Mark the two side edges accurately.
4. Remove the tape and place it on a flat surface.
5. Measure between the marks in millimeters.
6. Repeat for all ten fingers and record the results.
This creates a useful starting point, not a guaranteed fit. Check whether the supplier's chart describes curved surface width or another measurement method before comparing numbers.
Do not assume size numbers transfer between brands or molds. A numbered tip identifies a position within a particular sizing system; it is not a universal measurement.
For online orders, look for millimeter dimensions, available widths, and a sizing kit where offered. For repeat purchases, save your measurements alongside the exact brand, collection, shape, and preferred tip numbers.
| What you notice | Possible fit issue | Practical next step |
|---|---|---|
| Tip overlaps the side skin | Excess width | Try a smaller tip or lightly refine a suitable larger one |
| Natural nail remains exposed at the sides | Insufficient width | Try a wider tip |
| Tip rocks despite adequate width | Curvature mismatch | Compare another mold or profile |
| Pressure appears when you push the tip down | Excessive curve or poor overall fit | Stop forcing it and change the tip |
| Base rests on the cuticle | Base-shape or placement mismatch | Reposition or choose another base shape |
| Tip lifts after application | Fit, preparation, or adhesive issue | Inspect all three before reapplying |
These are troubleshooting possibilities, not diagnoses. Several problems can occur together. A tip may be wide enough but too curved, or correctly sized but applied onto an oily surface.
For a conventional tip that is only slightly too wide, gentle side-edge filing may improve the fit. Modify the artificial nail, not your natural nail's sidewalls.
1. Select a tip with a reasonably compatible underside curve.
2. Use a fine nail file and make a few light passes.
3. Work gradually along the side edges, preserving the overall shape.
4. Dry-fit again before removing more material.
5. Smooth rough edges before application.
Keep checking both sides. Removing too much from one side can make the design look off-center and change how the tip sits.
Avoid filing through raised decorations, embedded details, or important structural areas. If adjustment requires substantial reshaping, switch sizes or collections instead.
Not every press-on system should be adjusted at the same stage. Some pre-glued products instruct users to wait after application before filing, while conventional loose tips may be assessed before bonding.
Follow the instructions for your exact product. Do not remove protective adhesive backing during a trial fit unless the manufacturer directs you to do so.
A tip that leaves the sides of your natural nail uncovered needs a different fit. Extra glue cannot create missing coverage.
Try the next suitable width, a wide-fit collection, or a different mold. Check curvature again: the wider option still needs to sit comfortably rather than bridge over your nail.
Avoid treating heat as a universal resizing technique. Material, coating, decoration, and adhesive systems vary. Without product-specific instructions, hot-water or cup-heating tricks are not a reliable way to enlarge a finished tip.
Even if warming changes its shape, that does not establish consistent sizing, intact decoration, or safe handling. Never use boiling water, open flames, or uncontrolled heating as a shortcut.
For brand buyers, repeated reports of undersized thumbs should trigger a review of the size assortment rather than a customer instruction to stretch the product.
"Always size up" and "always size down" are both incomplete rules.
For some conventional loose tips, selecting a slightly larger compatible tip and carefully filing its edges can work. However, imPRESS advises choosing the smaller option between sizes for its own press-on system, explaining that its nails conform during application.
That guidance belongs to that product, not every artificial nail on the market.
Use this decision sequence:
1. Read the product's sizing instructions.
2. Compare both neighboring sizes without adhesive where possible.
3. Reject any option that causes pressure or unacceptable coverage gaps.
4. Make only the adjustments the product permits.
5. Change collections if neither option fits comfortably.
The goal is compatible coverage, not obedience to a universal sizing slogan.
Two tips with similar listed widths can feel different because their undersides have different curves. A highly curved tip may require pressure to sit on a flatter nail. A flatter tip may contact a curved nail unevenly.
During a dry fit, look from the front and side as well as above. Notice whether the tip rocks, bridges, or presses into the sidewalls.
Do not try to eliminate a major mismatch with a thick layer of glue. Choose a profile that fits more naturally and apply adhesive as directed.
The base should sit close to the cuticle without sitting on surrounding skin. A rounded base and a squarer natural cuticle line may need different positioning or a different tip design.
Check alignment before bonding. Trying to reposition a partially attached nail can interfere with the application and tempt you to pull against the natural nail.
Once you have a comfortable set, arrange the tips in finger order before preparing your nails.
- Wash your hands and dry them thoroughly.
- Remove previous products as instructed.
- Follow the kit's cleaning and preparation steps.
- Avoid aggressive buffing of the natural nail.
- Keep adhesive away from skin and use the specified amount.
- Follow the stated pressing time and aftercare restrictions.
Do not automatically add glue to a pre-glued product. Some systems specifically advise against it.
Avoid covering damaged or inflamed nails. If you develop pain, swelling, itching, or unusual discoloration, stop using the product and seek appropriate medical advice. Follow removal instructions; do not pry or forcibly pull off a bonded tip.
For wholesalers and retailers, fit complaints can reveal opportunities in product design, assortment, and packaging. The following is a proposed development workflow, not a claim about results from a completed customer study.
Test more than one comfortable-looking sample hand. Include different nail widths, flatter and more curved profiles, and varied cuticle outlines.
Record practical observations for each sample:
- Side-to-side coverage.
- Comfort without forced pressure.
- Cuticle alignment.
- Rocking or visible gaps.
- Filing required to achieve an acceptable fit.
This separates decoration approval from fit approval. A visually successful sample can still need mold or assortment changes.
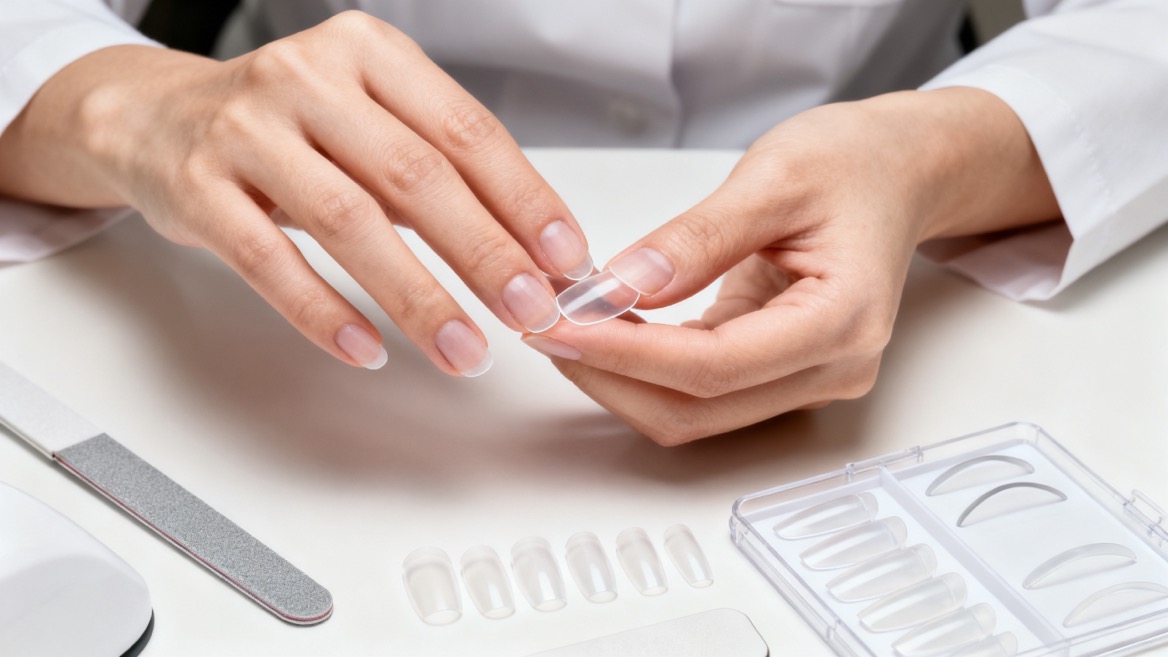
A larger pack is not automatically more inclusive. Buyers should examine which widths are present and whether useful sizes have sufficient duplicates.
Ask suppliers to explain their measurement method, mold options, and pack composition. Where demand justifies it, assess petite or wide-fit variants rather than assuming one assortment serves every customer.
Replace vague categories such as "bad fit" with structured feedback: which finger, which tip number, which collection, and what happened during the dry fit?
At YoungMei, we welcome these details when discussing OEM/ODM requirements. They help define the sampling brief and focus conversations on measurable product characteristics rather than guesswork.
Planning a private-label collection or reviewing recurring fit complaints? Contact Dongguan YoungMei Technology Co., Ltd. with your target market, preferred shapes, sizing requirements, and packaging brief. Our team can discuss OEM/ODM options, sampling, and one-stop sourcing for press-on nails, nail stickers, and related nail products. Start with a fit-focused sample review before finalizing your collection.
Check for exposed natural nail at the sides or pressure during a dry fit. Compare a wider option and its curvature before applying adhesive.
A slightly oversized artificial tip may permit light side filing. Follow product instructions, protect decorations, and change sizes if extensive reshaping is necessary.
Follow your product's instructions. Some loose tips can be lightly reduced; some pre-glued systems recommend the smaller size. Comfortable coverage remains the deciding factor.
Width may be correct while curvature, preparation, or adhesive application is not. Recheck the underside fit and the kit's application instructions rather than adding glue repeatedly.
Do not assume heat reshaping is suitable. Unless your manufacturer provides validated instructions, choose a better-fitting size or mold instead.
Discuss target dimensions, mold availability, sample evaluation, and pack composition with your manufacturer. Feasibility depends on the project; confirm it before committing to production.
1. [Ersa Nails — "Perfectly Fitting Press-Ons: Tips to Solve Sizing Issues"]. Original article used to identify the initial sizing advice and content gaps. Its heating technique is not presented here as a universally validated method.
2. [Allure — "Press-On Nails Have a Sizing Problem"]. Supports the discussion of sizing variability, measuring nail width with transparent tape, and carefully filing suitable oversized tips.
3. [imPRESS — "Frequently Asked Questions"]. Source for product-specific between-size recommendations, preparation requirements, filing timing, and guidance against adding glue to its pre-glued system.
4. [KISS — imPRESS Wide Fit: "Just a Dream"]. Example of a commercial wide-fit option intended for wider nail beds.
5. [American Academy of Dermatology — "Artificial Nails: Dermatologists' Tips for Reducing Nail Damage"]. Supports caution concerning natural-nail filing and covering damaged nails. Its acrylic and gel guidance should not be interpreted as instructions for every press-on system.
6. ["Adverse Effects of Do-It-Yourself Nail Cosmetics: A Literature Review" — full text hosted by PubMed Central]. Provides medical context on adverse reactions associated with nail cosmetics, including press-on adhesives.