
- All
- Product Name
- Product Keyword
- Product Model
- Product Summary
- Product Description
- Multi Field Search
English
Views: 222 Author: Jenny Publish Time: 2026-07-22 Origin: Site

Content Menu
● Why Press-On Nails Fall Off Too Soon
● Tip 1: Start With Completely Clean, Dry Nails
>> What to do
● Tip 2: Push Back Cuticles for a Better Seal
● Tip 3: Lightly Buff the Nail Surface
● Tip 4: Choose the Right Size for Each Nail
● Tip 5: Use Glue on Both Surfaces
● Tip 6: Angle the Nail Into Place
● Tip 7: Keep Water Away at the Start
● Tip 8: Seal the Edges and Shape After Application
>> Good options
● Tip 9: Treat Press-Ons Like a Product, Not a Tool
● Tip 10: Reapply and Reuse the Right Way
● Expert Take: What Matters Most
● Why Better Materials Still Matter
● CTA
● FAQ
>> 1. How long can press-on nails last?
>> 2. Should I use glue on both the nail and the press-on?
>> 3. Can I shower after applying press-on nails?
>> 4. Why do my press-ons pop off at the sides?
>> 5. Can I reuse press-on nails?
>> 6. What is the biggest secret to longer wear?
Press-on nails can last much longer than most people expect when you prep correctly, choose the right size, and protect them after application. In fact, the difference between a two-day pop-off and a two-week wear often comes down to a few small habits that are easy to miss.
Most press-on nail failures are not caused by the nails themselves, but by poor prep, excess moisture, oil on the nail plate, or a sizing mismatch. Expert guides consistently point to clean, dry nails, gentle buffing, cuticle management, and proper glue placement as the biggest factors affecting adhesion.
From a manufacturer's perspective, this is also why product quality alone is not enough. Even a well-made set can lift early if the user skips dehydration, uses the wrong glue amount, or applies the nail too close to skin and cuticle overgrowth.
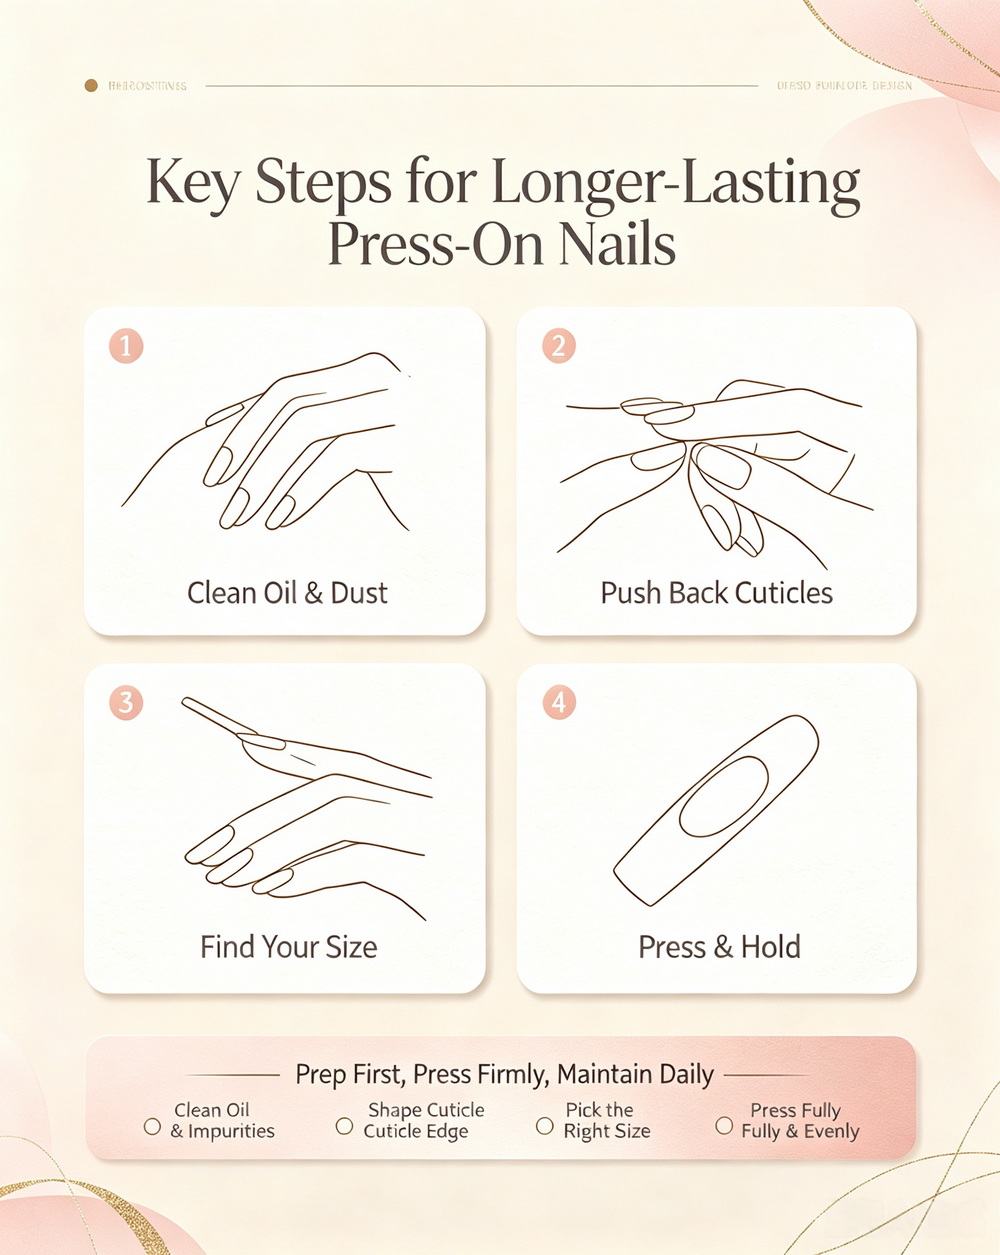
The first step is to remove everything that prevents glue from bonding. Wash your hands, then clean each nail with alcohol or a cleansing wipe to remove oil, lotion, dust, and residue.
Avoid applying press-ons immediately after a shower, bath, or dishwashing session. Water temporarily changes the nail surface and can weaken adhesion once the nail dries again.
- Wash hands and dry them fully.
- Wipe each nail with 70% isopropyl alcohol or a nail cleanser.
- Wait until the nail plate looks matte, not glossy.
Visual suggestion: Insert a close-up image of a natural nail before application, showing a clean, matte nail plate.
AI image prompt: "Macro beauty photo of clean natural fingernails prepared for press-on nail application, matte nail plate, soft studio lighting, white background, realistic detail, editorial style."
A press-on nail should sit on the nail plate, not on living skin. Gently pushing back cuticles creates more contact area and reduces the chance of early lifting at the base.
Do not cut cuticles aggressively. A careful push-back is enough for most users, and it also improves the final look by making the manicure appear more seamless.
- Use a wooden or rubber cuticle pusher.
- Remove only loose dead skin from the nail plate.
- Never apply glue over wet, damaged, or irritated cuticle skin.
A soft buff helps the glue grip by removing shine and creating micro-texture. Expert sources repeatedly recommend buffing the natural nail lightly rather than aggressively.
Over-buffing is a mistake because it can thin the nail plate and create long-term damage. For most users, a few gentle passes are enough.
- If the nail looks slightly dull and feels lightly rough, stop.
- If you can see grooves, you buffed too much.
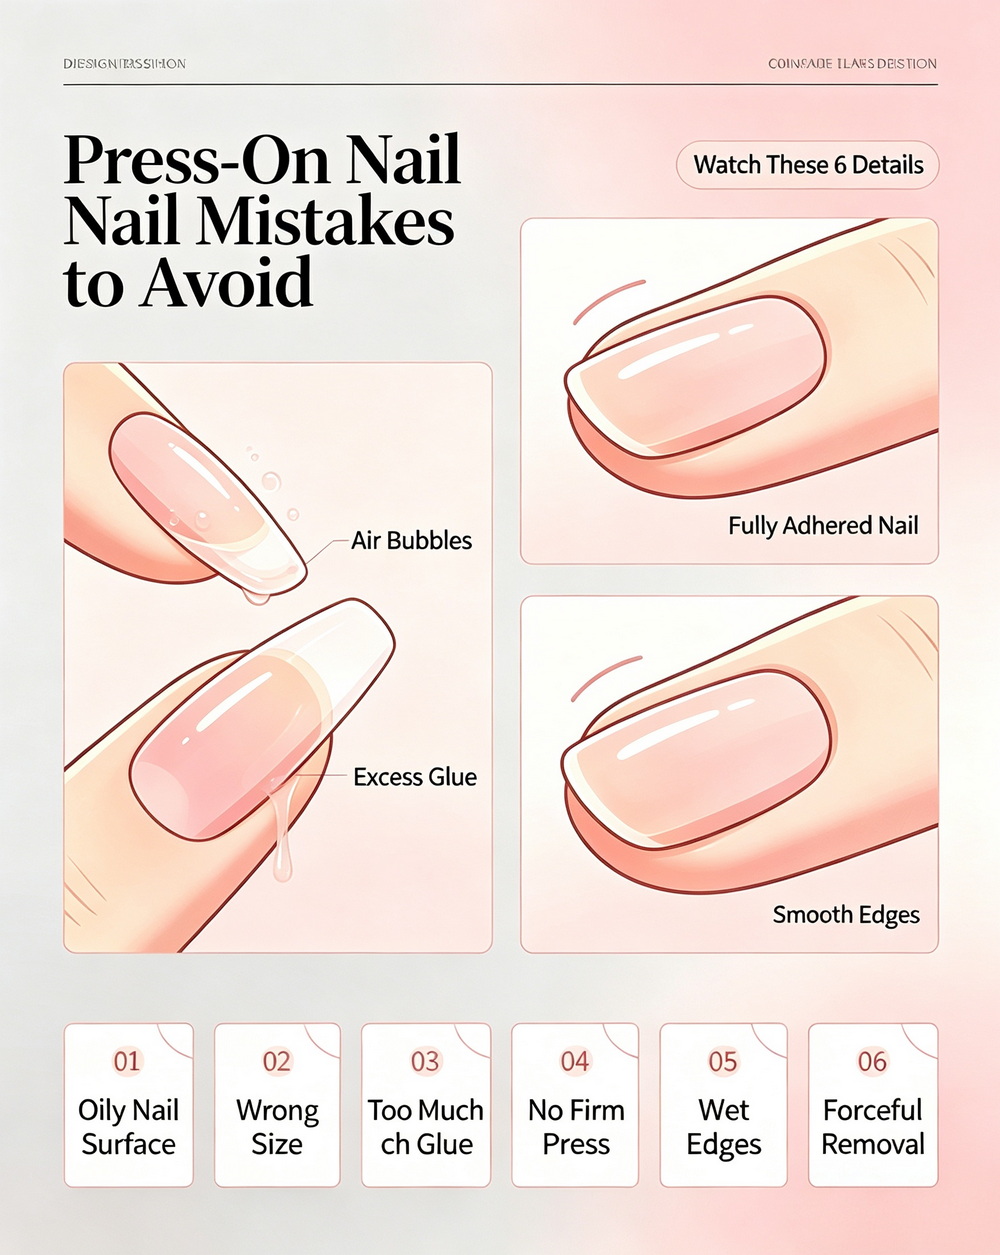
Sizing is one of the most overlooked reasons press-ons fail early. If a nail is too wide, it can touch skin and lose adhesion; if it is too narrow, it creates tension and may pop off faster.
The best fit is snug without forcing the sidewalls. Many experts recommend sizing slightly larger and then filing the sides down if needed, rather than using a nail that is too small.
- Match each nail to its correct finger before gluing.
- Ensure the press-on does not overlap the skin.
- File side edges only if necessary.
Visual suggestion: Add a comparison graphic showing "too small / perfect fit / too wide."
AI image prompt: "Educational beauty infographic showing three press-on nail fits on a natural nail bed: too small, perfect fit, too wide, clean modern layout, pastel tones, realistic 3D nail render."
Several expert guides recommend applying a thin layer of glue to both the natural nail and the back of the press-on nail. This improves contact and creates a stronger bond than applying glue to one side only.
The goal is not excess glue. Too much can squeeze out from the sides, create a messy finish, and interfere with sealing. A thin, even layer is better.
1. Apply a thin layer of glue to the natural nail.
2. Add a small amount to the back of the press-on.
3. Place the nail starting near the cuticle line.
4. Press and hold steadily for 20 to 30 seconds.
Instead of dropping the press-on straight down, place it at a slight angle and then roll it into position. This helps reduce air gaps and improves the seal near the cuticle area.
Hold even pressure while the adhesive sets. Users and nail professionals often report better wear when the nail is pressed firmly and left alone long enough to bond properly.
- Start at the cuticle area.
- Lower the rest of the nail slowly.
- Hold firmly without sliding the tip around.
The first hour after application is critical. Many sources advise avoiding water right away because glue needs time to fully set before it is exposed to moisture.
That means no long showers, dishwashing, or lotion-heavy hand care right after applying your set. Even after the first hour, prolonged hot water exposure can shorten wear time.
- Wear gloves for cleaning.
- Avoid soaking hands in hot water.
- Dry hands quickly after washing.
Once the nails are secure, lightly file the free edge to smooth shape and reduce snagging. Some guides also recommend a clear top coat for added protection and shine.
This is especially useful for users with active routines, frequent typing, or household work. A smoother edge is less likely to catch on fabric or loosen prematurely.
- Light shaping with a fine file.
- Clear top coat on compatible press-on materials.
- Extra care around the sidewalls and corners.
One of the biggest causes of early failure is mechanical stress. Using nails to open cans, scrape stickers, or pry packaging puts leverage on the adhesive bond and lifts the nail edge.
For longer wear, press-on nails need the same behavior rules as a salon manicure. Daily habits matter just as much as glue quality.
- Open packages with the pad of your finger, not the nail tip.
- Wear gloves for chores.
- Refrain from picking at corners.
If a nail starts lifting, do not rip it off. A gentle re-bonding method or careful removal protects both your natural nails and the press-on set.
Press-ons can often be reused if removed properly, cleaned thoroughly, and stored in a dry case. Many reuse guides recommend removing glue residue, letting the nails dry fully, and keeping each piece organized by size.
1. Soak gently to loosen adhesive.
2. Lift from the side with an orangewood stick.
3. Clean residue from the back of the nail.
4. Dry completely.
5. Store in a labeled case away from heat and sunlight.
Visual suggestion: Add a step-by-step photo strip showing removal, cleaning, drying, and storage.
AI image prompt: "Four-panel beauty tutorial image showing press-on nail removal, cleaning adhesive residue, air-drying nails, and storing them in a labeled organizer, bright clean background, instructional editorial photography."
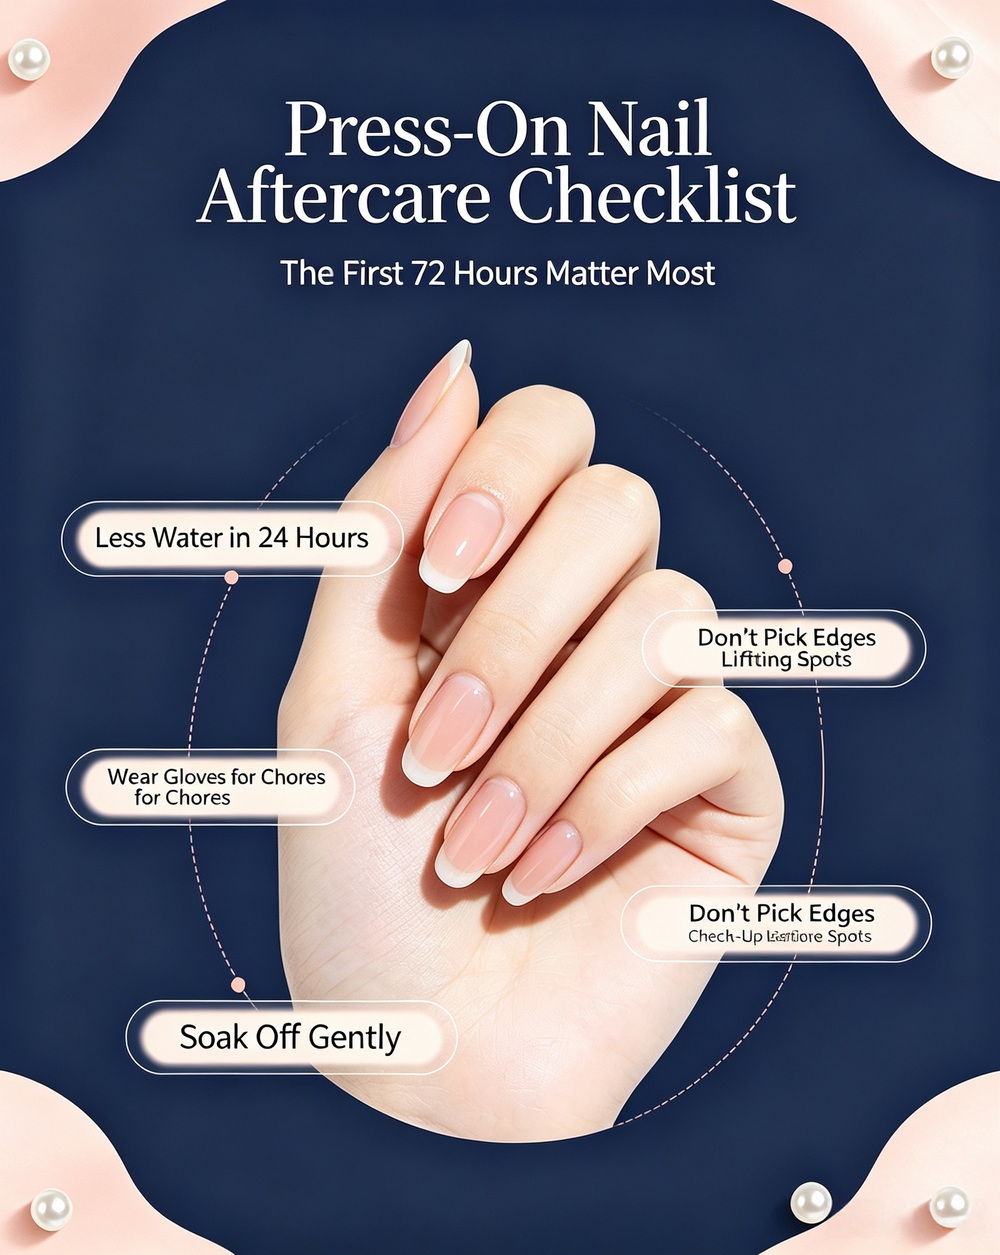
If we compress all the advice into one rule, it is this: adhesion is built before the glue even touches the nail. Clean nails, proper cuticle prep, good sizing, and controlled moisture are the core variables that determine whether a set lasts days or weeks.
For brands and manufacturers, this creates a strong content opportunity. A high-performing press-on nail product page should not only describe the product, but also teach the customer how to get the best result from it. That kind of education increases trust, lowers complaints, and improves repeat purchases.
User behavior is only part of the equation. Product construction also influences wear time, especially the thickness, flexibility, and fit consistency of the nail tip. Some sources and user reports note that softer gel-style press-ons often feel more comfortable and can last well when paired with the right prep.
For OEM and wholesale buyers, this is an important differentiation point. A durable set should balance appearance, comfort, adhesion-friendly shape, and easy sizing for a broad customer base.
To improve UX and conversion, place visuals at these points:
- Before Tip 1: a "clean nail prep" image.
- Between Tip 4 and Tip 5: a fit comparison chart.
- After Tip 6: a 3-step application diagram.
- After Tip 10: a reuse and storage infographic.
- Near the conclusion: a short demo video embed showing press-on application.
These visuals make the article easier to scan, reduce bounce risk, and help readers remember the method.
If your brand sells press-on nails, glue-on nails, or private-label nail sets, use this article as a traffic-driving guide on your product page or blog. Pair it with a how-to video, a sizing chart, and a free application checklist to turn educational traffic into sales.
With proper prep and care, many users can get one to two weeks of wear, and some report even longer results.
Yes, many expert guides recommend a thin layer on both surfaces for stronger adhesion.
It is better to wait at least 20 to 60 minutes, and many experts suggest avoiding water for as long as possible right after application.
The most common reasons are poor sizing, cuticle overlap, oil on the nail plate, or too much water exposure after application.
Yes, if you remove them gently, clean off the adhesive, dry them fully, and store them properly.
The single most important factor is a clean, dry, oil-free nail plate before application.
1. [How To Make Press-On Nails Last Longer](https://www.lorealparisusa.com/beauty-magazine/beauty-tips/beauty-looks/how-to-make-press-on-nails-last)
2. [How to Make Press-on Nails Last Longer, According to Experts](https://www.businessinsider.com/how-to-make-press-on-nails-last-longer-from-experts)
3. [How To Make Press-On Nails Last Two Full Weeks](https://www.nylon.com/beauty/tips-to-make-press-on-nails-last)
4. [How to apply press-on nails: a step-by-step guide](https://www.cvs.com/learn/beauty/nail-care/how-to-apply-press-on-nails)
5. [How to Make Press on Nails Last Longer: 8 Tips](https://www.wikihow.com/Make-Press-on-Nails-Last)
6. [How to Have the Longest-Lasting Press On Nails](https://goatnails.com/longest-lasting-press-on-nails/)
7. [Make Press-Ons Last Over 2 Weeks: A Complete Guide](https://www.lemon8-app.com/isacooksandstuff/7301161406061150726?region=us)
8. [How can I reuse my press-on nails, and how do I best prepare them for reapplication?](https://support.doonails.com/en/support/solutions/articles/80001184732-how-can-i-reuse-my-press-on-nails-and-how-do-i-best-prepa)
9. [Press-on Nails Care Guide: How to Clean & Store for Reuse](https://pressonlab.com/press-on-nails-care-guide-how-to-clean-store-for-reuse/)
10. [How to Reuse Press Ons: Here's How to Do It Right](https://us.doonails.com/blogs/tips-tricks/press-ons-reuse)

