
- All
- Product Name
- Product Keyword
- Product Model
- Product Summary
- Product Description
- Multi Field Search
English
Views: 241 Author: Young Mei Publish Time: 09-13-2026 Origin: Site


Content Menu
● Why Cozy Japanese Gel Nail Art Remains So Appealing
● The Core Design Formula for a Sweater Nail Look
>> Start With a Soft Neutral Base
>> Build Dimension With Sponge Application
>> Add Textile-Inspired Texture Carefully
● How to Keep Textured Gel Nail Art Thin and Wearable
>> Use a Controlled Layering Sequence
>> Choose Embellishments With Purpose
● A Practical Step-by-Step Recipe
● Safety and Product-Use Considerations
● Turning This Look Into a Press-On Nail Collection
>> Using Too Many Unrelated Colors
>> Applying Thick Texture Layers
>> Overcrowding Every Nail With Decorations
>> Skipping Product Compatibility Checks
>> Ignoring Packaging and Application Guidance
● Create Your Cozy Nail Collection With a Professional Manufacturer
● FAQ
>> What is Japanese-inspired sweater nail art?
>> Can sweater nail art be made as press-on nails?
>> Which colors are best for a cozy sweater nail design?
>> How can I prevent textured gel nail art from becoming bulky?
>> What should a private-label press-on nail kit include?
>> Can I customize the nail shape, packaging, and designs for my brand?
>> How should gel nail products be used safely?
A cozy sweater-inspired manicure is one of the most wearable ways to bring Japanese gel nail art into a seasonal collection. By combining soft neutral shades, controlled sponge application, fine textile-like gel textures, and low-profile embellishments, nail artists and beauty brands can create a dimensional look that feels warm, refined, and commercially versatile.
For private-label nail brands, salon chains, wholesalers, and press-on nail businesses, this Japanese-inspired sweater nail design is more than a tutorial concept. It is a useful product-development direction that can be adapted into gel nail sets, nail stickers, ready-to-wear press-on nails, seasonal retail kits, and OEM/ODM collections.

Japanese gel nail art is often recognized for its balance of detail, restraint, and finish quality. Rather than relying only on bold color blocking, many Japanese-inspired manicures use translucent layers, tonal contrast, subtle texture, and carefully placed accents to create a polished visual effect.
A cozy sweater manicure follows the same principle. The look does not need to imitate a knitted sweater literally. Instead, it should suggest softness through color, texture, and depth.
The most successful versions usually include:
- Warm beige, taupe, cocoa, cream, or muted rose tones
- A soft gradient or sponge-blended color transition
- Fine textile-inspired gel texture
- Thin, controlled layers rather than heavy product buildup
- Small crystals, pearls, metallic accents, or studs
- A smooth final topcoat that keeps the surface comfortable to wear
This combination works well because it feels seasonal without becoming overly themed. It can suit autumn, winter, holiday retail promotions, café-inspired collections, bridal sets, and understated everyday nail designs.
For a brand developing a cozy nail collection, the design language is also highly adaptable. A single concept can be translated into several formats:
| Product Format | Best Use | Design Opportunity |
|---|---|---|
| Gel polish collection | Salons and advanced home users | Layered, textured, customizable sweater effects |
| Press-on nails | Retail, e-commerce, subscription boxes | Pre-finished texture and embellishment placement |
| Nail stickers | Fast application and entry-level buyers | Knit patterns, gradients, bows, pearls, and metallic details |
| Nail wraps | Lightweight, flat packaging | Soft neutral sweater motifs with printed texture |
| DIY nail kits | Giftable seasonal products | Bundled nails, adhesive tabs, mini files, and care cards |
The commercial advantage is clear: one creative direction can support multiple customer segments while maintaining a consistent visual identity.
A successful sweater-inspired nail design should look layered, but it should not feel thick or uncomfortable. The key is to create visual depth through controlled product placement instead of excessive bulk.
A beige or sand-toned base color gives the design a warm foundation. It also allows textured gel, darker shading, and decorative pieces to stand out without competing for attention.
For a classic version of the look, use two thin coats of a neutral gel color. Cure each layer according to the gel manufacturer's instructions.
Good base-color directions include:
- Sand beige
- Milk tea brown
- Soft caramel
- Mushroom taupe
- Dusty pink
- Warm ivory
- Grey-beige
- Muted cocoa
For a retail-ready press-on nail collection, these neutral shades are especially valuable because they appeal to buyers who want a manicure that coordinates easily with knitwear, office clothing, and daily accessories.
A sponge technique creates an irregular, soft-focus color effect. Unlike a sharply painted line, sponged gel color can look naturally blended, similar to the depth found in fabric fibers or brushed textiles.
To create this effect:
1. Place a small amount of gel color onto a palette.
2. Pick up a limited amount with a cosmetic sponge.
3. Dab lightly onto selected areas of the nail.
4. Flash cure briefly to keep the product stable.
5. Repeat in thin layers until the desired opacity is achieved.
6. Add a second related tone for greater depth.
7. Fully cure before moving to the texture stage.
The two shades should be close in intensity but different in undertone. For example, a cool taupe paired with a warm brown can create a more sophisticated result than two nearly identical beige shades.
Avoid overloading the sponge. Too much gel can create uneven patches, pooled edges, or a bulky surface. A light hand produces a more refined, fabric-like finish.
The signature step in a cozy sweater manicure is the textured gel layer. Mohair-inspired gels, fiber gels, glitter-fiber gels, flocking-style gels, or specially formulated texture gels can create a soft, woven appearance.
Before application, stir textured gel gently with a clean spatula or wooden stick. Fibers, particles, and decorative components may settle at the bottom of the jar during storage.
Apply the lighter textured gel first. Keep the layer thin and even. Then use a darker or complementary texture gel in selected areas to create visual variation.
This works particularly well when the colors are related but not identical, such as:
- Cream + warm grey
- Beige + cocoa
- Dusty pink + muted berry
- Camel + olive taupe
- Milk tea + soft brown
The goal is not to make every nail exactly the same. Slight differences in texture placement can make the finished set feel more handcrafted and premium.
One common challenge with textured gel nail art is thickness. If multiple layers of gel, texture product, rhinestones, and topcoat are applied without control, the nail can become bulky. This may reduce comfort, weaken the silhouette, and make press-on nails look less natural.
A better approach is to think in terms of thin functional layers.
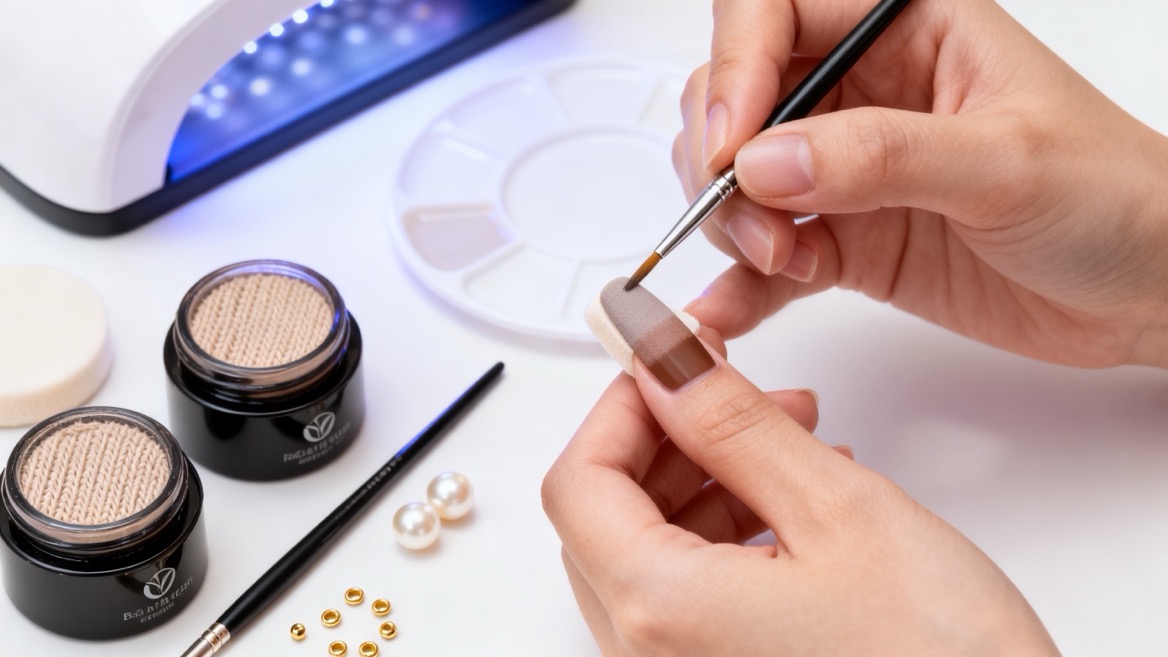
For a smoother result, follow this order:
1. Base coat
2. Two thin coats of background color
3. Sponge-blended color accents
4. Thin texture-gel layer
5. Fine shadow or line details
6. Adhesive gel for embellishments
7. Encapsulation where needed
8. Non-wipe topcoat
Each layer should have a clear role. If a layer does not improve adhesion, color depth, texture, or protection, it may not be necessary.
For press-on nail production, this principle becomes even more important. A bulky nail can affect packaging, wear comfort, adhesive contact, and customer satisfaction. Manufacturers should inspect side profiles during quality control, not only the top view.
Pearls, crystals, mini metal beads, charms, and metallic studs can elevate a sweater manicure, but they should act as finishing details rather than dominate the design.
Good placement options include:
- A curved line near the cuticle
- One small accent on the ring finger
- A fine metallic detail at the sidewall
- A mini pearl cluster on one feature nail
- A small bow or gem on a single nail in the set
For commercial press-on nail collections, it is often more practical to use low-profile embellishments. These are less likely to catch on hair, knitwear, packaging materials, or shipping inserts.
After applying decorative pieces, seal around their edges with a suitable gel product. The objective is to reduce snagging while retaining visible dimension.
This version is designed for salon professionals, advanced DIY users, and brands creating a test sample for a seasonal collection.
Prepare the following materials before starting:
- Base gel
- Neutral gel polish
- Two complementary gel colors for sponging
- Textile-effect or fiber gel
- Detail gel in a deeper tone
- Cosmetic sponges
- Mixing spatula or wooden stick
- Fine liner brush
- Adhesive or builder gel for embellishments
- Small crystals, pearls, or metal accents
- Clear topcoat
- Compatible curing lamp
Step 1: Prepare the nail surface.
Perform standard nail preparation. Remove shine carefully, clean the nail plate, and apply a suitable base product. Cure as directed.
Step 2: Apply the neutral base shade.
Use two thin layers of a beige, taupe, caramel, or cream gel color. Cure between coats.
Step 3: Create the first soft color layer.
Place a small amount of the first gel shade on a palette. Dab the gel lightly with a sponge and press it onto selected areas of the nail. Flash cure briefly.
Step 4: Add the second tonal shade.
Use a fresh sponge to add the second color. Concentrate the shade in areas where you want more contrast. Cure fully once the blend looks balanced.
Step 5: Apply the textured gel.
Mix the fiber or textile-effect gel before use. Apply a thin layer of the lighter shade across the nail, then add a small amount of the second texture shade for dimension. Cure fully.
Step 6: Add subtle shadows or fine art details.
With a small brush, apply a deeper gel color in limited areas. This can define the texture, add a soft gradient, or frame the placement of embellishments.
Step 7: Attach embellishments.
Apply a small amount of adhesive gel or builder gel where decorative elements will sit. Place pearls, crystals, or metal accents carefully, then cure.
Step 8: Encapsulate exposed edges.
Seal around embellishments so they are less likely to catch on clothing or hair. Do not cover decorative pieces so heavily that the design loses its detail.
Step 9: Finish with a clear topcoat.
Apply a smooth, even layer of non-wipe topcoat. Cap the free edge where appropriate and cure completely.
The result should feel warm, dimensional, and polished, with enough detail to look premium while remaining practical for everyday wear.
Gel nail products should always be used according to the product label and curing guidance. A well-designed manicure depends not only on appearance but also on proper application, complete curing, and responsible product handling.
For brands selling consumer products, clear usage instructions are essential. Packaging should identify the product, provide suitable directions, and include ingredient information where required for the intended market. Retail cosmetic products in the United States generally require ingredient declarations, and ingredients are typically listed in descending order of predominance.
When using gel systems, several habits support a better user experience:
- Avoid skin contact with uncured gel.
- Use a lamp that is compatible with the gel system.
- Follow the recommended cure time rather than guessing.
- Apply thin coats to support even curing.
- Stop use if irritation occurs.
- Keep products tightly closed and stored away from heat and direct sunlight.
- Use proper removal methods instead of forcefully peeling product from the nail plate.
People who wish to reduce hand-skin exposure during nail-lamp use can consider broad-spectrum sunscreen or fingerless UV-protective gloves. This is especially relevant for frequent salon visitors and professional nail technicians who work with curing lamps regularly.
For product developers, a complete collection should include not only attractive colors and designs, but also clear instructions, compatible accessories, and realistic wear expectations.
The cozy sweater trend is particularly suitable for premium press-on nails because the visual impact comes from layered finish quality, not only from complex hand painting.
A manufacturer can develop a coordinated collection with several style levels:
| Collection Tier | Suggested Design Direction | Target Customer |
|---|---|---|
| Essential | Neutral base, printed sweater pattern, glossy finish | Mass retail and value-focused buyers |
| Signature | Sponge gradient, textured finish, subtle metallic accents | E-commerce brands and boutique retailers |
| Premium | Hand-finished texture, pearls, crystals, custom shapes | Gift sets, salons, and high-end beauty brands |
| Seasonal Limited Edition | Autumn, winter, holiday, or Valentine color stories | Trend-driven launches and promotional campaigns |
For OEM/ODM buyers, customization options can include:
- Nail shape and length
- Color palette selection
- Texture effect and finish
- Custom charm or crystal arrangement
- Logo printing
- Packaging materials
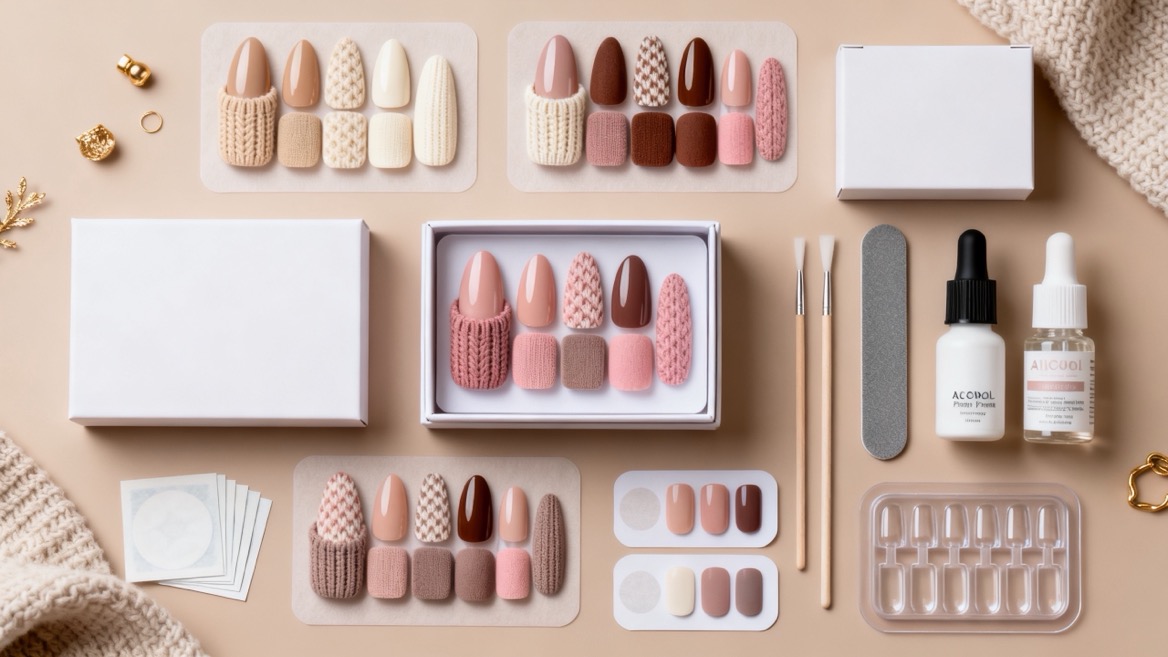
- Adhesive tabs, glue, mini files, and prep pads
- Instruction cards in multiple languages
- Low minimum-order trial collections
- Fast sample development for seasonal launches
At Dongguan YoungMei Technology Co., Ltd., this type of collection can be developed as a complete ready-to-market solution. With more than 15 years of nail product manufacturing experience, an in-house factory, and an integrated supply chain, the company can support brands from early concept and sample development through quality-controlled production and packaging.
Even a simple sweater manicure can lose its premium appearance if the design is overworked. These are the most frequent issues to watch for.
A cozy look depends on harmony. Choose two or three connected tones rather than introducing several unrelated colors.
Texture should look soft, not heavy. Thick layers may reduce comfort and create an uneven side profile.
Use embellishments selectively. One or two feature nails usually create a more elevated result than applying large decorations to every nail.
Base gel, color gel, texture gel, adhesive gel, topcoat, and curing lamp should be tested as a system. Product compatibility can affect adhesion, cure quality, gloss, and wear time.
For press-on nail brands, a beautiful nail set can still produce negative customer feedback if the packaging lacks clear application, removal, and aftercare instructions.
A sweater-inspired Japanese gel nail design can become a high-value addition to a seasonal beauty collection. Its soft color story, tactile finish, and premium decorative details make it suitable for press-on nails, gel products, nail stickers, and retail kits.
If you are building a private-label nail brand, expanding a salon retail program, sourcing wholesale press-on nails, or planning a custom seasonal launch, Dongguan YoungMei Technology Co., Ltd. can help turn your concept into a finished product line.
From OEM/ODM customization and rapid sampling to controlled production, packaging support, and one-stop nail product sourcing, our team is ready to help you create a collection that feels distinctive, wearable, and ready for market.
Contact Dongguan YoungMei Technology Co., Ltd. today to discuss your custom press-on nail, nail sticker, or gel nail product project.
Japanese-inspired sweater nail art is a manicure style that uses soft color layers, textile-like textures, subtle gradients, and carefully placed embellishments to create a warm, refined, fabric-inspired appearance.
Yes. Sweater nail art works very well as press-on nails because texture, printed patterns, gradients, pearls, and low-profile decorations can be pre-applied during production. This makes the finished design easy for customers to wear without needing salon-level application skills.
Popular choices include beige, cream, caramel, milk tea brown, taupe, cocoa, dusty rose, muted berry, and soft grey. Related tones generally create a more sophisticated result than highly contrasting colors.
Use thin layers, cure each stage properly, avoid excessive product, and choose low-profile decorations. Build visual depth with tonal contrast and texture placement rather than stacking thick gel layers.
A complete kit may include press-on nails, adhesive tabs, nail glue, a mini nail file, a cuticle stick, an alcohol prep pad, application instructions, removal guidance, and branded packaging.
Yes. OEM/ODM nail product manufacturing can support custom nail shapes, lengths, colors, textured finishes, decorations, packaging, branded inserts, application accessories, and seasonal collection concepts.
Apply gel in thin layers, avoid contact with skin, use a compatible lamp, follow the product's curing instructions, and discontinue use if irritation occurs. Do not peel off gel products forcefully, as this can damage the natural nail surface.
1. [Paola Ponce Nails — Easy Japanese Gel Nail Art: Cozy Sweater]
2. [U.S. Food and Drug Administration — Nail Care Products]
3. [U.S. Food and Drug Administration — Cosmetics Labeling Guide]
4. [U.S. Food and Drug Administration — Salon Professionals Fact Sheet]
5. [U.S. Food and Drug Administration — Summary of Cosmetics Labeling Requirements]
6. [MD Anderson Cancer Center — UV Nail Lamps and Skin Cancer Risk]
7. [American Academy of Dermatology — Manicures and Pedicures]