
- All
- Product Name
- Product Keyword
- Product Model
- Product Summary
- Product Description
- Multi Field Search
English
Views: 257 Author: Young Mei Publish Time: 10-28-2026 Origin: Site


Content Menu
● What Is Solid Nail Glue Gel?
>> Solid Nail Glue Gel vs. Liquid Glue vs. Adhesive Tabs
● Why Choose Solid Nail Glue Gel for Nail Tips?
● Before Application: Verify the Gel, Lamp, and Nail Tip
>> Can You Use Solid Nail Glue Gel Under Opaque Press-On Nails?
>> Why There Is No Universal Curing Time
● How to Apply Solid Nail Glue Gel Step by Step
>> 1. Check Nail and Skin Condition
>> 2. Select the Correct Tip Size
>> 3. Prepare Without Aggressive Filing
>> 4. Apply the Specified Amount
>> 5. Position and Inspect the Tip
>> 6. Complete the Validated Cure
● How Long Does Solid Nail Glue Gel Last?
● Troubleshooting Lifting, Bubbles, and Early Detachment
>> Turn Customer Feedback Into Useful Evidence
● Solid Nail Glue Gel Safety: What Users Should Know
>> Protect Hands During Light Curing
● How to Remove Solid Nail Glue Gel Without Forcing the Nail
● What Brands Should Verify Before Private-Label Development
>> Evaluate the Kit, Not Just the Jar
● Build Your Next Nail Collection With YoungMei
>> Does Solid Nail Glue Gel Need a UV or LED Lamp?
>> Can I Use It With Fully Painted Press-On Nails?
>> Is Solid Nail Glue Gel Better Than Regular Nail Glue?
>> Can I Apply It Without Buffing My Nails?
>> Is HEMA-Free Nail Glue Gel Allergy-Free?
>> Can I Remove Every Solid Nail Glue Gel With Acetone?
Solid nail glue gel can help create secure, neatly fitted nail enhancements, but reliable results depend on more than adhesive strength. Choosing the right solid nail glue gel for press-on nails means checking the formula, nail-tip compatibility, curing equipment, application instructions, and removal method together.
At Dongguan YoungMei Technology Co., Ltd., we bring more than 15 years of experience in developing and manufacturing press-on nails, nail stickers, and related nail products. Our approach to product selection starts with a practical question: does the complete system work for its intended user?
This guide explains what to check before application, how to troubleshoot lifting, and what brands should verify before introducing a private-label nail adhesive.
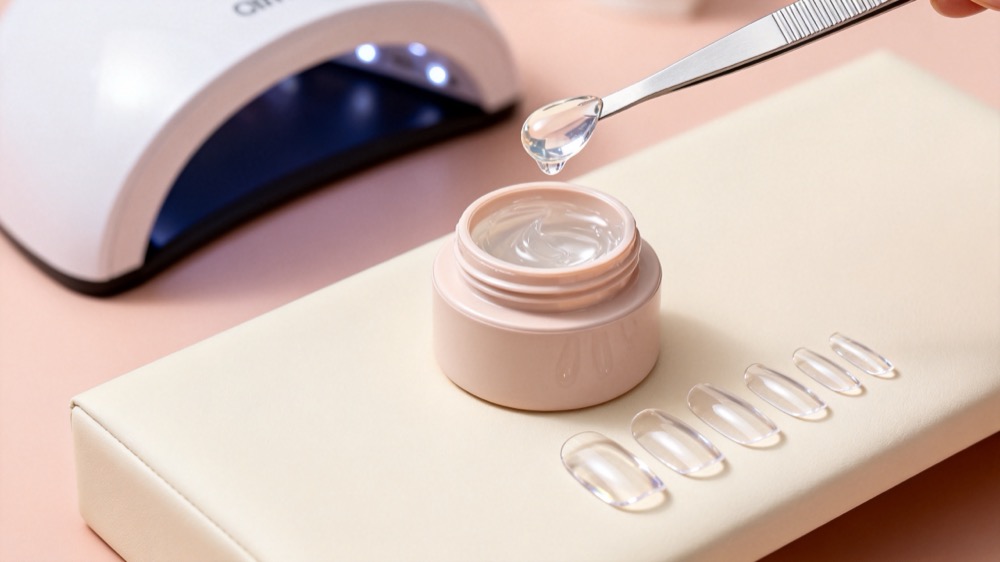
Solid nail glue gel generally describes a thick, shape-holding nail adhesive. Compared with a runny liquid, its putty-like consistency can make placement easier to control.
However, "solid" describes texture—not a standardized formula or curing mechanism. Products sold under similar names may have different ingredients, intended applications, and removal requirements.
Many solid nail glue gels require compatible UV or LED curing equipment. Others marketed as solid adhesives may work differently. Always identify the product category before following an application tutorial.
| Adhesive category | How it generally works | Practical advantage | Main limitation |
|---|---|---|---|
| Light-curable solid nail glue gel | Hardens through a specified light-curing process | Controlled placement before curing | Requires verified gel, lamp, and tip compatibility |
| Conventional liquid nail glue | Commonly uses a moisture-reactive cyanoacrylate formula | Usually needs no curing lamp | Can set quickly and requires careful handling |
| Adhesive tabs | Attach through pressure-sensitive adhesive | Convenient for temporary applications | Wear and suitability vary by product and activity |
These categories are not interchangeable. A lamp cannot make conventional nail glue perform like a light-curable gel, and a gel should not be treated as an air-drying adhesive unless its instructions explicitly say so.
The main appeal is application control. A thicker adhesive can help users position a compatible tip without the same immediate movement associated with a thinner liquid.
Potential practical benefits include:
- More controlled product placement.
- Time to adjust alignment before curing.
- Easier management of the adhesive layer when used correctly.
- A useful option for systems designed around compatible full-cover tips.
These benefits do not establish a universal wear time or guarantee damage-free removal. Nail condition, tip fit, preparation, adhesive quantity, and curing all affect the outcome.
Our manufacturing perspective is straightforward: compatibility matters more than an isolated "strongest glue" claim.
This is the most important checkpoint for any light-curable nail adhesive.
A gel needs suitable light exposure to cure as intended. Lamp wavelength, irradiance, exposure time, product thickness, and positioning all matter. A wattage number alone does not establish that a lamp is appropriate.
Do not assume that you can.
Opaque colors, dense decoration, and other light-blocking features can interfere with light reaching adhesive beneath a nail tip. A firm-looking exterior does not independently establish that the entire adhesive layer has cured adequately.
Use a light-curable adhesive beneath a finished press-on only when the supplier has validated that specific combination.
If compatibility is unclear:
1. Ask for written instructions covering the exact gel and nail type.
2. Confirm the recommended lamp and curing procedure.
3. Choose another adhesive system approved for that finished nail if validation is unavailable.
Simply adding more curing time is not a reliable substitute for compatibility evidence.
A curing schedule belongs to a particular product system.
Do not copy a time from another brand, another lamp, or a tutorial using a different tip design. Likewise, do not assume that changing the lamp requires no other adjustment.
For private-label projects, the final instructions should identify the approved equipment and application conditions before packaging is printed.
The following workflow supports—not replaces—the manufacturer's instructions. If the product is designated for professional use, have it applied by a trained professional.
Do not apply enhancements over visibly injured nails, broken surrounding skin, or suspected infection.
Persistent pain, discoloration, separation, or inflammation deserves professional assessment rather than concealment beneath a new nail set.
Dry-fit each tip before opening the adhesive.
Look for comfortable sidewall coverage and an appropriate curve. A tip that requires excessive pressure to sit correctly may be unsuitable.
Do not use extra gel to compensate for a severely mismatched shape.
Clean and dry the natural nail according to the product instructions.
Remove surface residue using the specified preparation products. If light buffing is required, keep it minimal. Aggressive filing can thin the nail plate.
Avoid cutting living skin or damaging the protective skin around the nail.
Place the adhesive where the instructions require it.
Use enough to create the intended contact layer, without flooding the sidewalls or cuticle area. Both insufficient coverage and excessive thickness can undermine a well-controlled application.
If gel touches the skin, remove it using the recommended method before curing. Do not cure product onto the skin.
Align the tip carefully and apply controlled pressure.
Before curing, check for:
- Visible gaps or trapped air.
- Crooked placement.
- Adhesive escaping beyond the intended contact area.
- Pressure or discomfort from an unsuitable fit.
Correct the placement before continuing.
Use the approved lamp and full curing procedure.
If the instructions include a brief positioning cure, do not assume it replaces the final cure. Keep the hand positioned as directed and avoid substituting equipment without confirmation.
Stop if you experience significant burning or pain.
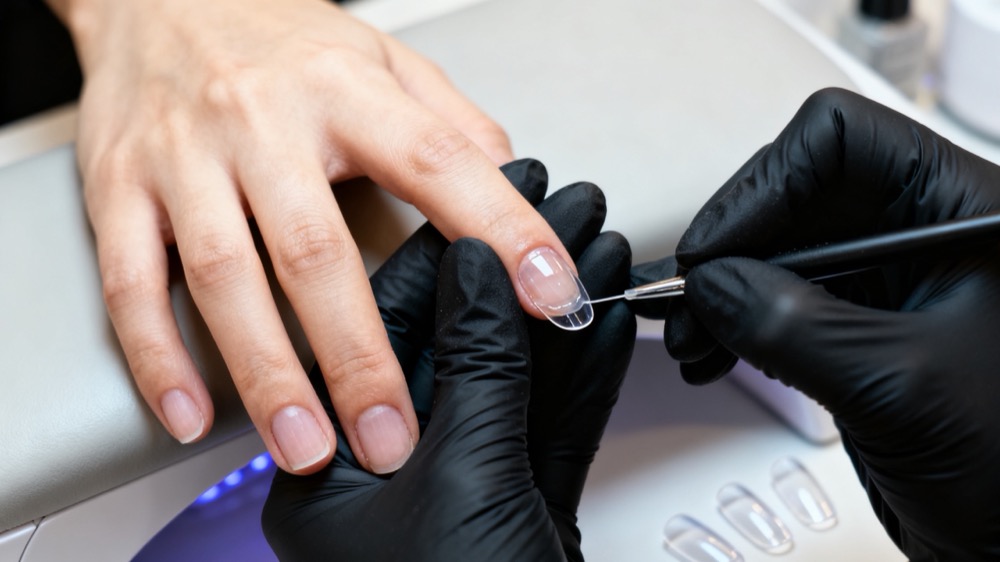
There is no responsible single answer for every formula and user.
Wear depends on the complete application system, including:
- Natural nail condition.
- Tip size and curvature.
- Preparation quality.
- Adhesive coverage.
- Adequate curing.
- Nail length and daily activity.
- Exposure to repeated impact or demanding manual work.
Treat an advertised wear period as a product-specific claim, not a guarantee for the entire category.
For brands, a more useful question is: "Under what documented conditions was this wear claim achieved?"
That question connects marketing promises to the actual customer experience.
When nails lift, applying more adhesive is not automatically the solution. Diagnose the likely cause first.
| Problem | Factors to investigate | Better response |
|---|---|---|
| Lifting around the cuticle | Residue, skin contact, poor placement | Review preparation and application margins |
| Sidewall separation | Incorrect width or curvature | Reassess tip fit |
| Visible bubbles | Uneven placement or coverage | Reposition before curing |
| Early detachment | Preparation, fit, curing, or activity | Check the complete system |
| Adhesive overflowing | Excess quantity or pressure | Adjust application according to instructions |
| Burning, itching, or redness | Irritation or possible allergy | Stop use and seek appropriate medical advice |
Do not seal a lifting area with additional gel while ignoring the cause. Follow the removal instructions and reassess the nail before reapplication.
A review saying "it fell off quickly" identifies a problem, but not necessarily its cause.
For a useful investigation, ask about the tip design, lamp model, preparation steps, application date, and location of the lifting. Request photographs when appropriate and obtain permission before publishing them.
Verified feedback can improve instructions and product development. Unverified testimonials should never become invented proof of performance.
A thicker texture does not make a gel automatically non-toxic, hypoallergenic, or suitable for sensitive skin.
Some nail products contain acrylate or methacrylate ingredients that can cause allergic reactions. Avoiding skin contact and following validated curing instructions are important precautions.
Stop using the product and seek medical advice for symptoms such as:
- Persistent itching or redness.
- Swelling or blistering.
- Pain around the nail.
- New nail separation or unusual changes.
Do not deliberately apply uncured gel to your skin as a home allergy test.
For light-cured manicures, dermatologists recommend protective measures such as broad-spectrum, water-resistant SPF 30 or higher sunscreen on the hands, or dark, opaque fingerless gloves.
Keep preparation products and sunscreen away from the bonding surface as required by the application instructions.
Start by identifying the removal method for the exact adhesive.
Some systems are soak-off; others require a different procedure or professional removal. Do not assume that every solid gel dissolves in acetone or that a remover pen works with every formula.
A careful removal process should:
1. Follow the specified remover and preparation steps.
2. Allow the instructed softening time.
3. Remove only material that releases without force.
4. Repeat the approved process when resistance remains.
5. Clean and moisturize afterward.
Never pry a tightly bonded tip upward or force a tool underneath it. Mechanical removal can take layers of natural nail with it.
Removing the tip intact also does not automatically mean it is suitable for reuse.
For brands, wholesalers, and chain retailers, a successful nail range needs consistent instructions as much as attractive packaging.
We recommend defining these checkpoints before approving a sample:
| Checkpoint | What to request |
|---|---|
| Product identity | Formula category, ingredients, intended use |
| System compatibility | Approved tips, lamp, and curing conditions |
| Removal | Validated procedure and required products |
| Performance claims | Test conditions and supporting records |
| Traceability | Batch identification and shelf-life information |
| Packaging | Warnings, storage guidance, market-specific labeling |
These are purchasing criteria, not a claim that every supplier already holds the same documentation.
Test the proposed retail configuration together: tips, adhesive, lamp where applicable, removal products, and printed instructions.
A clear-tip sample does not validate an opaque finished collection. Similarly, changing a component should trigger a review rather than an assumption that previous results still apply.
This system-level approach helps identify instruction gaps before customers encounter them.
Dongguan YoungMei Technology Co., Ltd. supports global brands, wholesalers, and chain retailers with OEM/ODM customization, rapid sampling, an owned factory, and an established supply chain.
Our focus covers press-on nails, nail stickers, and related nail products, with one-stop sourcing support tailored to the project.
Send our team your target market, nail designs, packaging requirements, estimated order quantity, and preferred application method. Request an OEM/ODM consultation to define a coordinated product and sampling plan before committing to bulk production.
Many products do, but the name alone is insufficient. Check whether the formula is light-curable and use the equipment specified by its manufacturer.
Only when that specific adhesive and finished tip combination has been validated. Opaque decoration can obstruct curing light. Otherwise, choose an adhesive approved for those nails.
Neither is universally better. The right choice depends on the tip, application method, intended wear, removal requirements, and user. Compare complete systems rather than strength claims alone.
Possibly, if the product instructions allow it. Do not omit required preparation, but do not add aggressive filing in pursuit of stronger adhesion.
No. Removing one ingredient does not establish that a product cannot cause allergy. Other ingredients may still trigger reactions, especially in people already sensitized.
No. Removal depends on the formula. Confirm whether it is soak-off and follow its instructions. Seek professional help if the product does not release as expected.
1. ERSA Nails. "The Ultimate Guide to Solid Nail Glue Gel: Strong, Secure, and Long-Lasting Nails." Original article reviewed for its claims, application instructions, removal procedure, and comment availability. Its product-specific timings are not treated here as universal guidance. [ersanails]
2. U.S. Food and Drug Administration. "Nail Care Products." Supports discussion of nail-product reactions, methacrylate sensitization, ventilation, and avoiding skin contact. [fda]
3. American Academy of Dermatology Association. "Gel Manicures: Tips for Healthy Nails." Supports hand protection during light curing, avoiding picking, and moisturizing after removal. [aad]
4. American Academy of Dermatology Association. "Artificial Nails: Dermatologists' Tips for Reducing Nail Damage." Supports discussion of filing-related damage, irritation, and removal considerations. [aad]
5. UK National Occupational Standards. "Enhance and Maintain Nails Using Light Cured Nail Products," SKANT6. Supports manufacturer-led preparation, product compatibility, curing wavelength, irradiance, timing, and adverse-reaction management. [ukstandards.org]
6. NailKnowledge. "The Truth About Free-From Nail Product Marketing & Allergies." Supports the distinction between ingredient-exclusion claims and freedom from allergy risk. [nailknowledge]