
- All
- Product Name
- Product Keyword
- Product Model
- Product Summary
- Product Description
- Multi Field Search
English
Views: 277 Author: Young Mei Publish Time: 09-30-2026 Origin: Site


Content Menu
● What Bottled Builder Gel Is Designed to Do
● How Thick Should Builder Gel Be?
>> Check the Nail From Three Angles
● Why Excess Thickness Creates Problems
>> A Thick Layer Can Be Harder to Cure
>> More Product Does Not Automatically Mean Better Support
>> Bulk Changes the Finished Look
● How to Apply a Controlled Overlay
>> A Practical Example: Short, Flat Natural Nails
● What to Do If the Gel Looks Too Thick
● Safety: Keep Uncured Gel Off Skin
● When a Different Nail Product Makes Sense
● What Brands Should Specify Before Launch
>> Can I apply bottled builder gel in one thick layer?
>> Is there an exact thickness in millimeters for every nail?
>> Should the apex be the same size on every nail?
>> Can I simply cure a thick layer for longer?
>> Does a hard surface mean the builder gel has fully cured?
>> Are press-on nails safer than builder gel?
>> Can I use bottled builder gel beneath an opaque press-on nail?
How thick should you apply bottled builder gel? Thick enough to create a smooth, supportive overlay, but no thicker than the product and curing lamp are designed to handle. On most short natural nails, that means thin coverage near the cuticle and sidewalls, with a modest rise over the nail's stress area. It does not mean spreading one heavy bead evenly from base to tip.
There is no reliable universal millimeter target for every bottle, shade, nail shape, or lamp. The useful question is whether your application has the right structure for the nail and can be cured according to the manufacturer's instructions. This guide explains how to judge both—and when another nail product may be the better choice.

Bottled builder gel is a brush-on product used to reinforce and smooth the natural nail. You may also see products described as "builder in a bottle" or "BIAB," although formulas and application directions differ between brands.
A structured overlay differs from a simple color coat. It places a controlled amount of material where the nail needs support rather than creating the same thickness everywhere. Bottled formats often self-level, which can make them convenient for short to medium natural nails. That same flow can cause trouble if too much gel collects at the sidewalls, cuticle, or free edge.
Check the actual product instructions before applying it. Some builder gels act as a base and builder in one; others call for a separate base product. Removal also varies. Do not assume every bottled builder can be soaked off or that every formula can support an extension.
Think of thickness as a profile, not a single number. Viewed from the side, a balanced overlay rises gently through the area that needs support, then tapers toward both ends. It should not resemble a uniformly thick shell.
| Nail area | What to aim for | What to avoid |
|---|---|---|
| Cuticle area | A thin, smooth transition into the natural nail | A raised ridge or gel touching skin |
| Sidewalls | Neat coverage that preserves the nail’s outline | Pooled product and bulky edges |
| Stress area | A modest, controlled apex suited to the nail length | A large bead used to compensate for a weak design |
| Free edge | Enough coverage to complete the overlay without a heavy tip | A thick edge that looks or feels top-heavy |
The apex is the highest part of the structure. Its position and size depend on the natural nail's shape and length; it is not a fixed dot that belongs in exactly the same place on every client. For a short nail, the change in height may be subtle. As length increases, product choice and structure deserve more careful assessment.
A "credit card thickness" comparison may help someone picture a relatively slim overlay, but it is not a universal safety specification. Card thickness varies, and a visual comparison cannot establish whether a particular gel has cured correctly.
Before curing, pause and look at the application:
- From above: Is the outline even, without gel flooding the skin or sidewalls?
- From the side: Does the profile rise gently, then taper toward the free edge?
- From the front: Is one side noticeably heavier than the other?
If the product has flowed out of position, refine it before placing the hand in the lamp. A smooth top surface alone does not prove that the structure underneath is balanced.
Gel hardens through a light-activated chemical reaction. The result depends on the formulation, layer thickness, lamp output, exposure time, and how the hand sits inside the lamp. A thick or highly pigmented application can make it harder for sufficient light to reach the entire layer.
Do not solve this by guessing at a longer timer. Use the lamp and curing schedule recommended for the specific product. If you change the lamp, check whether the gel manufacturer has approved that combination. A surface that feels firm is not, by itself, proof of a complete cure beneath it.
Strength comes from choosing a suitable system and placing material deliberately. Repeatedly adding bottled builder because a long nail still feels unsupported can create bulk without addressing the underlying product-selection problem.
A more suitable builder system—or a shorter nail—may make more sense. The decision depends on the person's nail condition, desired length, daily activities, and the manufacturer's intended use for the product.
An overly thick overlay may appear swollen near the cuticle, wide through the sidewalls, or heavy at the tip. It can also require additional filing to recover a natural-looking shape. Starting with a controlled amount of gel usually makes refinement simpler than building too much and removing it afterward.
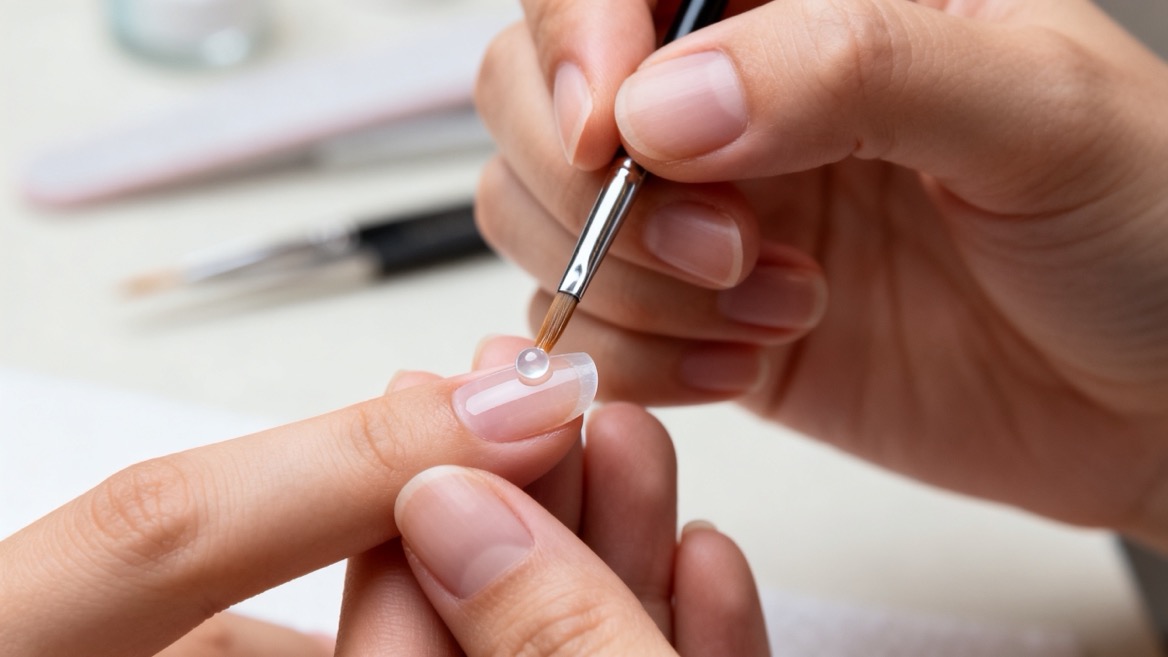
These steps are a framework, not a substitute for your gel brand's directions. Preparation, base requirements, layering, and cure times vary by system.
1. Assess the natural nail. Check its length, shape, flexibility, and condition. Avoid covering a nail with unexplained pain, visible irritation, or suspected infection.
2. Prepare as directed. Follow the manufacturer's instructions for cleansing, surface preparation, and any required base product. Keep the surrounding skin intact.
3. Apply a thin first layer. Create even coverage without touching the cuticle or sidewalls. Cure it at this stage if the product's instructions require it.
4. Place a controlled amount for structure. Use the next layer to create a modest apex rather than building an equally thick coat across the whole nail.
5. Inspect the profile before curing. Check the top, side, and front views. Remove gel from the skin before it enters the lamp.
6. Cure with the approved lamp and timing. Position fingers as directed so the product receives the intended exposure. Follow any separate thumb instructions.
7. Refine only if needed. Shape the cured overlay gently, then apply and cure the compatible finishing product according to its directions.
Manufacturer instructions matter more than a generic tutorial. For example, one published BIAB application guide specifies a thin first layer followed by a second layer to build an apex, with each layer cured under its named lamp. That is a useful illustration of a system-specific process, not a timing rule for all bottled builders.
Imagine a client with short natural nails who wants a smoother, slightly more supportive finish. After following the selected system's preparation steps, apply a thin layer, then place a small amount of builder over the area that needs structure. Look sideways before curing: the result should show a gentle rise, not a pronounced mound.
Now imagine applying the same bead to a much longer nail. The original application may no longer provide the appropriate structure. Adding more of the same bottled gel should not be the automatic answer; reassess the length and product system first.
Before curing: Remove or redistribute excess product with the brush. Check the sidewalls and free edge again. If gel touches skin, remove it fully before curing.
After curing: Do not assume that filing the outside fixes a potentially under-cured interior. Wrinkling, unusual softness, or product that appears wet beneath a firm-looking surface calls for stopping and reviewing the product-and-lamp instructions. Do not seal questionable material under another coat.
At the next appointment: Look for patterns rather than blaming every problem on thickness. Repeated lifting or cracking may involve preparation, fit, structure, wear habits, or cure compatibility. Record the product, lamp, application method, and where the problem occurred so you can troubleshoot the actual cause.
This is the most important boundary in builder-gel application. Uncured nail products should not touch the skin. Methacrylate-related ingredients in nail products can cause allergic contact dermatitis in some people, and insufficient curing can increase concern about exposure.
If itching, swelling, redness, or a persistent rash develops, stop using the suspected product and seek medical advice. Do not keep applying gel to test whether the reaction happens again. A clinician can advise whether assessment for contact allergy is appropriate.
Normal surface tack also needs context: some correctly cured gel systems leave an inhibition layer. Tack alone is not a reliable home test of cure. Follow the product's finishing directions, and treat visible wetness, wrinkling, or unexpected softness as reasons to investigate rather than cover the nail.
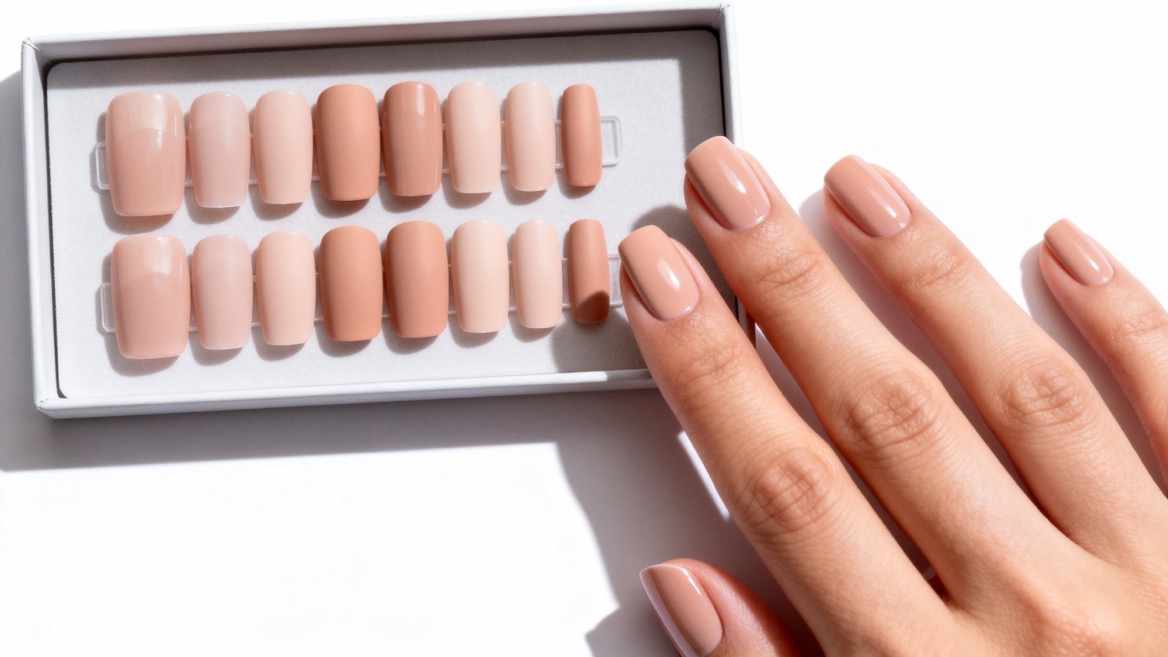
Bottled builder gel is not the answer to every request. The choice should start with the desired result, not with the product already on the table.
| Desired result | Option to consider | Question to check |
|---|---|---|
| A subtle overlay on a short natural nail | Bottled builder gel | Is the formula intended for this nail and compatible with the available lamp? |
| Greater structural support | Another builder system assessed by a trained professional | Does the system support the intended length and shape? |
| Color or design without a sculpted overlay | Nail stickers or wraps | What preparation and removal does the product require? |
| A ready-to-wear shape or detailed design | Press-on nails | Which size, curvature, length, and attachment method fit the wearer? |
Press-on nails are not automatically risk-free or interchangeable with builder gel. Fit, adhesive choice, wear instructions, and removal still matter. Nail glue can also cause reactions in some users. Avoid assuming that an opaque, prefinished press-on can be attached safely with a light-cured gel underneath: if light cannot adequately reach the adhesive, curing may be incomplete.
For beauty brands and retailers, "natural-looking thickness" is too vague to serve as a complete product brief. A useful brief describes the finished appearance and the conditions needed to reproduce it.
For a bottled builder-gel line, ask the formula supplier for written guidance on:
- Intended use, including natural-nail overlays and any permitted extension length.
- Required base, top product, and removal method.
- Approved curing lamp and instructions for each layer and shade.
- Application limits, warnings, and ingredient information for the destination market.
- How darker, more opaque, or decorative versions affect the tested process.
For a press-on collection, the questions change. Review size coverage, curvature, edge profile, finish, adhesive options, packaging instructions, and removal guidance. A beautiful sample is only the starting point: buyers also need repeatable specifications for production and clear directions for end users.
Dongguan YoungMei Technology Co., Ltd. focuses on press-on nails, nail stickers, and related products rather than presenting itself here as a bottled builder-gel formula supplier. With more than 15 years of manufacturing experience, its stated services include in-house production, OEM/ODM customization, sampling, and packaging development for brands, wholesalers, and chain retailers. Those capabilities are relevant when a business wants to develop a ready-to-wear alternative to a salon-applied overlay.
Apply bottled builder gel with thin edges and deliberate structure, not maximum overall thickness. Check the nail from several angles, keep uncured product off skin, and follow the exact gel-and-lamp instructions. If achieving the desired length requires repeatedly piling on product, reconsider the system rather than forcing a bottled builder to do a different job.
For brands developing a press-on or nail-sticker range, contact Dongguan YoungMei Technology Co., Ltd. with your target customer, design references, preferred shapes, expected order quantity, and packaging requirements. Request samples so your team can assess fit, appearance, and product instructions before placing a bulk order.
Do not assume so. Follow the specific product's application directions. A thick bead can be harder to cure evenly, especially if the gel is highly pigmented. Controlled layers and a modest apex are more useful than building a heavy, uniform coating.
No. The appropriate profile depends on the nail, the formula, and the manufacturer's tested application method. A generic measurement cannot confirm correct structure or curing across different systems.
No. The apex should suit the natural nail and its length. On a short nail, it may be barely noticeable. Judge the whole side profile rather than copying a fixed bead size from another client or a video.
Not as a general fix. More time cannot be assumed to correct an unsuitable layer or an incompatible lamp. Check the manufacturer's approved lamp, layer guidance, and curing schedule instead.
Not necessarily. The surface may appear firm while the application beneath it remains questionable. Wrinkling, wet-looking material, or unexpected softness should prompt you to stop and review the system instructions.
Neither option is risk-free. Press-ons avoid the user applying a brush-on builder overlay, but adhesives may still cause reactions, and poor fit or forceful removal can cause problems. Select and use either product according to its instructions.
Do not assume the gel will cure through it. A prefinished or opaque nail may block the light needed by a light-cured adhesive. Use only an attachment method that the relevant product manufacturers approve for that nail and lamp combination.
- [Paola Ponce Nails, "How Thick Should You Apply Bottled Builder Gel?"] — The source article's discussion of bottled builders, natural-nail overlays, visual thickness, and overapplication. [paolaponcenails]
- [The GelBottle Inc, "How to Apply BIAB™"] — A manufacturer example of a thin first layer, apex-building layer, and product-specific lamp directions. [thegelbottle]
- [NailKnowledge, "Gel Polish Curing: Lamp Compatibility and Common Issues"] — Explanation of formulation, lamp compatibility, layer thickness, and visible cure problems. [nailknowledge]
- [British Association of Dermatologists, "Dermatologists Issue Warning About UK Artificial Nail Allergy Epidemic"] — Clinical guidance on uncured product, skin contact, allergic reactions, and recommended curing equipment. [skinhealthinfo.org]
- [U.S. Food and Drug Administration, "Nail Care Products"] — Nail-product labeling, safe-use guidance, and information about methacrylate sensitivity. [fda]
- [Wang and Lipner, "Adverse Effects of Do-It-Yourself Nail Cosmetics: A Literature Review"] — Peer-reviewed discussion of reactions associated with gel products, press-ons, nail glue, and improper curing. [pmc.ncbi.nlm.nih]
- [Dongguan YoungMei Technology Co., Ltd., "About YoungMei"] and ["Custom OEM/ODM Press-On Nails Manufacturer"] — Company-provided information on product focus, manufacturing, customization, sampling, and packaging services. [youngmeinails]