
- All
- Product Name
- Product Keyword
- Product Model
- Product Summary
- Product Description
- Multi Field Search
English
Views: 237 Author: Young Mei Publish Time: 10-14-2026 Origin: Site


Content Menu
● What Is Solid Nail Glue Gel?
>> Solid Nail Glue Gel vs. Liquid Nail Glue and Adhesive Tabs
● Can You Use Solid Nail Glue Gel Under Opaque Press-On Nails?
>> Why a Firm Nail Does Not Prove Complete Curing
● How to Apply Solid Nail Glue Gel Step by Step
>> Step 1: Prepare Your Workspace and Check Your Nails
>> Step 2: Dry-Fit Every Press-On Nail
>> Step 3: Clean Without Over-Filing
>> Step 4: Apply a Controlled Amount of Gel
>> Step 5: Position the Tip and Inspect the Bonding Area
>> Step 6: Cure With the Specified Lamp
>> Step 7: Inspect and Begin Aftercare
● Troubleshooting Solid Nail Glue Gel Application
● Safety: Skin Contact, Allergies, and Lamp Exposure
● How to Remove Solid Nail Glue Gel Safely
● A Manufacturer's Checklist for Better Press-On Nail Kits
>> Validate the Exact Finished Design
>> Make Instructions Specific and Usable
>> Turn Customer Feedback Into Product Improvements
● Build a Press-On Nail Range With Clearer Application Guidance
>> Does Solid Nail Glue Gel Always Need a UV or LED Lamp?
>> Can I Use Solid Nail Glue Gel With Fully Opaque Press-Ons?
>> How Much Gel Should I Apply?
>> How Long Will My Press-On Nails Last?
>> Is Solid Nail Glue Gel Safe for Sensitive Skin?
>> Can I Remove Gel-Attached Nails With Warm Water?
Solid nail glue gel can make press-on nail application easier to control, but a neat-looking manicure is not proof of a properly cured bond. Learning how to use solid nail glue gel means understanding nail preparation, tip compatibility, adhesive placement, lamp requirements, and safe removal—not simply pressing a nail into place and curing it longer.
At Dongguan YoungMei Technology Co., Ltd., we approach press-on nails from a product-development perspective. With more than 15 years of manufacturing experience, our work covers press-on nails, nail stickers, and related products for brands, wholesalers, and retail chains.
Our central recommendation is straightforward: treat the nail tip, adhesive, lamp, and instructions as one system. A beautiful design only becomes a dependable product when these components work together.
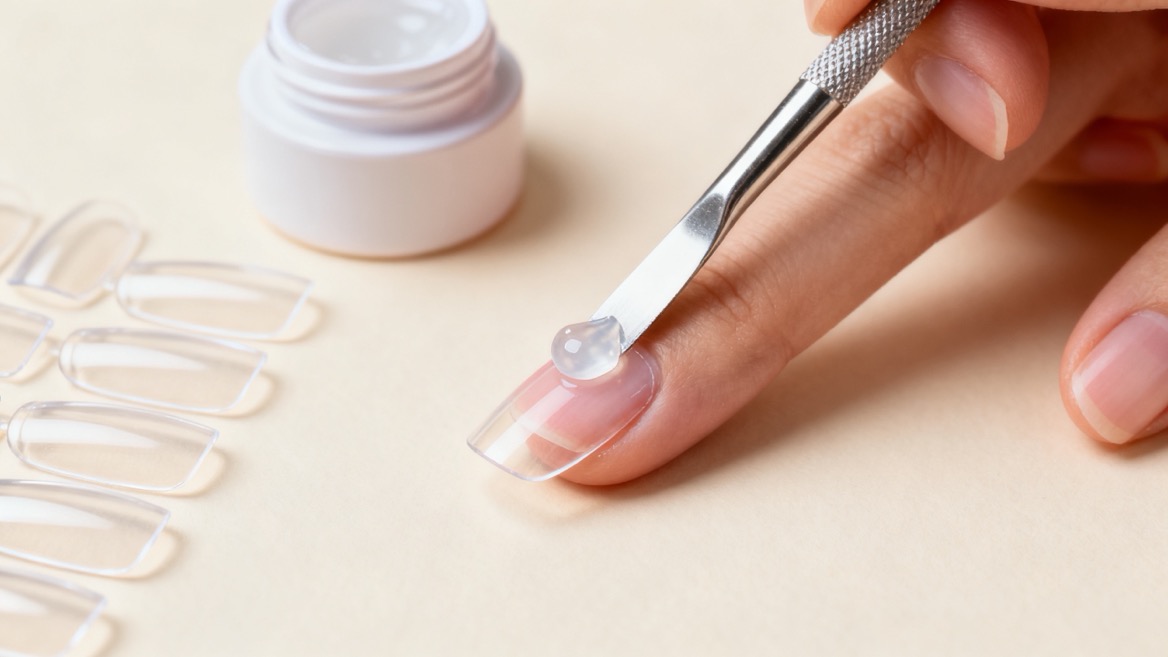
Solid nail glue gel generally describes a thick, moldable, light-curable adhesive used to attach compatible artificial nail tips. Compared with runnier adhesives, its shape-holding texture can make positioning easier before curing.
However, "solid" describes consistency, not a universal formula. Different products may require different preparation steps, lamps, exposure times, and removal methods.
Check the label before starting. Confirm whether the product requires light curing, which tips it supports, and whether it is intended for home or professional use.
These attachment methods should not be treated as interchangeable.
| Attachment method | Main consideration | What to check |
|---|---|---|
| Light-curable solid gel | Requires a compatible curing system | Tip transparency, lamp requirements, application thickness |
| Conventional liquid nail glue | Many formulas bond without a lamp | Ingredients, positioning instructions, removal method |
| Adhesive tabs | Attach through pressure-sensitive adhesion | Fit, intended wear, replacement instructions |
Choose according to the complete product instructions rather than assuming one category is always stronger, safer, or more suitable.
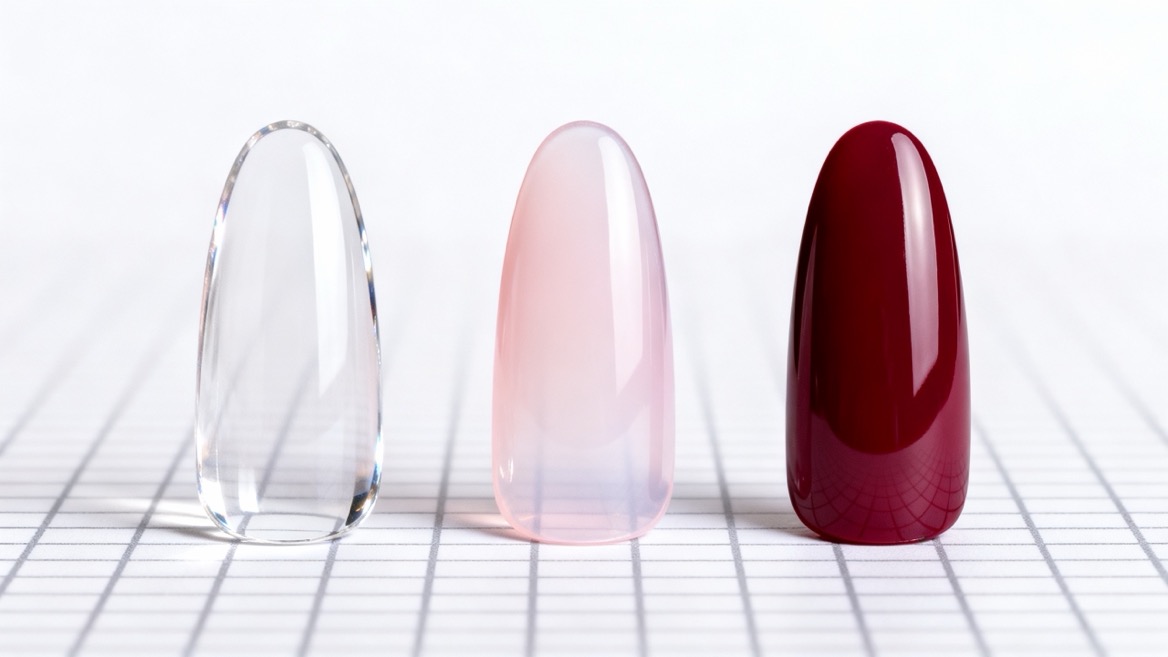
This is the most important compatibility question.
Light-curable adhesive needs sufficient light to reach the bonding layer. A fully opaque press-on nail can obstruct that light. Dark pigments, dense printing, metallic finishes, and decorative layers may also interfere.
Do not assume that extra curing time makes every finished press-on suitable for gel attachment. One manufacturer's application guidance specifically advises against using its solid gel beneath fully opaque nails.
Clear tips may be suitable when expressly supported by the adhesive manufacturer. Light-colored or translucent tips still require confirmation; appearance alone does not establish compatibility.
A nail that feels secure may still conceal an inadequately cured adhesive layer. Pressing the tip, checking its surface, or observing that it does not move cannot verify the chemical conversion throughout the bond.
If compatibility is unclear, choose an attachment method approved for that finished nail design. Do not experiment with longer exposure as a substitute for validated instructions.
Read the adhesive and lamp instructions together before opening the gel. If they conflict or leave essential details unanswered, contact the supplier before proceeding.
Work on a clean surface with good ventilation. Gather:
- Correctly sized, compatible nail tips.
- The specified adhesive and lamp.
- Clean application tools and lint-free wipes.
- The recommended nail cleanser.
- The approved removal product.
Do not cover nails that are painful, inflamed, discolored, or visibly damaged. Seek professional advice about unexplained changes before applying another set.
Keep products away from children, eyes, heat sources, and food-preparation areas.
Position each tip without adhesive. It should cover the natural nail comfortably without pressing into the surrounding skin.
A tip that requires force to sit flat is not a good fit. Check width and curvature, not just length.
Arrange the selected tips in application order. Resolving fit first reduces the temptation to compensate with excessive gel later.
Remove old polish and adhesive as directed. Wash and dry your hands thoroughly, then use the cleanser specified for the attachment system.
If light buffing is required, follow the product instructions conservatively. Do not aggressively file the natural nail to create stronger adhesion.
Avoid cutting or forcefully pushing back the living skin around the nail. Dermatologists warn that disturbing cuticles can contribute to inflammation and infection.
After cleaning, avoid touching the prepared nail surface.
Use a clean tool to place gel where the instructions specify—often on the underside of the compatible tip.
Avoid a universal "pea-sized" rule. Nail size, curvature, adhesive consistency, and the permitted application thickness all affect the required amount.
Aim for coverage within the intended bonding area without a thick central mound or gel extending onto skin.
If the product requires a base coat or primer, use only the specified preparation system.
Align the tip without touching the surrounding skin. Apply controlled pressure according to the instructions.
Before curing, inspect for:
1. Visible gaps or bubbles.
2. A tip that shifts or sits crooked.
3. Adhesive overflowing at the sidewalls.
4. Contact between uncured gel and skin.
If placement is wrong, correct it before curing. If necessary, remove the tip and restart using the manufacturer's cleanup procedure.
Do not use a finger to wipe away uncured gel or return contaminated material to the container.
Follow the validated curing schedule for the exact adhesive, lamp, tip, and application thickness.
There is no reliable universal "60–120 seconds" rule for every solid nail glue gel. Lamp wattage alone does not establish compatibility.
Keep the nail positioned as directed. If a brief initial cure is permitted to hold placement, remember that it does not replace the full curing cycle.
Do not intentionally increase gel thickness or extend exposure to compensate for an unsuitable tip.
Check for lifting, visible gaps, discomfort, and hardened overflow. Inspection can identify placement problems, but it cannot certify complete curing.
Follow the product's aftercare instructions. Wear gloves for cleaning tasks and avoid using nails to open containers or lift objects.
If a tip loosens, do not simply seal adhesive over the gap. Remove it appropriately, inspect the natural nail, and resolve the cause before reapplication.
When an application fails, repeating the same process with more gel rarely explains the problem. Check the system first.
| Problem | Possible contributing factor | Better response |
|---|---|---|
| Tip lifts early | Poor fit, contamination, or incompatible attachment system | Recheck fit, preparation, and approved components |
| Visible bubbles | Uneven contact or unsuitable placement | Reposition before curing |
| Gel reaches skin | Excess adhesive or misalignment | Stop, clean as directed, and restart |
| Bond remains questionable | Light obstruction or incompatible curing setup | Seek supplier guidance; do not rely on appearance |
| Burning, itching, or swelling | Irritation or a possible reaction | Stop use and seek medical advice |
Troubleshooting should protect the natural nail, not prioritize keeping the manicure attached at any cost.
Some nail-product ingredients can cause irritation or allergic reactions. Avoiding uncured adhesive on skin is an important precaution.
"HEMA-free" should not be interpreted as "allergy-free." A person may react to another ingredient. Likewise, low odor does not demonstrate that a formula cannot cause sensitization.
If you have a known nail-product allergy, consult a dermatologist before selecting another adhesive. Do not deliberately apply uncured gel to skin as a home allergy test.
Stop using the product if you develop persistent itching, redness, swelling, blistering, or nail changes. Seek medical advice rather than covering the symptoms with another manicure.
For UV exposure during gel services, dermatologists recommend broad-spectrum, water-resistant SPF 30 or higher on the hands, or dark, opaque fingerless gloves. Keep sunscreen away from prepared bonding surfaces.
Removal depends on the formula. Do not assume warm water, oil, alcohol, or acetone will release every adhesive.
Check whether your product requires a specified remover, soaking procedure, or professional removal. A method recommended for one adhesive is not automatically appropriate for another.
Use this sequence:
1. Read the removal instructions before beginning.
2. Apply the specified remover for the instructed duration.
3. Reassess without pulling or twisting the tip.
4. Repeat only as directed if the bond remains secure.
5. Seek professional help if removal is difficult or painful.
Do not pry off a firmly attached nail. Forceful removal can damage the natural nail.
After removal, moisturize and assess nail condition. Allow damaged or irritated nails to recover before another application.
For brands and retailers, application quality begins before a customer opens the package. We recommend evaluating the finished kit, not approving the nail design and adhesive separately.

Decoration can change light transmission. An attachment method suitable for an undecorated tip may not suit a densely printed or metallic version.
Ask suppliers to document which finished designs are compatible with the proposed adhesive and curing process.
Treat changes to the tip, decoration, adhesive, or lamp recommendation as reasons to review compatibility again.
A useful instruction card should explain:
- Supported nail-tip types.
- Required preparation products.
- Adhesive placement and permitted thickness.
- Compatible lamp requirements and curing procedure.
- Skin-contact precautions.
- Removal steps and warning signs.
Avoid unsupported claims such as "damage-free," "suitable for everyone," or guaranteed wear durations.
Useful feedback includes the exact tip design, adhesive batch, lamp model, preparation method, and timing of any lifting or discomfort.
These details help distinguish fit problems from application mistakes or compatibility issues.
Collect genuine reviews with permission. Do not turn isolated positive experiences into universal performance promises.
A successful press-on range needs attractive designs, appropriate attachment options, and instructions customers can follow confidently.
Dongguan YoungMei Technology Co., Ltd. offers OEM/ODM customization, rapid sampling, and one-stop sourcing through our own factory and established supply chain.
Contact our team with your target market, nail designs, packaging requirements, and preferred attachment method. Request a sample-development discussion that covers fit, adhesive compatibility, application guidance, and removal instructions—not appearance alone.
Not every product marketed as "solid glue" has the same chemistry. If the label identifies it as light-curable gel, use the specified compatible lamp. Check the instructions rather than relying on the product name.
Do not assume so. Opaque tips can block curing light. Use gel beneath them only if the manufacturer validates that exact combination. Otherwise, select an approved alternative attachment method.
Follow the permitted thickness and placement instructions. The amount should suit the tip's size and fit without overflowing. A fixed pea-sized quantity is not appropriate for every nail.
Wear depends on the complete system, preparation, fit, daily activities, and nail condition. Follow the product's stated expectations, but do not treat a general wear claim as a guarantee for every user.
It is not automatically suitable. Ingredients can cause irritation or allergic reactions, especially with skin exposure. People with previous reactions should consult a dermatologist before using another nail adhesive.
Only if the manufacturer specifies that method for the exact product. Some bonds require another remover or professional assistance. Never force removal because a generic soaking tutorial did not work.
1. [Ersa Nails — "Perfect Your Press-Ons: Mastering Solid Nail Glue Gel Application"]. Original article used as the restructuring baseline. Its five-step process was reviewed; the retrieved page displayed zero comments. [ersanails]
2. [U.S. Food and Drug Administration — "Nail Care Products"]. Supports guidance on following labels, ventilation, ingredient warnings, skin-contact avoidance, methacrylate sensitization, and reporting adverse reactions. Page states its content was current as of October 15, 2024. [fda]
3. [American Academy of Dermatology — "Gel manicures: Tips for healthy nails"]. Supports cuticle precautions, UV-protection recommendations, avoidance of picking, moisturizing, and seeking dermatological advice for persistent nail problems. These are general gel-manicure recommendations, not validation of a particular adhesive. [aad]
4. [CurvLife — "How to apply press on nails by solid nail glue gel"]. Manufacturer guidance supporting the distinction between tip opacity and curing compatibility. Its instructions expressly advise against fully opaque nails. Other promotional claims and its specific removal procedure have not been generalized to all products. [curvlife]
5. [DermNet — "Nail cosmetics allergy"]. Supports discussion of allergic contact dermatitis associated with nail cosmetics and artificial-nail adhesives. [dermnetnz]
6. [Asthma and Allergy Foundation of America — "Am I Allergic to Gel Nails or Nail Polish?"]. Supports discussion of HEMA-related reactions and avoiding direct contact with uncured nail products. [community.aafa]