
- All
- Product Name
- Product Keyword
- Product Model
- Product Summary
- Product Description
- Multi Field Search
English
Views: 237 Author: Young Mei Publish Time: 10-21-2026 Origin: Site


Content Menu
● What Is an Apex on Short Nails?
● Do Short Nails Always Need a Built-Up Apex?
● Where Should the Apex Be on Short Nails?
>> Check the Nail From Three Angles
● Choose the Right Product Before Building the Apex
● How to Create an Apex on Short Nails: Step by Step
>> Step 1: Assess the Natural Nail
>> Step 2: Prepare Without Over-Filing
>> Step 3: Apply the Required Foundation
>> Step 4: Create a Slip Layer When Specified
>> Step 5: Place and Guide the Structural Bead
>> Step 6: Check the Profile Before Curing
>> Step 7: Cure According to the Exact System
● Troubleshooting Common Short-Nail Apex Problems
● Safety Matters More Than a Perfect Profile
● How Apex Design Applies to Short Press-On Nails
>> A Practical Development Checklist for Nail Brands
● Developing a Short-Nail Collection With YoungMei
>> Can You Build an Apex on Very Short Nails?
>> How Thick Should an Apex Be on Short Nails?
>> Can Gel Polish Alone Create a Structural Apex?
>> Why Does My Builder Gel Move Toward the Cuticle?
>> Do Short Press-On Nails Need a Visible Apex?
>> When Should a Structured Overlay Be Rebalanced?
Learning how to create an apex on short nails starts with understanding one principle: short nails need balanced support, not unnecessary bulk. A carefully shaped builder gel overlay can create a smooth profile while keeping the cuticle area, sidewalls, and free edge refined.
At Dongguan YoungMei Technology Co., Ltd., our perspective combines nail aesthetics with product development. With more than 15 years of experience in nail product manufacturing, we approach short nail design as a balance between appearance, fit, and repeatable quality.
This guide explains apex placement, a practical application workflow, common mistakes, and what nail brands should consider when developing short press-on nails.

The apex is the highest point of a nail enhancement when viewed from the side. It forms part of the enhancement's supporting architecture rather than serving as a decorative bump.
A well-shaped apex connects smoothly with the surrounding nail surface. The cuticle transition remains thin, the sidewalls look balanced, and the free edge does not appear overloaded.
On short nails, this rise is usually subtle.
Think of the goal as balance: enough structure for the chosen length and product system, without making a small nail look thick or rounded like a bead.
An apex also differs from the C-curve. The apex describes the longitudinal profile, while the C-curve describes the nail's transverse curvature when viewed from the free edge.
Understanding both helps prevent a common mistake: confusing a strongly curved nail with a correctly structured enhancement.
Not every short manicure requires additional structural product.
Traditional nail polish adds color without building an enhancement. Gel polish alone should not automatically be treated as a substitute for a builder system.
When creating a structured overlay, the appropriate amount of reinforcement depends on:
- Natural nail condition and existing curvature.
- Free-edge length and intended shape.
- The selected product's intended use.
- Manufacturer application instructions.
- The wearer's activities and maintenance needs.
A very short nail may need only modest contouring. A longer free edge or flatter natural profile may require a different approach.
The useful question is not, "How large should the apex be?" It is, "What structure does this particular nail and product system require?"
There is no universal placement formula that suits every short nail.
Natural nail length, growth direction, free-edge projection, and the enhancement system all influence the finished profile. A placement rule copied from a long extension may produce unnecessary thickness on a short overlay.
For many short structured overlays, the highest point sits around or slightly behind the center of the visible nail, adjusted to the individual nail and the product's training guidance.
It should not become a bulky ridge against the proximal nail fold.
The original tutorial emphasizes keeping product from drifting too far forward during self-leveling. That is a useful observation, but "closer to the cuticle" must never mean allowing uncured gel to touch skin.
Before curing, inspect:
1. Side view: Is there a gentle rise followed by a smooth taper?
2. Top view: Is the structure centered rather than leaning sideways?
3. Free-edge view: Is product distribution even across the nail?
A flattering top view alone does not confirm balanced architecture.
Builder gels differ in viscosity, flexibility, preparation requirements, and curing instructions.
Some systems require a separate base. Others combine functions. Some workflows use an uncured slip layer beneath the structural bead, while others specify a cured foundation before further building.
Do not combine instructions from unrelated products.
| Product consideration | What to check | Why it matters |
|---|---|---|
| Intended application | Natural nail overlay or extension | Not every gel suits every service |
| Viscosity | Flow and self-leveling behavior | Determines working time and control |
| Base requirements | Separate base or integrated system | Supports correct application |
| Curing instructions | Compatible lamp, time, and layer limits | Guides proper curing |
| Removal method | Soak-off or file-off | Prevents inappropriate removal |
For beginners, product control matters more than choosing whichever formula appears fastest in a demonstration.
Start with clean, bare nails and inspect their condition.
Look for splitting, previous lifting, unusual discoloration, soreness, or irritated surrounding skin. Do not cover a suspected nail disorder simply to improve its appearance.
Assess the existing curve before deciding how much material to add. Naturally curved nails may need less visual correction than flat nails.
If the nail or surrounding skin is painful, inflamed, or otherwise abnormal, postpone the enhancement and seek appropriate professional advice.
Follow the selected system's preparation instructions.
Remove old product appropriately, shape the free edge, clear surface debris, and cleanse as directed. If surface refinement is required, keep it controlled.
Aggressive filing is not a shortcut to better adhesion.
Protect living skin and avoid cutting the protective cuticle seal. The goal is a clean working surface, not a thinner natural nail plate.
Use dehydrator, primer, or base only when the system calls for it.
Apply the recommended foundation layer with a controlled margin around the skin.
Keep the layer even and avoid pooling in the sidewalls.
If the instructions require curing this layer, cure it before continuing. Do not leave a base uncured merely because another tutorial uses a wet-on-wet method.
This distinction matters because a "base layer" and a "slip layer" are not interchangeable instructions across all brands.
A slip layer is a thin, uncured layer that helps a structural bead move across the surface in systems designed for that technique.
It should guide the product, not flood the nail.
On short nails, excessive liquid product leaves little room for controlled placement. Keep the skin margin visible, and work on one nail at a time while learning the formula's behavior.
Place a controlled bead near the intended apex zone.
Use light brush movements to guide the gel toward the surrounding areas while retaining the main structure where it belongs.
Avoid dragging the brush repeatedly through the center. Excessive pressure can flatten the intended rise and push product into the perimeter.
If the bead moves too quickly, reassess the amount, working temperature, and product viscosity rather than simply adding more gel.
Pause briefly for self-leveling, then inspect all three viewing angles.
Some trained workflows briefly invert the finger to help collect product centrally. This is optional, formula-dependent, and not a substitute for controlled placement.
Correct any skin contact before curing, following the product's cleanup guidance.
Do not cure flooded gel in place and plan to file it away afterward.
Use the compatible lamp and the manufacturer's specified curing procedure.
There is no universal "60-second rule" for every builder gel. Required exposure depends on the formulation, layer thickness, lamp compatibility, and application instructions.
A surface that feels hard is not reliable proof that the entire layer has cured correctly.
A brief flash cure, where permitted, also does not replace the required full cure.
After curing, inspect the structure again.
Refine only where necessary. Avoid filing away the support you just created or thinning the natural nail beneath it.
Complete the color and top-coat stages according to the system instructions.
The finished short nail should look intentionally shaped, not visibly overloaded.
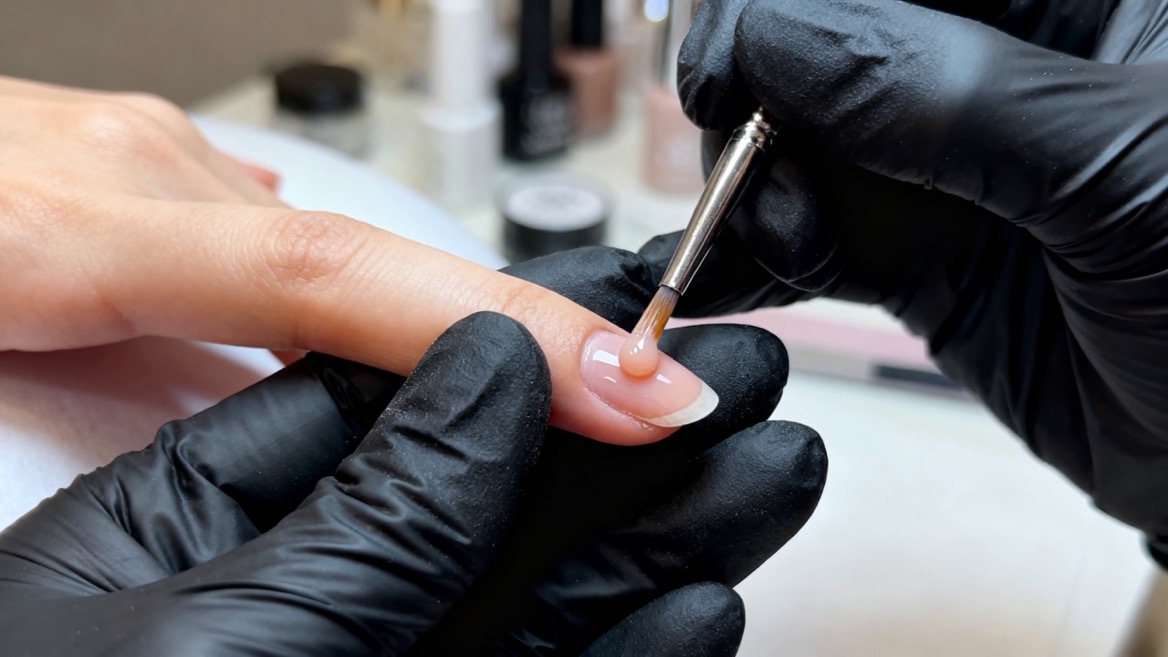
Small application errors can look more pronounced on a short nail because there is less surface area to distribute the product.
| Problem | Possible cause | Practical correction |
|---|---|---|
| Bulky cuticle area | Bead too close to the perimeter | Maintain a thin transition and clear skin margin |
| Heavy free edge | Gel migrated forward | Use less product and check sooner |
| Off-center apex | Finger tilted during leveling | Stabilize the hand and inspect straight on |
| Uneven surface | Poor bead control or overworking | Adjust quantity and use lighter movements |
| Lifting | Preparation, contact, damage, or system issues | Review the entire workflow |
| Repeated cracking | Structure, length, product, or wear mismatch | Reassess rather than adding thickness everywhere |
These are troubleshooting possibilities, not diagnoses.
Repeated failure deserves a full review of application, curing, nail condition, and aftercare.
Uncured nail products should not contact the skin.
Dermatology guidance identifies skin exposure to uncured acrylate materials and insufficient curing as important allergy concerns. Reactions may involve itching, redness, swelling, or symptoms beyond the fingertips.
Stop using a product if a reaction is suspected and seek medical advice. Do not attempt to diagnose the problem by testing more uncured product on the skin.
For lamp exposure, dermatologists recommend protective measures such as broad-spectrum sunscreen or dark, opaque fingerless gloves.
Removal also matters. Do not peel off an overlay or force away lifted material. Follow the specified removal process and obtain professional help when necessary.
A sculpted gel overlay and a preformed press-on nail are different products.
With an overlay, structure is built directly on the natural nail. With a preformed press-on, the shape and thickness distribution already exist before application.
That makes product selection especially important.
A taller external profile does not automatically mean a better-fitting press-on. The internal curvature, width, length, and contact with the natural nail must also be considered.
A tip that requires force to sit correctly may be unsuitable even when its surface looks attractive.
For a short press-on collection, we recommend evaluating samples for:
- Consistent side profiles across sizes.
- Refined cuticle-edge transitions.
- Balanced thickness distribution.
- Internal curvature suited to intended users.
- Smooth sidewalls and free edges.
- Clear sizing and application instructions.
These are proposed evaluation criteria, not claims that one design suits every customer.
Compare samples on different nail profiles rather than approving an entire collection from photographs alone.
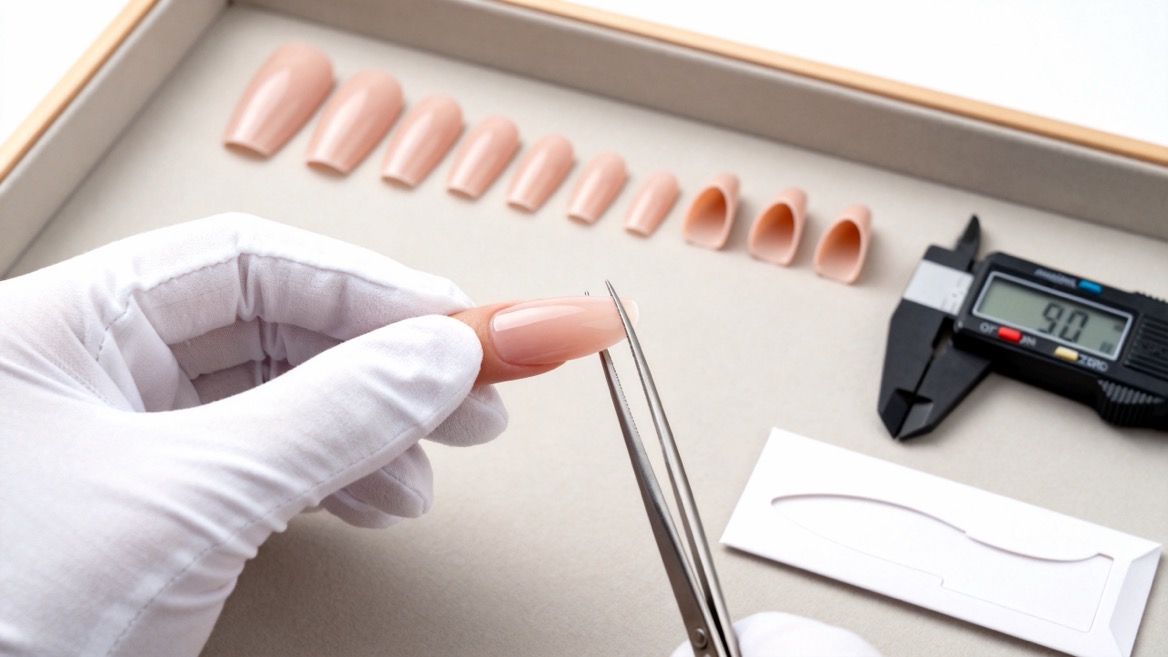
Dongguan YoungMei Technology Co., Ltd. manufactures press-on nails, nail stickers, and related nail products.
Our company combines more than 15 years of experience with an owned factory and an established supply chain. We support global brands, wholesalers, and chain retailers through OEM/ODM customization, rapid sampling, consistent-quality production, and one-stop sourcing.
For a short-nail project, a useful brief includes target customers, preferred lengths, shapes, sizing requirements, finishes, packaging, and application method.
Request a customized sample set so your team can evaluate profile, fit, finish, and packaging together before approving production.
Yes, when using a suitable structured enhancement system. However, the rise should suit the available nail surface and intended service. Very short nails do not need an exaggerated mound of product.
There is no universal thickness for every formula and nail type. Follow the product's structural guidance and layer limits. Aim for a controlled profile, not a fixed measurement copied from an unrelated system.
Do not assume so. Standard gel polish is primarily a color coating. Use a product specifically intended for building structure, and follow its instructions rather than stacking excessive color layers.
Possible reasons include excessive product, a tilted finger, low viscosity, or too much leveling time. Reduce the bead, stabilize the hand, and work individually. Correct all skin contact before curing.
Not necessarily. Some have a subtle manufactured rise rather than a pronounced salon-style apex. Evaluate overall profile, fit, thickness distribution, and intended use rather than judging quality by height alone.
Follow the product system and your nail professional's assessment. Growth changes the structure's position. Visible lifting, cracking, discomfort, or an increasingly unbalanced profile should prompt review rather than waiting for a fixed date.
1. [Paola Ponce Nails — "How To Create An Apex On Short Nails"]
Original article supplied for reconstruction. Informed the discussion of short-nail structure, slip layers, bead control, and self-leveling. Its placement advice is treated as technique-specific rather than a universal rule. [paolaponcenails]
2. [The GelBottle Inc — "How to Apply BIAB™"]
Manufacturer-specific instructions covering preparation, foundation application, apex building, curing, refinement, and finishing. Supports the distinction between product-specific procedures and generic tutorials. [thegelbottle]
3. [American Academy of Dermatology — "Gel Manicures: Tips for Healthy Nails"]
Dermatologist guidance on cuticle protection, gel-manicure precautions, lamp-exposure protection, and nail care. [aad]
Explains allergy risks associated with uncured nail materials, skin contact, and insufficient curing. Used for safety principles, not as evidence of current prevalence. [skinhealthinfo.org]
5. [British Society for Cutaneous Allergy — "Acrylates"]
Patient information distinguishing sources of methacrylate exposure, including nail gels, from cyanoacrylate-containing artificial-nail glues. [cutaneousallergy]
6. [Health and Safety Executive — "COSHH and Beauticians: Key Messages"]
Occupational guidance on irritation, dermatitis, and allergy hazards associated with beauty-service chemicals. [hse.gov]