
- All
- Product Name
- Product Keyword
- Product Model
- Product Summary
- Product Description
- Multi Field Search
English
Views: 231 Author: Young Mei Publish Time: 11-13-2026 Origin: Site


Content Menu
● 1. Choose Your Press-On Nail Business Model
● 2. Gather Supplies for Making Press-On Nails
>> Essential Tools and Materials
>> Set Up a Controlled Workspace
● 3. Solve Press-On Nail Sizing Before You Launch
>> Compare Three Sizing Approaches
>> Build a Reliable Sizing System
● 4. How to Make Press-On Nails to Sell: A Repeatable Workflow
>> Step 1: Select and Inspect the Tips
>> Step 2: Prepare the Surface
>> Step 3: Apply Controlled Layers
>> Step 4: Cure According to the Product System
● 5. Turn Quality Control Into a Practical Business System
● 6. Price Handmade Press-On Nails Without Ignoring Labor
● 7. Package Press-On Nails for Use, Not Just Unboxing
>> Write Clear Safety and Care Instructions
● 8. Create Product Pages That Reduce Buying Uncertainty
● 9. Move From Handmade Sets to OEM/ODM Production
● Build Your Next Press-On Nail Collection
>> How Many Nails Should I Include in a Set?
>> Do I Need a UV or LED Lamp to Make Press-On Nails?
>> Can I Start a Press-On Nail Business From Home?
>> How Much Should I Charge for Handmade Press-On Nails?
>> When Should I Work With a Press-On Nail Manufacturer?
Learning how to make press-on nails to sell involves more than decorating nail tips. You need a product that fits, a repeatable production process, pricing that covers your time, and packaging that helps customers apply and remove their nails correctly.
At Dongguan YoungMei Technology Co., Ltd., we approach press-on nails from a manufacturing perspective: an attractive sample is only the beginning. A sellable collection must also work consistently across sizes, production batches, and customer orders.
This guide connects handmade production with practical brand-building decisions, helping independent creators, wholesalers, and retailers develop a more dependable press-on nail business.

Before buying supplies, decide what you are actually selling: personalized artistry, convenient ready-to-wear sets, or a branded retail collection.
| Business model | Best suited to | Main operational challenge |
|---|---|---|
| Handmade custom sets | Artists offering personalized designs | Labor time and customer sizing |
| Ready-to-ship collections | Sellers testing repeatable designs | Inventory and size coverage |
| Private-label collections | Brands, wholesalers, and retailers | Supplier specifications and consistency |
A hybrid approach is also possible. You might handcraft premium commissions while sourcing repeatable everyday designs from a manufacturing partner.
Start with one clearly defined customer. A buyer seeking short office-friendly nails has different expectations from someone shopping for elaborate occasion sets.
Choose your opening range around that distinction rather than trying to offer every shape, length, and finish.
For handmade production, prepare:
- Full-cover nail tips in your selected shapes and sizes.
- Nail stands and mounting putty or suitable adhesive tabs.
- Files, buffers, and lint-free wipes.
- Tip-compatible cleaning and preparation products.
- Color coatings, top coats, and decoration tools.
- A compatible curing lamp when using light-cured products.
- Appropriate protective gloves and workspace ventilation.
- Packaging, labels, and application instructions.
Keep supplier instructions and safety data sheets accessible. Product compatibility matters more than buying the largest possible tool collection.
If you use air-dry coatings instead of gel, follow their drying and handling requirements rather than applying a gel-based workflow.
Separate dusty preparation work from finishing and packing.
Use a cleanable surface, remove dust between tasks, and keep food and drinks away from production materials. Avoid direct skin contact with uncured products.
Gloves are one protective measure, not a substitute for careful handling, ventilation, and product-specific safety instructions.
Sizing deserves attention before photography or promotion. Beautiful nails that do not fit create avoidable customer frustration.
A reader responding to the original tutorial highlighted an important operational insight: producing a fuller size assortment may take less effort than repeated sizing conversations. That is a useful hypothesis to test, not proof that one pack format suits every business.
| Approach | Customer advantage | Seller consideration |
|---|---|---|
| Custom-sized sets | Personalized selection with fewer unused tips | Requires reliable measurements or a sizing kit |
| Predetermined size bundles | Simple ordering | Size combinations need clear explanation |
| Multi-size sets | Customers can compare several tips | Higher material and decoration requirements |
A 20-piece set may offer more choices than a 10-piece set, but nail count alone does not guarantee fit.
The actual width range, curvature, and distribution of sizes matter. A broad assortment still needs suitable options for wider thumbs and narrower nail beds.
Use a physical sizing kit made from the same tip range as the finished product whenever practical.
Record:
1. Tip supplier and product range.
2. Shape and length.
3. Size code and measurement method.
4. Customer selection for each finger.
5. Any fit feedback after delivery.
Do not assume identical size numbers mean identical dimensions across suppliers. Recheck fit whenever the underlying tip specification changes.
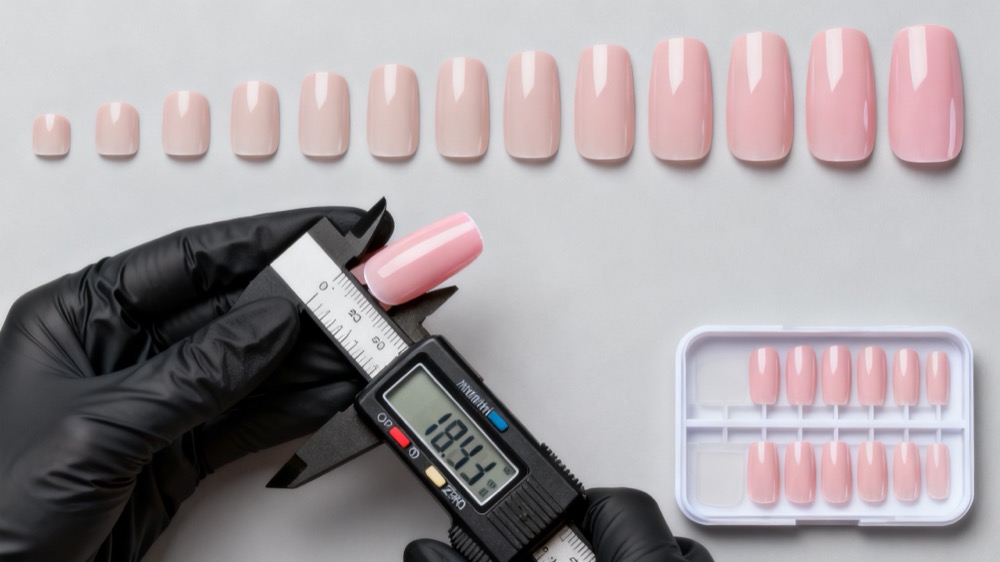
Check tips before decoration. Look for cracks, distorted shapes, rough edges, and inconsistent curvature.
Arrange the complete set in order so you can confirm size placement and design balance before applying color.
Remove unwanted molding edges and refine the free edge where necessary.
Prepare the surface according to the tip and coating manufacturers' instructions. Do not assume aggressive buffing or acetone treatment is appropriate for every material.
Remove preparation dust before coating.
Mount tips securely and apply coatings at the recommended thickness.
For repeat designs, document the color sequence, decorative placement, and finishing method. A reference photograph helps, but written production notes make the design easier to reproduce.
Keep uncured material away from skin and clean contaminated tools appropriately.
Use the lamp recommended for the gel system and follow its curing instructions.
Do not judge curing solely by surface hardness. Inadequate curing can increase allergy risk, and lamp compatibility matters.
Nail stands can change positioning inside a lamp. Confirm that your setup follows the equipment and coating suppliers' instructions rather than improvising lamp modifications.
A brief flash cure should not replace the specified full cure.
Check the completed set for:
- Consistent color and gloss.
- Clean edges and undersides.
- Correct size assortment.
- Secure decorative elements.
- Matching shape and length.
- Visible defects or contamination.
Keep an approved reference set or detailed photographs for future production comparisons.
Quality control becomes more useful when it produces records, not just a final visual check.
Create a batch sheet showing the design code, materials used, production date, operator, and inspection outcome.
For each new collection, define acceptance criteria before production. For example, specify acceptable decoration placement, edge finish, and packaging condition.
These are proposed working criteria—not universal industry standards.
Run a small pilot before committing to a large collection. Ask testers about fit, comfort, application clarity, and removal instructions. Treat that feedback as product development, not proof of guaranteed performance.
Track complaints by category:
- Incorrect fit.
- Finish defects.
- Missing accessories.
- Transit damage.
- Application difficulty.
This makes corrective action more specific than simply recording an unhappy customer.
Your selling price must cover more than tips and polish.
Include materials, labor, packaging, selling fees, shipping subsidies, replacement allowances, and a contribution toward business overhead.
The following example is illustrative, not a market benchmark:
| Cost item | Example per set |
|---|---|
| Tips, coatings, and decorations | $3.50 |
| Packaging and application accessories | $2.00 |
| Labor: 30 minutes at $18 per hour | $9.00 |
| Allowance for waste and rework | $1.50 |
| Subtotal before fees and shipping | $16.00 |
At a selling price of $24, only $8 remains before transaction fees, delivery subsidies, advertising, overhead, and tax.
That is not the same as $8 in net profit.
For wholesale orders, calculate a separate cost structure. Larger batches may change labor efficiency, but retailers also need a commercially workable resale margin.
Track actual production time across several orders before deciding whether your pricing is sustainable.
Protect the nails from movement and crushing, then make the application process easy to understand.
Depending on the product configuration, a kit may contain:
- The finished nail set.
- Adhesive tabs or suitable nail glue.
- A mini file and preparation accessories.
- Application and removal instructions.
- Size information and customer support details.
Do not automatically include every accessory. Confirm its suitability, labeling requirements, and shipping implications first.
Adhesives and liquid preparation products can require additional transport checks. Ask the carrier about the exact formulation and destination rather than assuming every manicure kit ships under the same rules.
Explain how customers should select sizes, prepare their nails, apply the product, and remove it according to the adhesive system.
Include relevant warnings and storage instructions. Avoid unsupported promises such as universal wear times, damage-free removal, or suitability for every sensitive user.
Labeling obligations depend on the destination market and the classification of each kit component. Review those requirements before printing bulk packaging.
Your product page should answer the questions shoppers cannot resolve from a styled photograph.
Include:
- Shape and length.
- Nail count and size assortment.
- Included accessories.
- Application and removal method.
- Processing time and dispatch expectations.
- Replacement and return terms.
- Clear photographs from multiple angles.
Show scale with a ruler or labeled measurements where useful. Photograph the actual product under consistent lighting, and explain meaningful color variations.
Separate verified product specifications from promotional language.
For example, "24 nails in 12 sizes" is a measurable statement. "A perfect fit for everyone" is not.
Use original artwork or appropriately licensed designs. Do not assume popular characters, logos, or images are available for commercial reproduction.
Consider manufacturing support when recurring designs, packing work, or replenishment demands exceed your available production time.
Before requesting quotations, prepare a product brief covering:
1. Target customer and destination market.
2. Shape, length, curvature, and size range.
3. Materials and finish.
4. Design files and decoration requirements.
5. Nail count and accessory configuration.
6. Packaging artwork and labeling needs.
7. Forecast quantity and required delivery window.
Ask suppliers to quote against the same specification. Otherwise, a lower price may simply reflect different materials, packaging, or inspection requirements.
Approve a physical reference sample before bulk production. Confirm how design changes, defects, and repeat orders will be handled.
Dongguan YoungMei Technology Co., Ltd. brings more than 15 years of experience in the development and production of press-on nails, nail stickers, and related products. With our own factory and an established supply chain, we support global brands, wholesalers, and chain retailers through OEM/ODM customization, rapid sampling, quality-focused production, and one-stop sourcing.
Project-specific quantities, timing, and documentation should be confirmed during consultation.
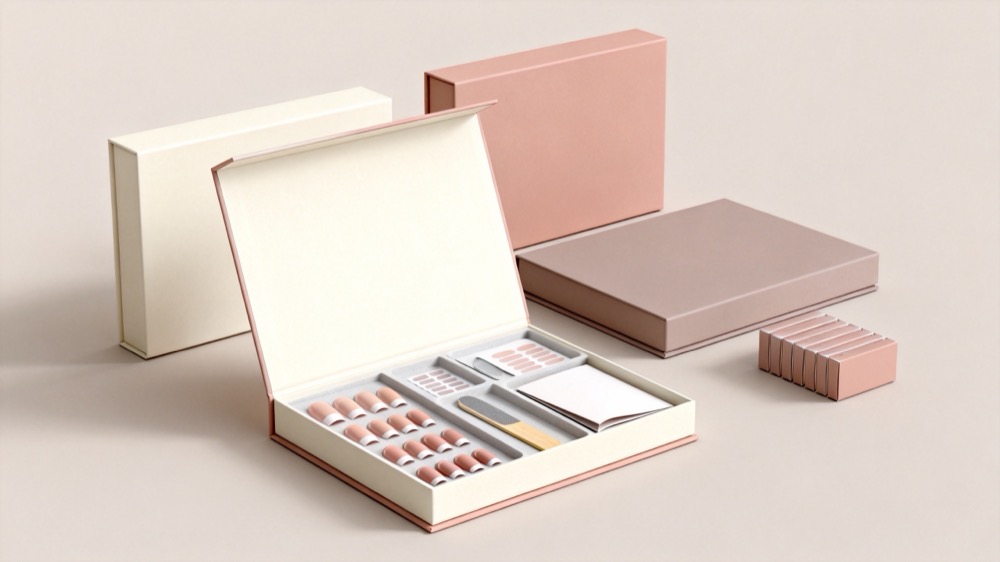
A dependable collection combines attractive design with practical sizing, controlled production, and clear customer guidance.
To discuss a custom collection with Dongguan YoungMei Technology Co., Ltd., send your reference designs, target market, preferred shapes, packaging needs, and estimated order quantity. Our team can review your requirements and discuss a suitable sampling and OEM/ODM development plan.
Choose the format around your customer and sizing strategy. Custom-sized sets can contain fewer tips, while multi-size sets offer more fitting options. Check actual size coverage rather than using nail count as your only selling point.
You need a compatible curing lamp when your chosen coating system requires light curing. Air-dry products follow different instructions. Use the equipment specified for the product rather than assuming any lamp will work.
A home-based setup may be possible, but check local business rules, workspace restrictions, insurance, and product obligations first. Your workspace must also support safe material handling and organized production.
Calculate materials, labor, packaging, fees, and other operating costs before setting a price. Then assess whether your intended customer values the design and service at that price. Competitor prices alone cannot establish your profitability.
Consider a manufacturing partner when repeat orders require more consistency or capacity than your handmade workflow provides. Start with a clear specification and approved sample rather than moving directly into a large order.
1. [Paola Ponce Nails — "How To Make Press On Nails To Sell"]. Source reviewed for the original handmade workflow, sizing approaches, packaging discussion, and reader feedback. The sizing insight above paraphrases AnitaTaco's comment dated December 13, 2021; it is not an independently verified performance result. [paolaponcenails]
2. [U.S. Food and Drug Administration — "Nail Care Products"]. Supports the discussion of nail-product warnings, ventilation, skin contact, and potential allergic reactions. [fda]
3. [British Association of Dermatologists — "Dermatologists reiterate artificial nails warning and risk of at-home kits"]. April 14, 2023. Supports the guidance on uncured products, insufficient curing, protective handling, and recommended lamp compatibility. [bad.org]
4. [U.S. Food and Drug Administration — "Cosmetics Labeling Guide"]. Supports the need to review applicable U.S. cosmetic labeling requirements; it does not establish that every component of a press-on nail kit has the same regulatory classification. [fda]
5. [U.S. Food and Drug Administration — "Summary of Cosmetics Labeling Requirements"]. Supports the discussion of applicable warnings, directions, and retail cosmetic labeling obligations. [fda]