
- All
- Product Name
- Product Keyword
- Product Model
- Product Summary
- Product Description
- Multi Field Search
English
Views: 231 Author: Young Mei Publish Time: 11-06-2026 Origin: Site


Content Menu
● Before Filing: Check Your Nails and Choose a Realistic Shape
● Choose the Best Nail File for Natural Nails
>> What Grit Nail File Should You Use?
>> Keep Your Tools Personal and Clean
● How to File and Shape Natural Nails Step by Step
>> 1. Remove Existing Color Appropriately
>> 2. Wash Your Hands and Dry Them Thoroughly
>> 3. Set a Comfortable Length
>> 4. File With Light, Controlled Strokes
>> 6. Check Symmetry Before Removing More
>> 7. Finish With Gentle Cleaning and Moisture
● How to Shape Natural Nails: Round, Square, Squoval, and Oval
>> How to File Short Natural Nails
>> How to File Square and Squoval Nails
>> How to File Oval or Almond Nails
● Troubleshooting: Why Do Nails Split After Filing?
>> You Are Filing the Surface Instead of the Edge
>> Everyday Habits Keep Damaging the Tips
● Preparing Natural Nails for Press-Ons and Nail Stickers
>> Before Applying Press-On Nails
>> Before Applying Nail Stickers
● A Manufacturer's Perspective: Better Instructions Make Better Nail Kits
● Build a Nail Collection With Clearer Preparation Guidance
>> Should You File Natural Nails Wet or Dry?
>> Is 180 or 240 Grit Better for Natural Nails?
>> Does Filing Make Nails Grow Faster?
>> How Often Should You File Your Nails?
>> Can You File the Sides to Make Wide Nails Narrower?
>> Should You Buff Before Applying Press-On Nails?
Learning how to file and shape natural nails starts with three essentials: a gentle file, light pressure, and a shape that suits your available length. You do not need aggressive buffing or a complicated manicure routine. The goal is to create a smooth free edge while preserving the nail you already have.
At Dongguan YoungMei Technology Co., Ltd., our manufacturing perspective connects natural nail care with product usability. With more than 15 years of experience developing press-on nails, nail stickers, and related products, we believe clear preparation instructions deserve as much attention as attractive designs.
This guide explains how to choose your tools, shape different nail styles, avoid common mistakes, and prepare healthy nails for your next manicure.
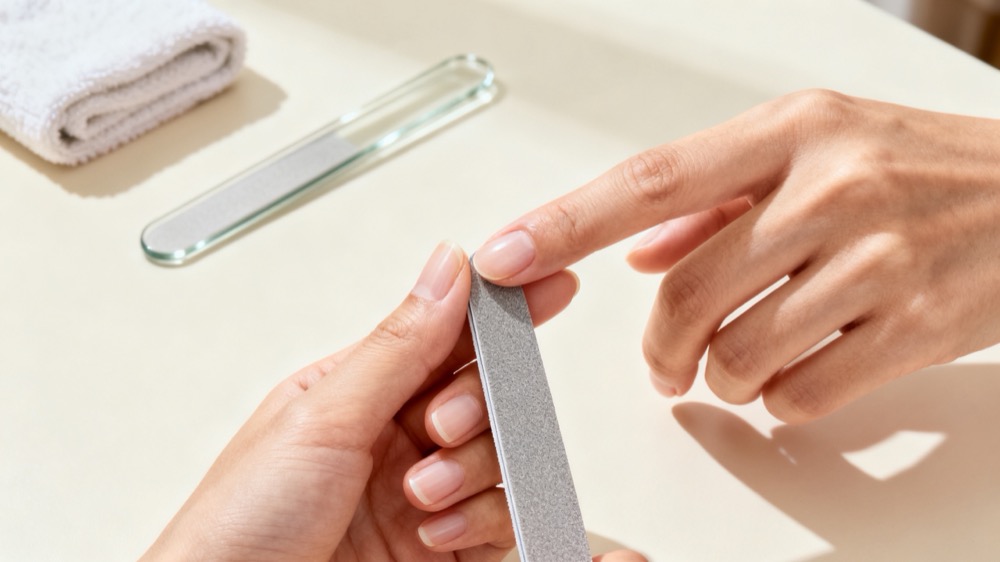
Look at your bare nails under good lighting. Check the tips, side edges, and surrounding skin before deciding how much length to remove.
A small snag may need only a few gentle strokes. Peeling, tenderness, or separation from the nail bed calls for a different response—not more filing.
Pause your manicure if you notice:
- Pain, bleeding, or inflamed skin.
- Unexplained discoloration or thickening.
- A nail lifting away from the nail bed.
- Persistent splitting that does not improve with gentler care.
Seek advice from a dermatologist for persistent or concerning changes. Do not cover a nail problem with a press-on or another cosmetic product.
For healthy nails, select your shape according to your shortest usable nail and everyday activities. A practical shape should remain comfortable when typing, dressing, and handling objects.
A file should remove small amounts of nail predictably. If it catches, feels harsh, or requires heavy pressure, reconsider the tool or your technique.
Grit describes the abrasive surface. Generally, a higher number indicates a finer abrasive.
A 240-grit file is a sensible starting point for gentle natural-nail shaping. Some professional guidance includes 180-grit files, but their suitability depends on the nail's condition, the file, and the task. For thin or peeling nails, start conservatively rather than choosing a coarser tool for speed.
| Tool | Practical use | Main precaution |
|---|---|---|
| Fine emery board | Routine shaping and smoothing | Replace it when worn or damaged |
| 240-grit file | Gentle free-edge refinement | Light pressure still matters |
| Quality glass file | Controlled natural-nail maintenance | Follow its cleaning instructions |
| Nail clippers | Removing substantial excess length | Avoid cutting into attached nail |
| Coarse enhancement file | Shaping artificial product | Not a default choice for natural nails |
"Emery board" describes a type of file, not a guaranteed level of gentleness. Check the grit or manufacturer's intended use.
Use your own tools at home. Clean reusable implements according to their manufacturer's instructions, and replace disposable files as directed.
Do not assume a porous file becomes suitable for sharing simply because it has been wiped with alcohol. Professional salons should follow applicable cleaning, disinfection, and single-use requirements.
The most important principle is preservation: remove only what you need to achieve a comfortable, even edge.
Inspect the natural nail without polish hiding its condition.
Use the removal method specified for the product. Do not peel away gel, scrape off stubborn material, or pull off an attached press-on nail. Removing a coating should not mean removing layers of natural nail with it.
Remove surface dirt and residue, then dry your hands before detailed shaping.
There is a useful distinction between trimming and filing. Dermatologists recommend trimming after bathing or showering, when nails are softer. For precise filing, work when your nails are dry enough to judge their edge and shape consistently.
Avoid prolonged soaking as a necessary preparation step.
If you need to remove considerable length, use clean, sharp clippers before refining with a file. Cut fingernails almost straight across rather than making deep cuts into the sides.
If you only need a small adjustment, a fine file may be enough.
Do not force every nail to retain the length of your longest one. A slightly shorter, coordinated manicure is often more practical than preserving one fragile tip.
Support the finger and guide the file across the free edge in one direction. Lift and reset between strokes rather than scrubbing aggressively back and forth.
For a curved shape, work from one outer edge toward the center, then repeat from the other side.
Keep the movement small and controlled. Filing should not hurt, create noticeable heat, or make the nail flex repeatedly.
One-direction filing is a conservative home-care technique. It helps you control abrasion; it does not directly accelerate nail growth.
The sidewalls are the lateral edges of the nail. Avoid digging into the grooves beside them or filing deeply into attached nail.
If your tips flare outward, make small adjustments only to the free edge. Do not try to transform a broad nail bed into a narrow one by removing its sides.
A dramatic taper is not worth sacrificing comfort and usable nail.
Pause frequently and inspect each nail:
- From above, to compare the outline.
- From the fingertip, to check the edge.
- With the hand relaxed, to assess overall balance.
Compare corresponding fingers across both hands. Aim for a coordinated appearance rather than mathematically identical lengths.
There is no universal requirement that the thumb must be longest or the little finger shortest.
Remove loose filing dust with gentle washing or a soft nail brush. Avoid digging under the nail with a sharp instrument.
If you are leaving your nails bare, apply hand cream or cuticle oil afterward. Moisturizing helps maintain flexibility, particularly when nails become dry.
If you are applying a manicure product immediately, follow its preparation instructions instead. Oil applied just before an adhesive product may interfere with the intended preparation process.
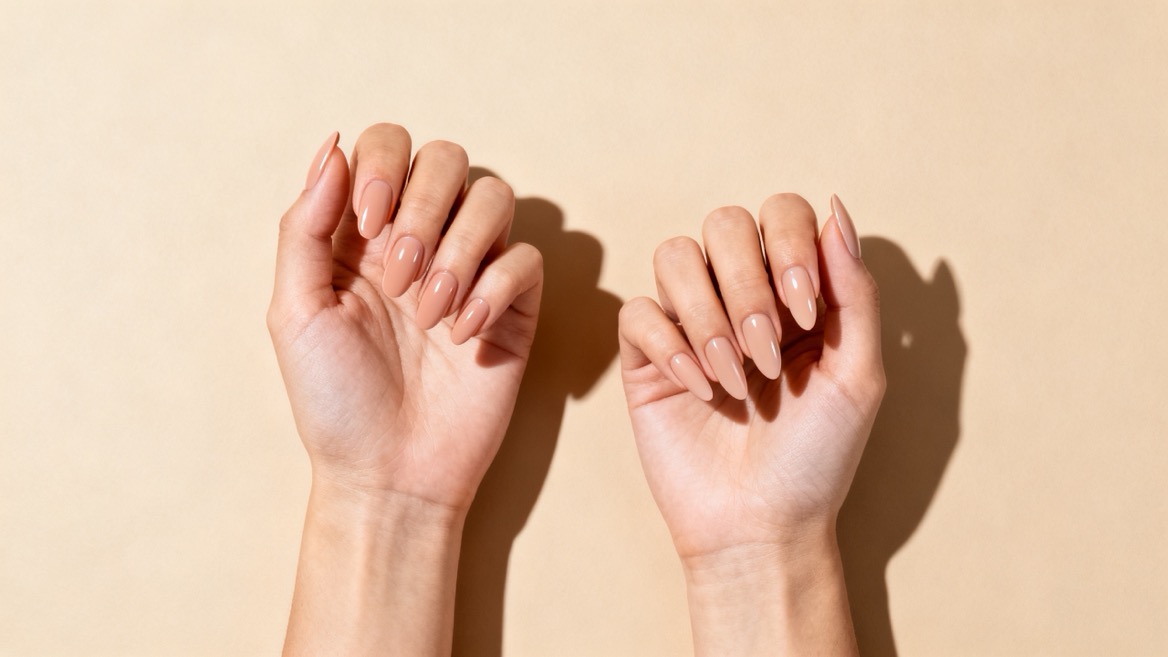
Your available free edge determines what you can realistically create. Filing removes material; it cannot add the length needed for an elongated silhouette.
| Shape | Suitable starting point | Filing approach |
|---|---|---|
| Round | Short nails with limited free edge | Create a gentle curve across the tip |
| Square | Enough width for a straight edge | Keep the tip straight and refine snags |
| Squoval | Short to medium nails | Combine a straight tip with softened corners |
| Oval | Enough length for a continuous curve | Round gradually without deep sidewall filing |
| Almond | Longer nails with room to taper | Narrow the free edge cautiously |
For very short nails, round or squoval shapes are usually easier to achieve without excessive removal.
Focus on smoothing the existing outline. If the nail barely extends beyond the fingertip, do not chase an almond shape by filing into its sides.
A neat short manicure can look intentional without an exaggerated silhouette.
For square nails, establish a straight free edge first. Check that one corner is not noticeably longer than the other.
For squoval nails, soften each corner with a few light strokes while preserving the central straight section.
Stop before the corners disappear completely; otherwise, you are moving toward a round shape.
Oval nails need enough length to form a smooth, continuous curve. Almond nails require additional room for a more tapered tip.
Work gradually and alternate sides. If achieving the shape requires deep filing beside the nail bed, choose a less tapered style or wait for more growth.
Splitting does not always have a single cause. Filing technique, existing damage, dryness, and repeated water exposure can all influence nail condition.
A coarse abrasive can remove more material than intended. Switching to a finer file helps, but pressure remains important.
Even a fine file can over-thin a nail when repeatedly worked across the same area.
Shaping and buffing are different tasks.
Shaping changes the outline. Buffing abrades the nail's upper surface. You do not need to buff the entire nail simply to create a smooth tip.
Do not chase every ridge or uneven patch with a file. Persistent surface changes may need professional assessment rather than cosmetic removal.
If one small area catches on clothing, refine that spot gently. Do not shorten the entire nail unnecessarily.
If a split extends into attached nail, stop trying to file it away.
Wear gloves for wet cleaning tasks, moisturize after washing, and avoid using nails to open packaging or scrape labels.
A careful manicure cannot fully compensate for repeated mechanical stress.
Natural-nail preparation and artificial-nail customization are related, but they are not interchangeable.
Start with healthy nails and a manageable natural free edge.
Check that each press-on fits without uncomfortable pressure. Do not file down the sides of your natural nail to fit an undersized tip.
Follow the adhesive system's instructions. Avoid aggressive surface filing as a general shortcut to longer wear, and do not assume every press-on application requires identical preparation.
If you experience burning, itching, swelling, or a rash, stop using the product and seek appropriate medical advice.
The preparation method depends on the product. Decorative decals, adhesive wraps, and gel-based strips may require different application and removal steps.
Smooth obvious snags first, then follow the supplied directions for cleaning, sizing, and finishing the edge.
More pressure and more filing are not automatically better. Product-specific instructions should explain how to finish the sticker without unnecessarily abrading the natural nail underneath.
For brands and retailers, nail preparation is part of the customer experience—not merely an accessory step.
Our recommended development approach is to evaluate the file and instructions alongside the finished nail product.
A useful kit review should ask:
- Is the included file clearly identified for its intended task?
- Do instructions distinguish natural-nail shaping from press-on adjustment?
- Are sizing and removal steps easy for beginners to understand?
- Do directions warn against covering damaged nails?
- Are the illustrations consistent with the actual product?
These are proposed quality checkpoints, not claims from a clinical trial or customer survey. Their purpose is to make product use clearer and reduce avoidable confusion.
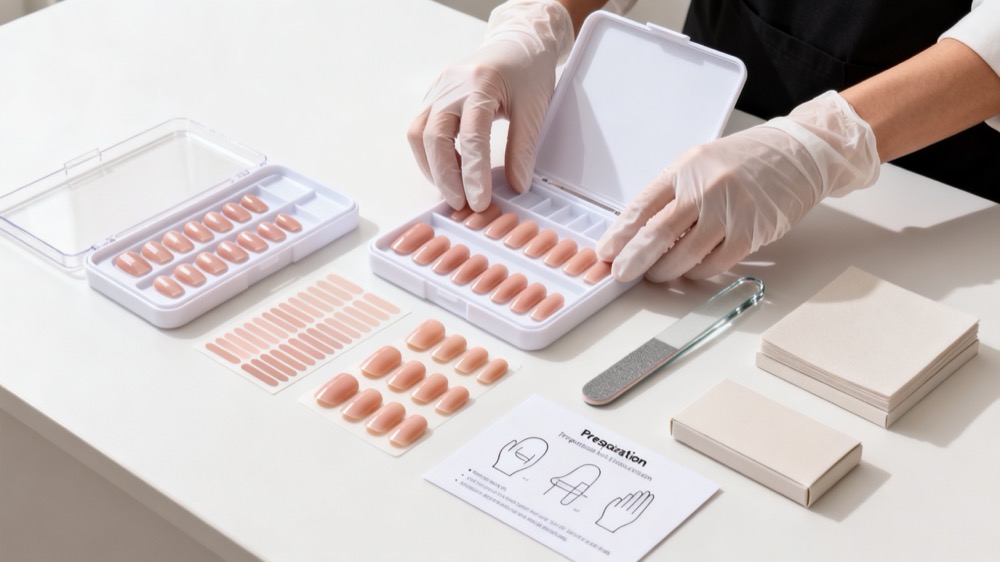
Dongguan YoungMei Technology Co., Ltd. provides OEM/ODM development for press-on nails, nail stickers, and related manicure products. Our own factory and established supply chain support rapid sampling, consistent quality, and coordinated sourcing for global brands, wholesalers, and retail chains.
Send our team your target market, preferred nail shapes, product category, and packaging requirements. Request samples and a preparation-accessory review to develop a collection with clearer application guidance and a more cohesive customer experience.
For detailed shaping, work with thoroughly dried nails so you can assess the edge consistently. Trimming is different: dermatologists recommend clipping after bathing or showering, when nails are softer.
A 240-grit file is a conservative starting point for gentle shaping. A 180-grit file may suit some tasks, but it removes material more readily. Nail condition, pressure, and the manufacturer's guidance all matter.
Filing shapes existing nail; it does not directly speed growth. Smoothing snags and reducing avoidable breakage may help you retain length, which can make progress more noticeable.
File when you notice a snag, uneven edge, or unwanted length. There is no need for aggressive daily shaping. Brief maintenance is preferable to repeatedly removing healthy material.
You can refine a flared free edge cautiously, but filing cannot safely redesign the attached nail bed. Avoid deep sidewall filing and choose a shape that works with your natural width.
Follow the specific adhesive system's instructions. Do not assume heavy buffing improves every application. Excessive surface filing thins the natural nail and is not a substitute for correct sizing, preparation, or removal.
1. Paola Ponce Nails. "How to File & Shape Natural Nails?" Original article reviewed for its discussion of filing technique, grit selection, shape, and length. This guide independently restructures the topic and does not reproduce the original wording. [paolaponcenails]
2. American Academy of Dermatology. "How to Trim Your Nails." Supports guidance on clipping, rounding fingernail corners, filing in one direction, and moisturizing. [aad]
3. American Academy of Dermatology. "11 Dermatologists' Tips for Healthy Nails." Supports recommendations on snag prevention, water exposure, protective gloves, and avoiding mechanical damage. [aad]
4. American Academy of Dermatology. "Manicure and Pedicure Safety." Supports cuticle precautions, moisturizing, and avoiding artificial nails over existing nail problems. [aad]
5. American Academy of Dermatology. "Artificial Nails: Dermatologists' Tips for Reducing Nail Damage." Supports cautions about surface filing, nail thinning, and covering damaged nails. Its discussion primarily concerns salon artificial-nail services, not testing of YoungMei products. [aad]
6. The GelBottle Inc. "180/240 White Half Moon Nail File 5 Pack." Product-specific professional guidance describing the 240-grit side for natural-nail shaping. This is a commercial source, not independent clinical evidence. [thegelbottle]