
- All
- Product Name
- Product Keyword
- Product Model
- Product Summary
- Product Description
- Multi Field Search
English
Views: 257 Author: Young Mei Publish Time: 11-11-2026 Origin: Site


Content Menu
● What Makes Latte Nail Art Look Realistic?
● Choose Your Latte Nail Color Palette
● Tools and Products for Soft Gel Latte Nails
● How to Create Coffee Latte Nail Art Using Soft Gel
>> Step 1: Prepare the Surface
>> Step 2: Establish a Milky Background
>> Step 3: Apply the Blooming Layer
>> Step 4: Add Light Brown First
>> Step 5: Introduce Darker Accents
>> Step 6: Let the Design Develop
● How to Adapt the Technique for Matcha Latte Nails
● Troubleshooting Latte Nail Art
>> Run a Controlled Practice Test
● Curing and Nail Safety: Follow the Product System
● Turning Latte Nail Art into Press-On Nails and Nail Stickers
>> Define Sample Acceptance Before Ordering
● Developing a Latte Nail Collection with YoungMei
>> What Is the Difference Between Latte Nails and Marble Nails?
>> Do I Need Blooming Gel for Latte Nail Art?
>> Why Does My Coffee Nail Design Become One Brown Color?
>> Can Beginners Try Soft Gel Latte Nails?
>> Can Latte Designs Be Made as Press-On Nails?
>> How Long Do Latte Nails Last?
Latte nail art using soft gel recreates the moment coffee meets milk: translucent brown ribbons, creamy clouds, and softly blurred edges. With the right blooming gel and a controlled application technique, you can create coffee latte nails, matcha-inspired designs, or coordinated concepts for custom press-on nails.
The challenge is not drawing more detail. It is knowing when to stop blending.
This guide explains the process, addresses common mistakes, and explores how brands can translate a hand-painted effect into a clear product development brief.
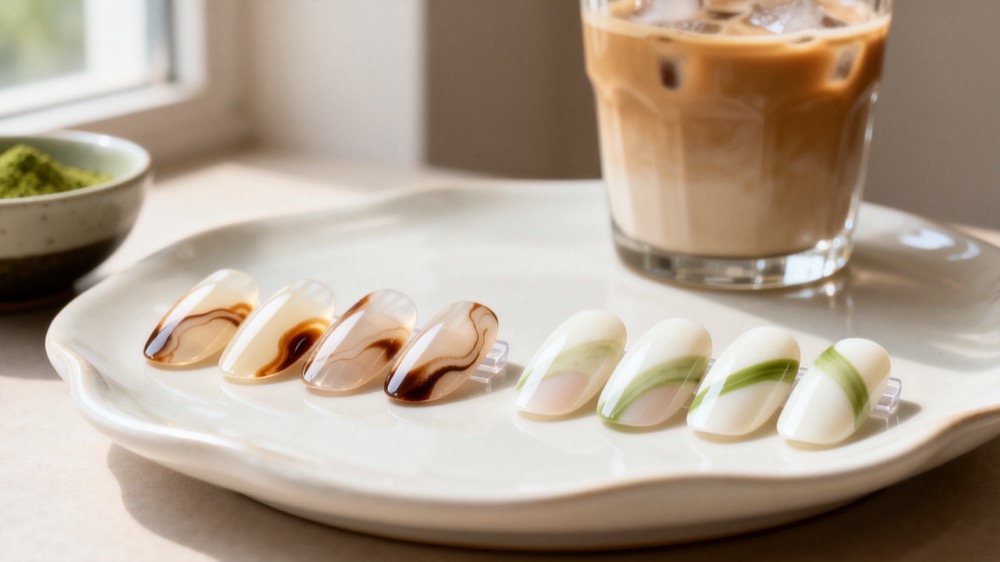
Convincing latte nails need contrast, translucency, and movement. A flat beige manicure may suggest coffee, but it will not reproduce the swirling effect of milk entering a drink.
Three visual elements make the difference:
- A milky background that remains visible.
- Fine ribbons of brown or green.
- Soft transitions alongside a few defined edges.
Blooming gel helps create those transitions. Color placed into its uncured surface spreads and softens before curing fixes the design.
KOKOIST describes its Hazy Gel White as suitable for latte-style art. Its instructions specify applying color over uncured Hazy Gel, allowing the colors to blur, and then curing.
The design principle is simple: preserve separate color zones rather than mixing everything into one shade.
Start with one concept instead of combining every coffee shade in a single nail.
| Design | Background | Main color | Accent | Suggested direction |
|---|---|---|---|---|
| Classic latte | Milky ivory | Caramel brown | Espresso | Soft coffee ribbons |
| Iced mocha | Sheer beige | Chocolate | Cream | Stronger contrast |
| Matcha latte | Milky white | Muted green | Pale sage | Airy green clouds |
| Minimal latte | Translucent nude | Light taupe | Ivory | Sparse, delicate swirls |
These are design starting points, not measured color formulas.
For a cohesive set, use a limited palette across all nails. Vary the placement and scale of the swirls while keeping the overall contrast consistent.
A practical approach is to reserve darker, more detailed artwork for accent nails and use quieter designs elsewhere.
Prepare everything before opening the blooming gel. Searching for a brush while color continues spreading makes the result harder to control.
You will need:
- A compatible base gel and color system.
- Milky white or sheer cream gel.
- Light brown and darker brown gel, or suitable green shades.
- Blooming gel.
- A small round brush and fine liner brush.
- A compatible top coat.
- The curing lamp specified for your gel system.
- Lint-free wipes and the recommended cleanser.
- Practice tips and a tip holder.
Use structural gel only when the nail service requires it. Blooming gel creates an artistic effect; it should not automatically be treated as a substitute for a builder product.
Before working on natural nails, practice on tips. This lets you compare color behavior without repeatedly removing an unsuccessful design from the nail plate.
For natural nails, follow your gel system's preparation instructions. Avoid aggressive filing and do not cut the cuticles.
For practice tips or press-on blanks, follow the substrate and coating suppliers' preparation requirements.
Apply the appropriate base layer and cure as directed. Keep uncured product away from surrounding skin.
Apply a thin, even layer of milky white or translucent cream.
Choose a background that provides softness without hiding every layer beneath it. If the white is very opaque, the finished design may look more like painted marble than a translucent drink.
Cure according to the product instructions.
Apply a controlled layer of blooming gel to the area intended for the artwork.
Leave this layer uncured when the manufacturer's instructions require it. This is the working surface that allows the next colors to disperse.
Avoid flooding the sidewalls or creating a thick pool.
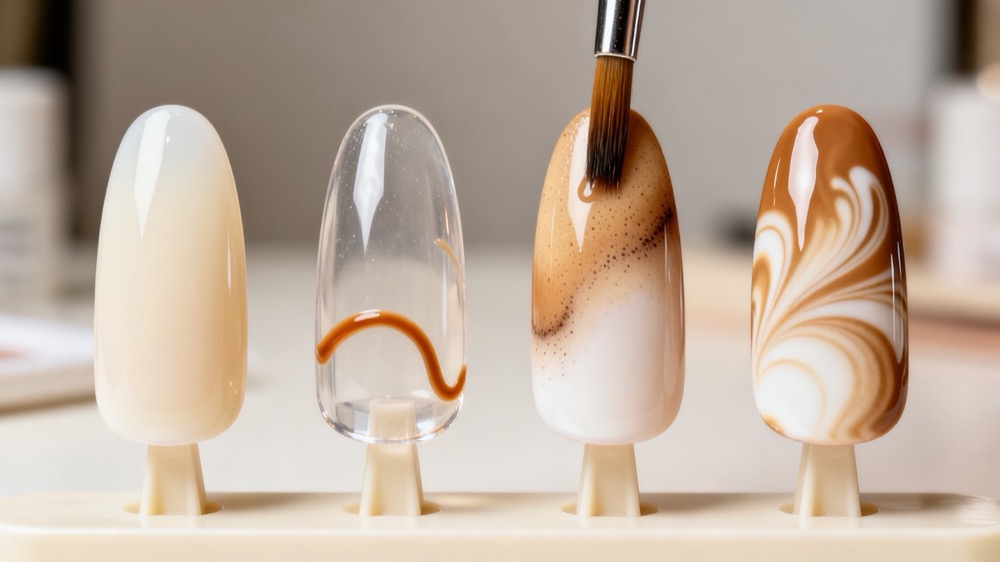
Place a small amount of caramel or milk-chocolate gel into the blooming layer.
Use a round brush to guide it through one loose curve. Leave visible spaces between the colored areas.
Think of a ribbon moving through milk, not a solid brown section covering the nail.
Add a small espresso-colored line or a few narrow touches beside the lighter brown.
Dark pigment can quickly dominate the composition. Start with less than you think you need.
Use the liner brush to stretch selected edges rather than repeatedly stirring the entire surface.
Pause and observe the spreading.
If the colors are separating attractively, avoid unnecessary brushwork. Repeated passes can erase the distinction between milk, caramel, and espresso.
Cure when the composition reaches the desired appearance, following the gel manufacturer's requirements.
If additional depth is needed, add another thin artistic layer only within your system's application limits.
Finish with a compatible top coat and complete the required cure.
Check the surface from the side. A glossy finish should enhance the artwork, not disguise uncontrolled product buildup.
Matcha latte nail art follows the same layering logic but requires careful green selection.
Choose a softened, slightly muted green rather than automatically reaching for a bright neon shade. Pair it with milky white and, if needed, a lighter green accent.
A straightforward sequence is:
1. Prepare and base-coat the nail.
2. Create a thin milky background.
3. Apply the uncured blooming layer.
4. Place green in selected areas.
5. Guide a few curves through the color.
6. Allow the edges to soften.
7. Cure and finish as directed.
Keep some pale areas uninterrupted. They provide the visual "milk" that distinguishes a matcha latte effect from an all-over green marble.
For a collection, coffee and matcha designs can share the same background and swirl language while using different accent colors.
Most visual problems begin with too much color, too much movement, or an unsuitable combination of products.
| Problem | Likely contributor | Practical adjustment |
|---|---|---|
| Colors become muddy | Overworking or excessive dark pigment | Reduce color and brush passes |
| Swirls barely spread | Product viscosity or compatibility | Test the combination on a tip |
| Design spreads too far | Excessive blooming layer or waiting | Use a more controlled layer and observe closely |
| White overwhelms the pattern | Opaque background or excess white | Try a sheerer background |
| Surface becomes bulky | Too many decorative layers | Simplify the composition |
| A full set looks inconsistent | No shared design reference | Define palette and contrast limits |
Change one variable at a time.
First, compare a smaller and larger amount of brown while keeping the background unchanged. Then compare different brush movements using the preferred color amount.
Photograph each result under the same lighting. Record the products, sequence, and lamp instructions used.
This creates a useful reference library. It also prevents a successful sample from becoming a result nobody can reproduce.
There is no universal curing time for every soft gel latte design.
For example, KOKOIST's Hazy Gel White listing gives an LED range of 30–60 seconds and a UV range of 60–120 seconds. Those figures belong to that product's instructions; they are not a general rule for every gel or lamp.
Follow the specified lamp, application thickness, and curing procedure for each product.
A hard-looking surface alone should not be used to validate an unfamiliar product combination.
Additional precautions include:
- Keep uncured gel away from skin.
- Use products according to their labels.
- Avoid applying nail enhancements over existing nail problems.
- Stop using a product if irritation develops.
- Seek medical advice for persistent redness, swelling, pain, or nail changes.
For gel manicures on natural nails, dermatologists recommend broad-spectrum, water-resistant SPF 30 or higher on the hands, or dark, opaque fingerless protective gloves.
Do not peel away gel during removal. Follow the appropriate removal method and moisturize afterward.
A successful hand-painted sample is a design concept, not yet a production specification.
For custom press-on nails, define the artwork across the entire set. Consider nail shape, length, size distribution, background coverage, and accent placement.
For nail stickers, translate the concept into artwork suited to the selected printing and material process. A printed swirl may reproduce the color arrangement without reproducing the physical depth of layered gel.
Neither format should be presented as identical to the other without sample approval.
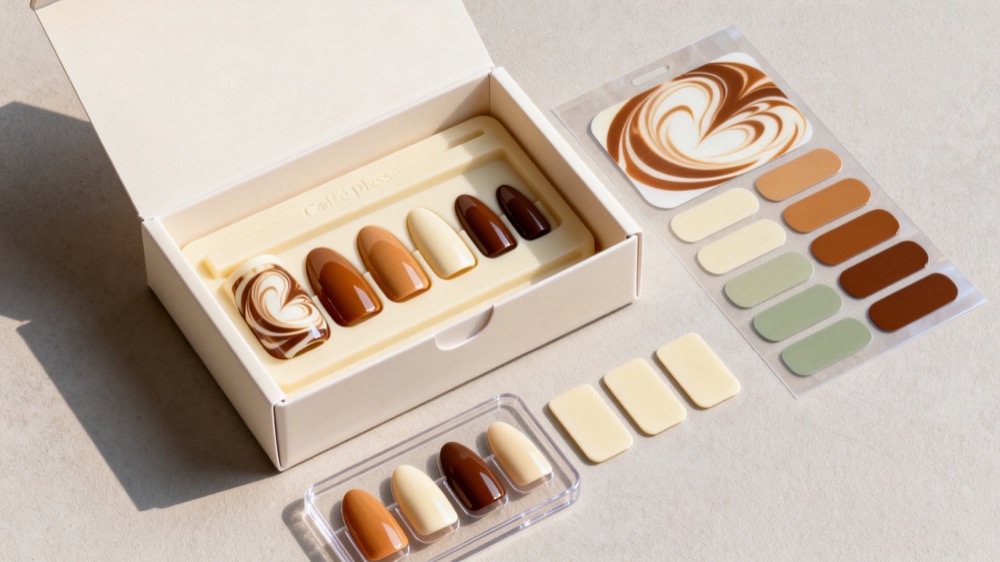
Include:
- Reference images with permission for the intended use.
- Target colors and background translucency.
- Preferred shapes and lengths.
- A full-set layout.
- Gloss or matte finish.
- Acceptable variation between nails.
- Packaging and instruction requirements.
- Target market and required documentation.
Separate essential features from preferences. For example, milky contrast may be essential, while the exact position of every caramel ribbon may remain flexible.
Review samples against written criteria:
| Checkpoint | What to assess |
|---|---|
| Color | Agreement with the approved reference |
| Artwork | Swirl visibility and overall balance |
| Finish | Consistent appearance and surface quality |
| Shape | Match to the agreed size and profile |
| Packaging | Correct contents, artwork, and instructions |
Any claims about wear, adhesion, or durability should be supported by an agreed test method. Do not infer performance from appearance alone.
Dongguan YoungMei Technology Co., Ltd. is a professional nail product manufacturer with more than 15 years of experience, according to its company information.
With its own factory and established supply chain, YoungMei focuses on the research, development, and production of press-on nails, nail stickers, and related nail products.
Its stated services include OEM/ODM customization, rapid sampling, consistent-quality production, and one-stop sourcing for global brands, wholesalers, and retail chains.
For a latte-inspired collection, begin with a focused brief rather than a broad request for "coffee nails."
Send YoungMei your reference direction, preferred product format, shapes, packaging concept, estimated quantity, and target market. Request a sampling proposal that confirms feasibility, customization options, lead times, and inspection criteria before production approval.
Both can use swirling techniques. Latte nails specifically suggest milk mixing with coffee or matcha through creamy backgrounds, translucent color, and drink-inspired palettes. Marble designs may use sharper veins and more stone-like contrast.
Not necessarily. Skilled artists can create swirls manually, but blooming gel helps soften edges. Test the selected products first because different combinations may spread differently.
You may be using too much pigment or blending too long. Reduce the darker shade, preserve milky spaces, and stop moving the brush once distinct ribbons appear.
Beginners can practice the artwork on tips. Applying gel to natural nails also requires suitable preparation, skin-contact precautions, compatible equipment, and correct curing. Practice artwork separately from learning a complete nail service.
Yes, latte-inspired artwork can be developed for press-on sets. Confirm the production method, finish, size range, and acceptable design variation through approved samples.
The artwork does not determine wear time. Durability depends on the product format, preparation, application, attachment method, and daily use. Avoid promising a fixed duration without relevant testing.
1. Paola Ponce and Fabiola Saucedo, "How To Latte Nail Art Using Soft Gel." Original coffee and matcha tutorial; background for the subject and layered design approach. [paolaponcenails]
2. KOKOIST USA, "Hazy Gel White 7ml." Manufacturer instructions covering uncured application, color dispersion, and product-specific curing ranges. [kokoistusa]
3. U.S. Food and Drug Administration, "Nail Care Products." Regulatory and safety information, including methacrylate sensitization and avoiding skin contact. [fda]
4. American Academy of Dermatology, "Gel Manicures: Tips for Healthy Nails." Guidance on hand protection, nail care, and avoiding picking during removal. [aad]
5. American Academy of Dermatology, "Manicure and Pedicure Safety." Guidance on cuticle care, existing nail problems, and reactions to nail products. [aad]