
- All
- Product Name
- Product Keyword
- Product Model
- Product Summary
- Product Description
- Multi Field Search
English
Views: 257 Author: Young Mei Publish Time: 11-04-2026 Origin: Site


Content Menu
● What Makes a No-Sponge Ombre Work?
● Tools and Products for Brush-Blended Ombre Nails
● How to Do Ombre Nails Without a Sponge: Step by Step
>> 1. Prepare the Nail and Apply the Base
>> 2. Choose the Direction of Your Fade
>> 3. Apply a Thin First Layer of Color
>> 4. Place Clear Gel Along the Boundary
>> 5. Blend With Light, Short Taps
>> 6. Allow Brief Leveling, Then Cure Correctly
>> 7. Build Depth With a Smaller Second Layer
>> 8. Finish With a Compatible Top Coat
● How to Create White Ombre and Baby Boomer Nails
● Troubleshooting Common Ombre Nail Problems
● Gel Ombre, Ombre Press-Ons, or Nail Stickers?
>> Finished Ombre Press-On Nails
>> Ombre Nail Stickers and Wraps
● From One Ombre Nail to a Consistent Retail Collection
>> Define the Gradient Before Sampling
>> Separate Appearance Approval From Performance Approval
● Safety Matters More Than a Perfect Fade
● Develop Your Custom Ombre Collection With YoungMei
>> Can I Do Ombre Nails Without a Sponge?
>> Can I Use Regular Nail Polish Instead of Gel?
>> Why Does My Ombre Look Patchy?
>> Do I Need a Special Ombre Brush?
>> Can Top Coat Hide a Harsh Gradient Line?
>> Are Ombre Press-On Nails Suitable for Custom Branding?
Learning how to do ombre nails without a sponge starts with three essentials: a suitable gel color, a controlled amount of compatible clear gel, and a light brush technique. Instead of stamping polish onto the nail, you soften the boundary between color and transparency with small, deliberate movements.
The result is a smooth gradient without sponge fragments or a stippled finish. This approach works particularly well for sheer pink fades, soft nude gradients, and white-tipped designs.
At Dongguan YoungMei Technology Co., Ltd., we approach nail designs from both a creative and a manufacturing perspective. A beautiful gradient should look attractive on one nail and remain visually consistent across an entire set.
This guide explains the brush-blending process, common mistakes, and how to translate an ombre concept into a clearer brief for custom press-on nails.
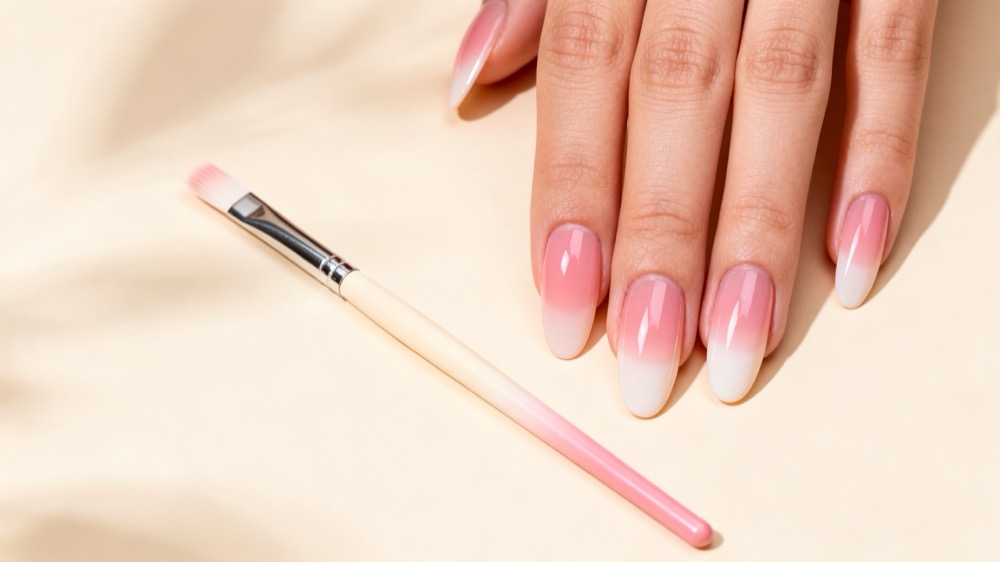
An ombre design gradually changes in color intensity. For a tip-focused gradient, pigment appears strongest near the free edge and becomes increasingly transparent toward the cuticle.
The key is transparency. A sheer or semi-sheer color gives you more room to soften the transition than a highly opaque product applied heavily.
Compatible clear art gel can help spread the pigment through the transition zone. However, it is not a universal thinner: only combine products when their manufacturer permits that use.
For beginners, a single-color fade is a practical starting point. Blending two contrasting opaque colors introduces another challenge: managing both the transition and the mixed color between them.
Prepare your workspace before opening the gel.
| Item | Purpose | Selection advice |
|---|---|---|
| Base gel | Prepares the coating foundation | Follow the chosen system's instructions |
| Sheer color gel | Creates the gradient | Start with a forgiving pink or nude |
| Clear mixing or art gel | Helps soften the color boundary | Confirm compatibility and permitted use |
| Ombre or tap brush | Diffuses pigment | Choose a brush intended for gel work |
| Fine liner brush | Places clear gel precisely | Use a small amount |
| Compatible top coat | Protects and finishes the design | Follow its thickness and curing limits |
| Specified curing lamp | Cures the gel system | Use the manufacturer-recommended lamp |
| Practice tips and holder | Support repeatable practice | Test the design before working on nails |
Keep lint-free wipes and the recommended brush cleaner nearby. A brush carrying excess pigment can turn a soft transition into a solid band.
Do not add ordinary polish thinner, acetone, or improvised solvents to gel products.
Follow your product system's preparation instructions. Work on clean nails, avoid aggressive filing, and keep products away from surrounding skin.
Apply the base gel in the recommended thickness and cure as directed.
For practice, use a nail tip secured to a holder. This allows you to adjust pressure, color placement, and blending distance before attempting a full manicure.
Decide where the strongest color should sit.
For a classic tip gradient, place the darkest area at the free edge. For a reverse ombre, concentrate color nearer the cuticle without touching the skin.
Plan the transition before applying product. A short nail needs a more compact fade than a long nail, so copying the same blending distance onto every length can produce uneven results.
For a tip-focused fade, apply a thin layer over roughly the distal half to two-thirds of the nail, depending on the desired design.
Keep the application controlled rather than trying to achieve full coverage immediately.
The upper boundary does not need to look perfect yet. However, avoid a thick ridge: excess product is harder to blend and may exceed the product's recommended application thickness.
Using a liner brush, place a small amount of approved clear art or mixing gel along the edge of the color.
The objective is a narrow blending zone, not a large pool.
Too much clear gel can make the color migrate or leave the transition looking washed out. Start conservatively and assess the movement before adding more.
Hold the ombre brush lightly and tap across the color boundary.
Work in small sections, using short movements that soften the line without dragging pigment across the whole nail. Wipe excess color from the brush as necessary.
My recommendation for practice is to judge the transition from normal viewing distance before making another adjustment. Constantly chasing tiny imperfections can remove too much color and create patchiness.
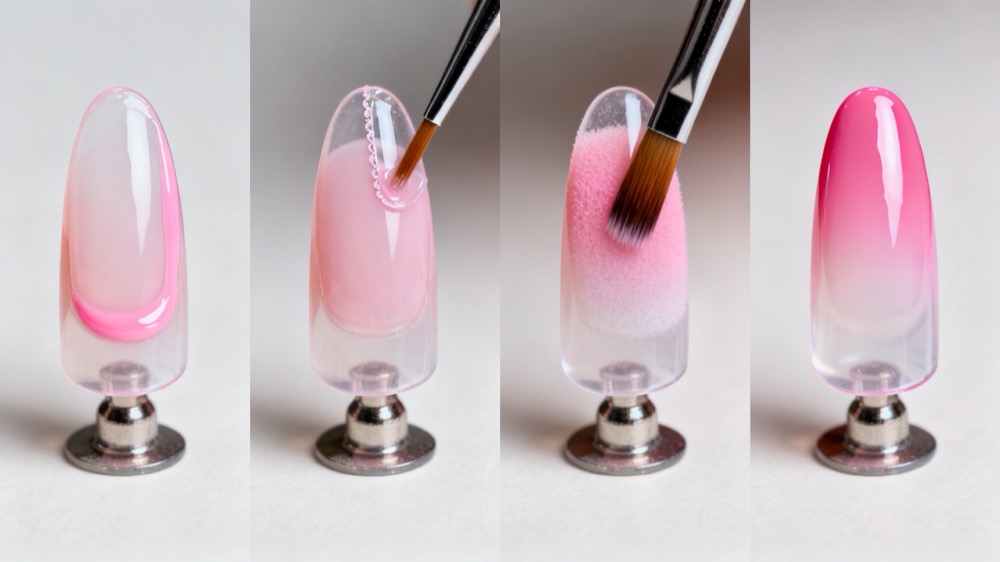
If the product is designed to self-level, allow it a brief moment to settle while watching for movement toward the sidewalls.
Check the skin margins before curing.
Follow the gel manufacturer's specified lamp and full curing instructions. A short flash cure may temporarily hold a design when the system allows it, but it does not replace the required full cure.
There is no universal curing time suitable for every gel, lamp, pigment, and layer thickness.
Apply another thin layer closer to the tip, covering less area than the first.
Soften its boundary using the same controlled process, then cure according to instructions.
This staggered layering builds intensity at the tip while preserving a translucent transition above it. Add further layers only within the product's application limits.
Inspect the gradient before applying top coat.
A suitable top coat can improve surface appearance, but it cannot correct a poorly blended color band or compensate for uncured material.
Choose the finish according to the product system—not simply whether it is wipe or no-wipe. Those labels do not reliably tell you how thick, leveling, or suitable a formula will be.
Apply and cure as directed, then complete any required cleansing step.
White ombre nails are especially demanding because the contrast makes an abrupt transition easy to see.
For a baby boomer design, start with a suitable pink or nude base and blend a compatible white toward it from the tip. A white gel formulated for gradation may be easier to control than a highly opaque white.
Use less product than you think you need. Build the tip gradually rather than attempting a dense white edge in one application.
Before starting a set, test the combination on one practice tip. Check whether the pink remains visible through the fade and whether the white looks clean rather than chalky.
For short nails, narrow the transition deliberately so the design does not become an almost entirely white nail.
| Problem | Likely cause | Practical adjustment |
|---|---|---|
| Visible horizontal band | Abrupt color placement or insufficient blending | Soften the boundary before curing |
| Patchy transition | Heavy brush pressure or excessive reworking | Reduce pressure and stop earlier |
| Color disappears | Too much clear gel or pigment removal | Reduce clear gel and rebuild gradually |
| Cloudy two-color blend | Unsuitable color combination | Test a closer color pairing |
| Product collects at sidewalls | Excess product or excessive leveling time | Use less and monitor movement |
| Bulky tip | Repeated heavy color layers | Build intensity with thinner applications |
| Inconsistent nails | Different placement or brush loading | Follow one repeatable sequence |
Change one variable at a time when practicing. If you alter the color, brush, clear gel, and pressure together, identifying the cause of improvement becomes difficult.
The best format depends on whether you want to create the artwork yourself or apply an existing design.
Choose gel when you want direct control over the transition and have the appropriate products, lamp, and application skills.
It offers flexibility, but each nail requires careful product placement and curing.
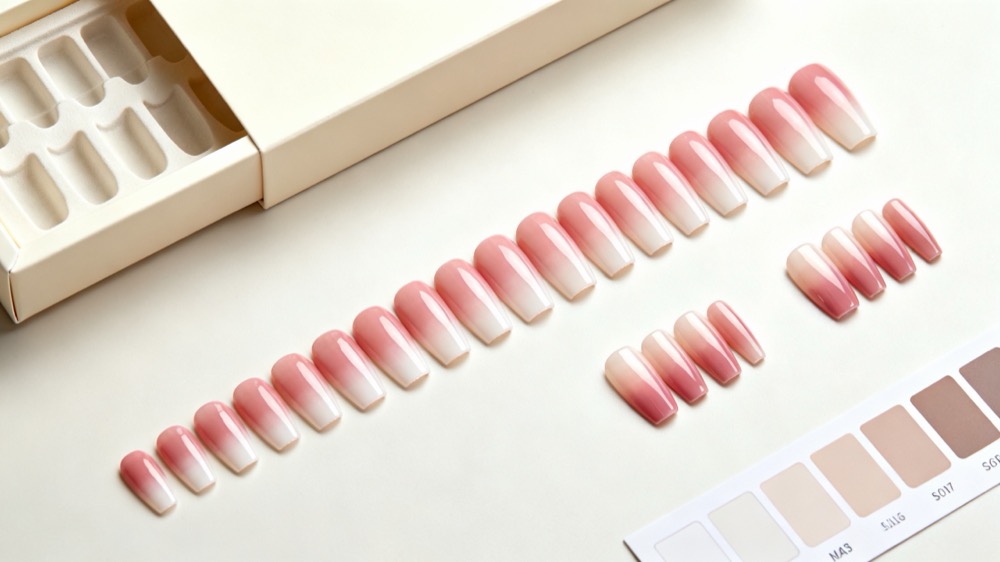
Choose finished press-ons when you want a predesigned gradient without painting the fade during application.
Follow the adhesive manufacturer's fitting, application, wear, and removal instructions. Predecorated nails remove the blending step; they do not eliminate the need for safe adhesive use.
These can provide a preprinted gradient, but application requirements vary.
Some products need only placement and trimming; others require additional steps. Check whether a particular product requires a lamp rather than assuming all nail stickers are applied the same way.
For brands and wholesale buyers, the challenge is not simply approving an attractive photograph. It is defining a design clearly enough to reproduce across sizes and production batches.
The following framework is a recommended purchasing checklist, not a claim about a particular factory's test results.
A useful design brief specifies:
- Base and tip colors.
- Fade direction and transition position.
- Sheer or opaque appearance.
- Nail shape, length, and size range.
- Glossy, matte, or decorative finish.
- Acceptable differences across nail sizes.
- Packaging and application-instruction requirements.
Use a physical reference where possible. Screen brightness and photography can change how pinks, whites, and translucent finishes appear.
Review the smallest and largest nails together.
A transition that looks balanced on a wide thumbnail may appear too abrupt on a narrow pinky nail. Assess the collection as a coordinated set rather than approving one display sample.
Compare samples under consistent lighting and against the same background. Record agreed changes before approving the next sample.
Color approval does not establish adhesive performance, wear duration, or removal suitability.
Agree separately on the relevant inspection criteria, supporting documentation, and any testing needed for the target market. Avoid treating attractive samples as proof of every product claim.
Keep uncured gel away from skin. Nail-product ingredients can cause allergic reactions, and repeated exposure should not be treated casually.
Use products as directed, maintain ventilation, and stop application if irritation develops. Seek medical advice for persistent itching, swelling, blistering, or nail changes.
For lamp-cured manicures, dermatologists recommend broad-spectrum, water-resistant SPF 30 or higher sunscreen on the hands, or suitable dark, opaque fingerless protection.
Do not peel off gel or force off press-ons. Follow removal instructions and avoid covering visibly irritated or damaged nails with another application.
Dongguan YoungMei Technology Co., Ltd. brings more than 15 years of experience in nail-product research and manufacturing, according to our company information.
With our own factory and established supply chain, we support global brands, wholesalers, and chain retailers with OEM/ODM customization, rapid sampling, quality-focused production, and one-stop sourcing for press-on nails, nail stickers, and related products.
Send our team your reference design, preferred shape, size range, packaging requirements, target market, and estimated order quantity. Request a custom ombre sample set and a quotation based on your specifications before confirming bulk production.
Yes. A gel-compatible ombre or tap brush can soften the boundary between a sheer color and a compatible clear art gel. Product selection and light pressure are central to the technique.
Regular polish can create gradients, but it dries differently and requires a different workflow. Do not assume that the clear-gel blending method or lamp-curing instructions apply to ordinary polish.
Common causes include too much pressure, an overloaded brush, excessive reworking, or a color that is difficult to blend. Practice with thin layers and change one variable at a time.
A purpose-designed brush is a useful starting point. Other gel-art brushes may work, but their shape, stiffness, and pigment load change how they move the product.
Not reliably. Top coat may improve surface smoothness, but a visible color boundary normally needs correction before curing and finishing. Avoid adding excessive top coat to conceal a blending problem.
They can be developed as a branded product. Discuss artwork, shapes, size assortment, packaging, application instructions, and sampling requirements with your manufacturer before approving production.
- Paola Ponce Nails, "How-to Easy Ombre Nails (no sponge!)." Original technical reference for sheer-color selection, clear-gel placement, tap-brush blending, and layered gradients. The article above independently reorganizes and expands the topic rather than reproducing the original wording. [paolaponcenails]
- U.S. Food and Drug Administration, "Nail Care Products." Supports the guidance on following labels, ventilation, skin-contact avoidance, and potential allergic reactions. [fda]
- American Academy of Dermatology, "Gel manicures: Tips for healthy nails." Supports the hand-protection, removal, and nail-health guidance. [aad]
- KOKOIST USA, "Top 10 Kokoist Colors Must-Haves!" Provides manufacturer context for gradation white and its use in ombre designs. [kokoistusa]
- KOKOIST USA, "How to Encapsulate Chunky Glitter with Soak-off Gel." Provides supplementary technical context on self-leveling, flash curing versus full curing, and avoiding contact with uncured gel. It is not presented as an ombre-specific protocol. [kokoistusa]