
- All
- Product Name
- Product Keyword
- Product Model
- Product Summary
- Product Description
- Multi Field Search
English
Views: 277 Author: Young Mei Publish Time: 10-07-2026 Origin: Site


Content Menu
● 1. Understand Blooming Gel Nails
>> What controls the blooming effect?
>> What real users find helpful
>> Prepare your products and workspace
>> Step 1: Prepare the nail surface
>> Step 2: Apply and cure the background
>> Step 3: Apply blooming gel without curing
>> Step 4: Place small dots or strokes
● 3. Better Designs and Troubleshooting
>> Blooming gel nail designs for beginners
>> Why is my blooming gel not spreading?
>> Build a simple swatch record
● 4. Safety and Collection Development
>> Protect skin and nail health
>> Turn blooming artwork into press-on nails
>> Adapt the look for nail stickers
>> Can I use regular nail polish with blooming gel?
>> Do I cure blooming gel before adding color?
>> Can I use a normal gel base coat instead?
>> How long should I wait before curing?
>> Can blooming designs work on short press-on nails?
>> Are blooming-inspired press-ons identical to salon blooming gel?
Blooming gel nails create soft flowers, flowing marble, and organic patterns by allowing colored gel to spread across an uncured gel layer. Learning how to use blooming gel is less about complicated brushwork and more about controlling product quantity, placement, and timing.
This guide combines practical application instructions with a manufacturer's perspective on developing blooming-inspired press-on nails and nail stickers. Whether you want one beautiful manicure or a coordinated retail collection, the priority is the same: attractive designs supported by a reliable process.

Blooming gel is a specialty nail-art medium that lets added gel colors blur and disperse before curing. Apply it over a cured background, place your design colors into the wet layer, and cure once the pattern reaches the desired appearance.
Unlike detailed hand-painted art, blooming techniques intentionally soften edges. The results can resemble watercolor petals, smoky stone, animal-inspired spots, or abstract ink.
The most useful distinction is between design development and curing. Waiting lets the pattern spread; placing the nail under the recommended lamp cures the gel. These are separate steps, not interchangeable forms of drying.
Four variables deserve attention:
- Product combination: Different gel formulas do not necessarily spread or cure compatibly.
- Color viscosity: KOKOIST notes that less viscous gels spread more in its Hazy Gel.
- Application quantity: Excess material can overwhelm small details and complicate curing.
- Waiting time: Longer development generally creates softer, less defined boundaries.
My recommendation is to treat your first swatch as a controlled experiment, not a finished masterpiece. Change one variable at a time so you know why the result improved.
A public nail-art discussion describes practicing on swatches before attempting a finished set. The contributor also explains floating colors over the wet medium rather than pressing the brush into the cured background. A beginner's response specifically praises the detailed technique explanation.
That feedback suggests a useful teaching priority: show the sequence and brush handling, not just the final photograph. These are individual community experiences, not controlled performance tests or testimonials about our products.
Gather a compatible base coat, background color, blooming gel, design colors, top coat, detail brush or dotting tool, practice tips, and the manufacturer-recommended lamp. Keep lint-free wipes and the system's recommended cleaning materials nearby.
Compatibility matters more than simply owning a powerful lamp. Follow the relevant product instructions for preparation, layer thickness, lamp selection, and curing. Do not assume that a lamp's wattage alone establishes suitability.
Practice on mounted tips first. This lets you study spreading without repeatedly exposing your natural nails and surrounding skin to uncured products.
Clean and dry the nails, shape the free edge, and prepare the surface according to your chosen system. Avoid aggressive filing and do not cut living skin around the nail.
For detached press-on tips, use the preparation method specified for the tip material and coating system. A procedure intended for natural nails may not suit every plastic tip.
Apply the required base coat and cure as instructed. Add your background color in controlled layers, curing each layer according to its instructions.
A pale background makes translucent blooms easier to see. Darker backgrounds can support dramatic contrast, but the design color still needs to remain visible after spreading.
Brush on a thin, even layer of blooming gel. Keep it away from skin and avoid pooling along the sidewalls.
Uncured is the essential condition here. If you cure this layer before adding your art, the intended wet-layer blooming process will not happen.
Work on one nail at a time while learning. Preparing all ten nails together makes it harder to control development consistently.
Use a dotting tool for flowers and separated spots. Use a fine brush for flowing lines or marble effects.
Start with small amounts and leave breathing room between marks. It is easier to build a restrained design than rescue a surface where every color has merged.
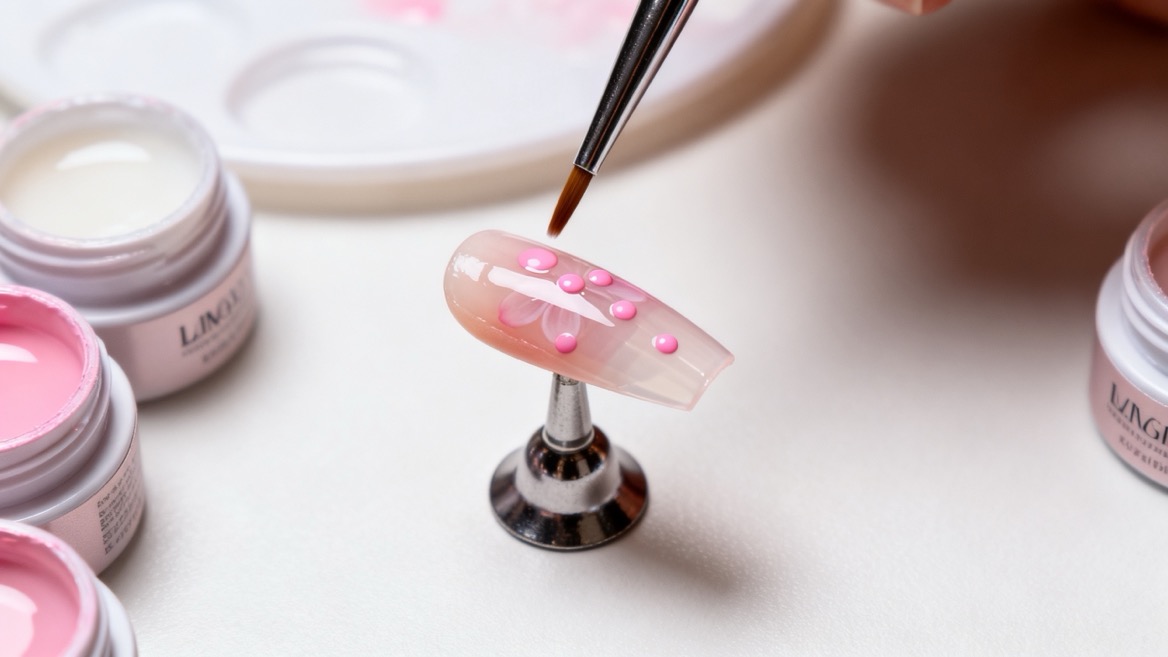
Watch the edges soften. Cure when the pattern reaches your intended appearance, using the lamp and duration specified for the product system.
There is no universal blooming waiting time or curing time. For example, KOKOIST lists LED curing of 30–60 seconds and UV curing of 60–120 seconds for Hazy Gel Clear. Those directions should not be transferred automatically to another formula.
Apply a compatible top coat and cure according to its instructions. Remove any inhibition layer only if the finishing product requires it.
Inspect the surface for flooding, rough edges, lifting, and uneven thickness. A glossy appearance alone does not establish that every underlying layer has cured adequately.
Choose your design before loading the brush. Different effects need different spacing and visual priorities.
| Design | Starting approach | Main control point |
|---|---|---|
| Watercolor flowers | Small dots arranged around an open center | Keep petals separated initially |
| Soft marble | Sparse, irregular lines in contrasting colors | Leave visible background space |
| Aura-inspired accents | A small central color placement | Test how evenly the color disperses |
| Animal-inspired spots | Spaced dots in staggered rows | Cure before neighboring spots merge |
| Smoky abstract art | A few translucent strokes | Avoid repeated brushing that muddies colors |
For short nails, reduce the number of elements rather than squeezing in a full large-nail pattern. One clear focal point often communicates the design better than several crowded details.
Begin with the process, not the assumption that the product is defective. Confirm that the blooming layer remained uncured and that you used the intended art medium.
| Problem | Possible explanation | Practical next test |
|---|---|---|
| Little or no spread | Cured blooming layer or unsuitable color viscosity | Retry on a swatch with the recommended products |
| Blurred, muddy design | Too much color or excessive development | Reduce color quantity and cure earlier |
| Uneven patches | Inconsistent wet-layer coverage | Apply a more uniform layer |
| Lost flower definition | Dots placed too close together | Increase spacing and simplify the pattern |
| Gel reaches sidewalls | Excess product or insufficient margin | Remove uncured material safely and reapply thinner |
Do not thin gel with acetone, alcohol, or improvised solvents. If performance remains inconsistent, ask the manufacturer which combinations it supports.
Create three practice tips using the same background and colors. Keep product quantities as similar as possible, but allow progressively longer development before curing.
Record the gel names, lamp model, application method, approximate waiting interval, and final photograph. Choose the result that best matches your brief, then repeat it on different tip sizes.
Repeatability does not require identical swirls. It requires a consistent color story, recognizable pattern scale, and acceptable finish across the set.
Avoid skin contact with uncured gel. Use the correct lamp and follow the full curing instructions; thicker layers or unsupported product combinations can undermine the intended process.
Stop using the products and seek medical advice if you develop itching, swelling, blisters, or persistent changes around the nails. Do not keep applying gel to conceal a suspected reaction.
For lamp exposure, dermatologists recommend broad-spectrum, water-resistant SPF 30 or higher on the hands, or dark, opaque fingerless gloves. Keep the nail surface prepared as required by the product system.
Removal also matters. Do not peel or pry off the coating. Follow the removal method for that specific system, since soak-off products and file-off products require different approaches.
For brands and wholesalers, the opportunity is not simply to copy a manicure. It is to translate the visual language into a product that looks coordinated across sizes and production batches.
Start with a clear development brief:
- Specify the background shade and acceptable color variation.
- Define the main pattern, accent nails, and negative space.
- Select tip shape, length, size range, and finish.
- Confirm whether artwork will be gel-applied, printed, or produced using another agreed process.
- Approve packaging, application instructions, and relevant product documentation.
A hand-created blooming pattern naturally varies. Printed artwork can reproduce a chosen image more consistently, but it recreates the appearance rather than the live blooming technique.
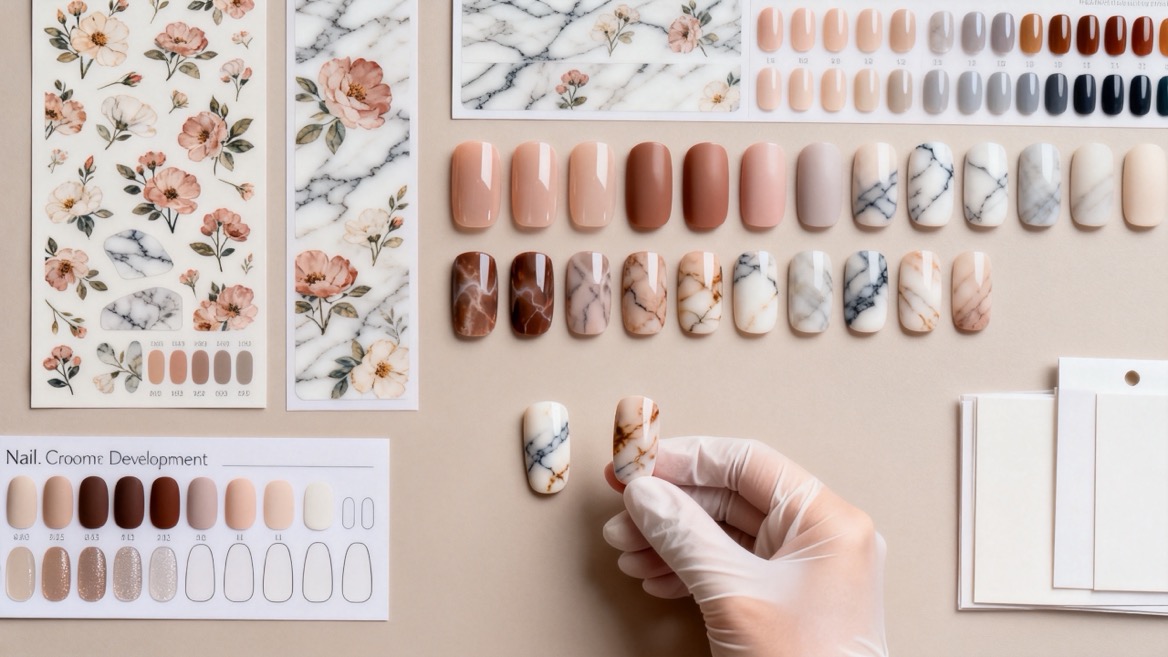
Blooming-inspired nail stickers need their own development route. Photographing a beautiful gel manicure does not automatically create print-ready artwork.
Evaluate the motif at actual nail size, check visibility against light and dark backgrounds, and review how the design fits different nail widths. Specify whether the product is a decorative sticker, wrap, or another format, because application and finishing requirements differ.
A useful sampling proposal is to compare one high-contrast floral design with one softer marble design. Review both on the smallest and largest planned sizes before selecting a collection direction.
Approval should cover more than an attractive sample photograph. Inspect physical samples for pattern balance, color consistency, smooth edges, coating finish, and packaging accuracy.
Agree on measurable acceptance criteria and request documentation appropriate to the product and destination market. Avoid unsupported claims such as universal compatibility, guaranteed wear duration, or allergy-free performance.
Dongguan YoungMei Technology Co., Ltd. brings more than 15 years of nail-product manufacturing experience, with an owned factory and established supply chain. Our focus includes press-on nails, nail stickers, OEM/ODM customization, rapid sampling, consistent quality, and coordinated sourcing for global brands, wholesalers, and retail chains.
To develop your collection, send YoungMei your reference images, target market, preferred shapes, packaging requirements, and estimated order quantity. Request a feasibility review and sample proposal before committing to production.
Do not assume compatibility. The methods described here use gel colors in an uncured gel medium. Conventional polish has a different drying process; use it only if the blooming-product manufacturer specifically supports that combination.
No. Add the design colors while the blooming layer is wet and uncured. Cure after the pattern develops to your preferred appearance, following the product's instructions.
Some wet gel layers may allow movement, but a base coat is not automatically a validated substitute. A dedicated blooming medium offers a product-specific method that is easier to test and reproduce.
Watch the design rather than relying on a universal countdown. Product viscosity, color quantity, and spacing affect the result. Use swatches to establish a repeatable development interval for your chosen combination.
Yes. Simplify the artwork, use smaller placements, and preserve open space. Test the smallest tip first so the collection does not lose definition when scaled down.
Not necessarily. A finished press-on may feature hand-applied gel art or a printed interpretation. Ask how the artwork is produced and assess physical samples instead of assuming that the appearance proves the method.
1. Paola Ponce. ["How-to Blooming Gel Nails."] Original topic reference explaining the uncured blooming layer and how longer development softens the effect. The rewritten article uses an independent structure and wording rather than reproducing the original text. [paolaponcenails]
2. KOKOIST USA. ["Hazy Gel Clear 7ml."] Primary manufacturer source for application order, the effect of color viscosity, and the product-specific LED and UV curing ranges quoted in the article. [kokoistusa]
3. Ezmio Beauty. ["How To Use Blooming Gel."] Manufacturer guidance supporting the sequence of curing the background, leaving blooming gel uncured, adding gel colors, curing the completed design, and finishing with top coat. [ezmiobeauty]
4. LUXAPOLISH. ["How to Use Blooming Gel Polish."] Practical guidance supporting thin application, restrained color quantities, development control, and swatch testing. Its product-specific curing instructions are not presented as universal rules. [luxapolish]
5. American Academy of Dermatology. ["Gel Manicures: Tips for Healthy Nails."] Dermatologist guidance supporting hand protection during lamp exposure, avoidance of picking gel polish, careful removal, and seeking professional advice for persistent nail problems. [aad]
6. The Beauty Academy. ["Working Safely with Gel & Acrylic Nail Products to Minimise the Risk of Allergic Reaction."] Professional training guidance supporting avoidance of uncured-product skin contact and use of manufacturer-matched products, lamps, and curing procedures. [thebeautyacademy]
7. Reddit, r/DIYGelNails. ["Kokoist Blooming Gel Effects."] Public community discussion posted March 12, 2023. Contributor "intellidepth" describes swatch practice and floating colors over the wet layer; "Luxene" comments on the usefulness of the detailed technique explanation. These observations are anecdotal, not clinical evidence or YoungMei customer testimonials. [reddit]
8. Dongguan YoungMei Technology Co., Ltd. Company profile supplied in the project brief. Source for the statements about 15-plus years of experience, the owned factory, supply chain, product categories, and OEM/ODM services. These company statements have not been independently verified; no company-page URL was supplied. The sampling and inspection framework is editorial guidance, not a claim about a completed customer project.[https://www.youngmeinails.com/]